Marguerites Cookbook

A cooking blog all about making vintage recipes from a cookbook we inherited from our grandmother

  • Home
  • Recipes
    • Main Dishes
    • Appetizers and Sides
    • Desserts
    • Breakfast
  • About
  • Contact

June 11, 2016 by: Shannon and Aaron

Fish Fillet Recipe

Fish Fillet Header

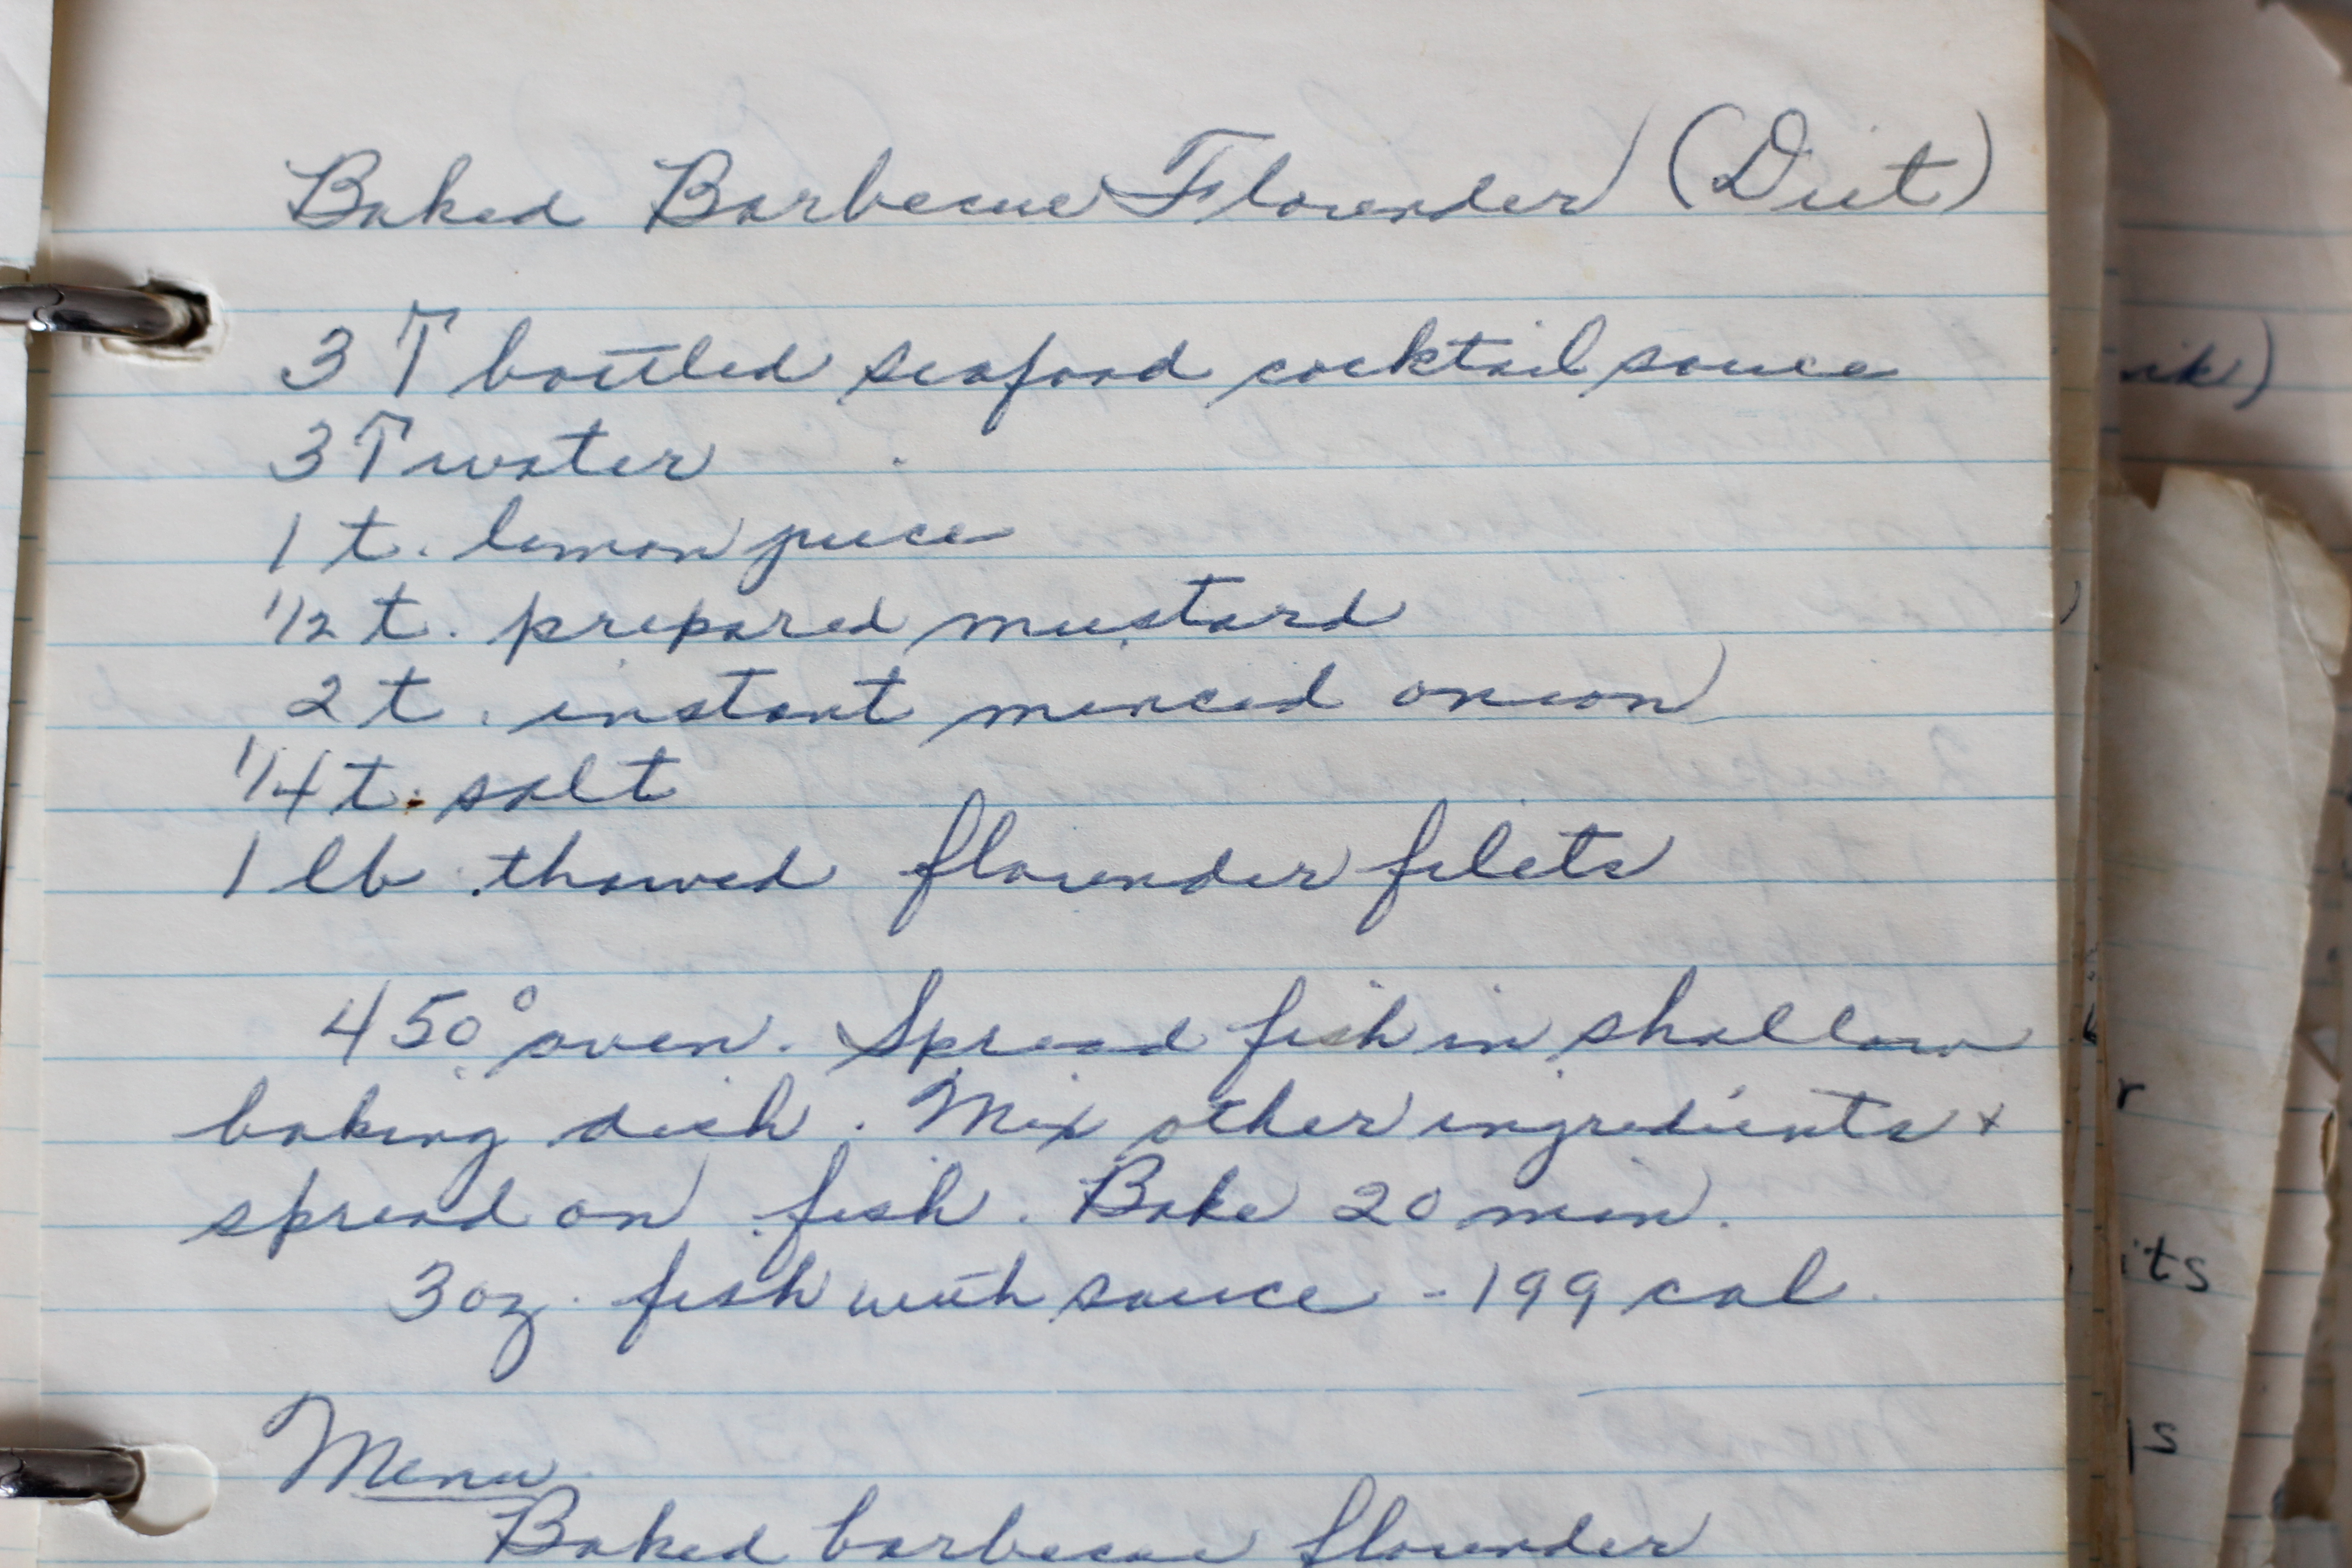
Here’s an interesting fact about Marguerite that we recently learned—she was not a huge fan of seafood!  We learned from Aaron’s mother that Marguerite only made fish recipes on Friday’s during lent, and made seafood recipes to appeal to her other family members, such as Aaron’s mom, Mercedes.  She was devoutly Catholic, so Fish Fridays were important to her. After we learned this fact, we flipped through the book and realized just how few seafood recipes there are! We will feature a favorite seafood recipe of Mercedes’ in a few weeks, but for now, on to this fish fillet recipe.


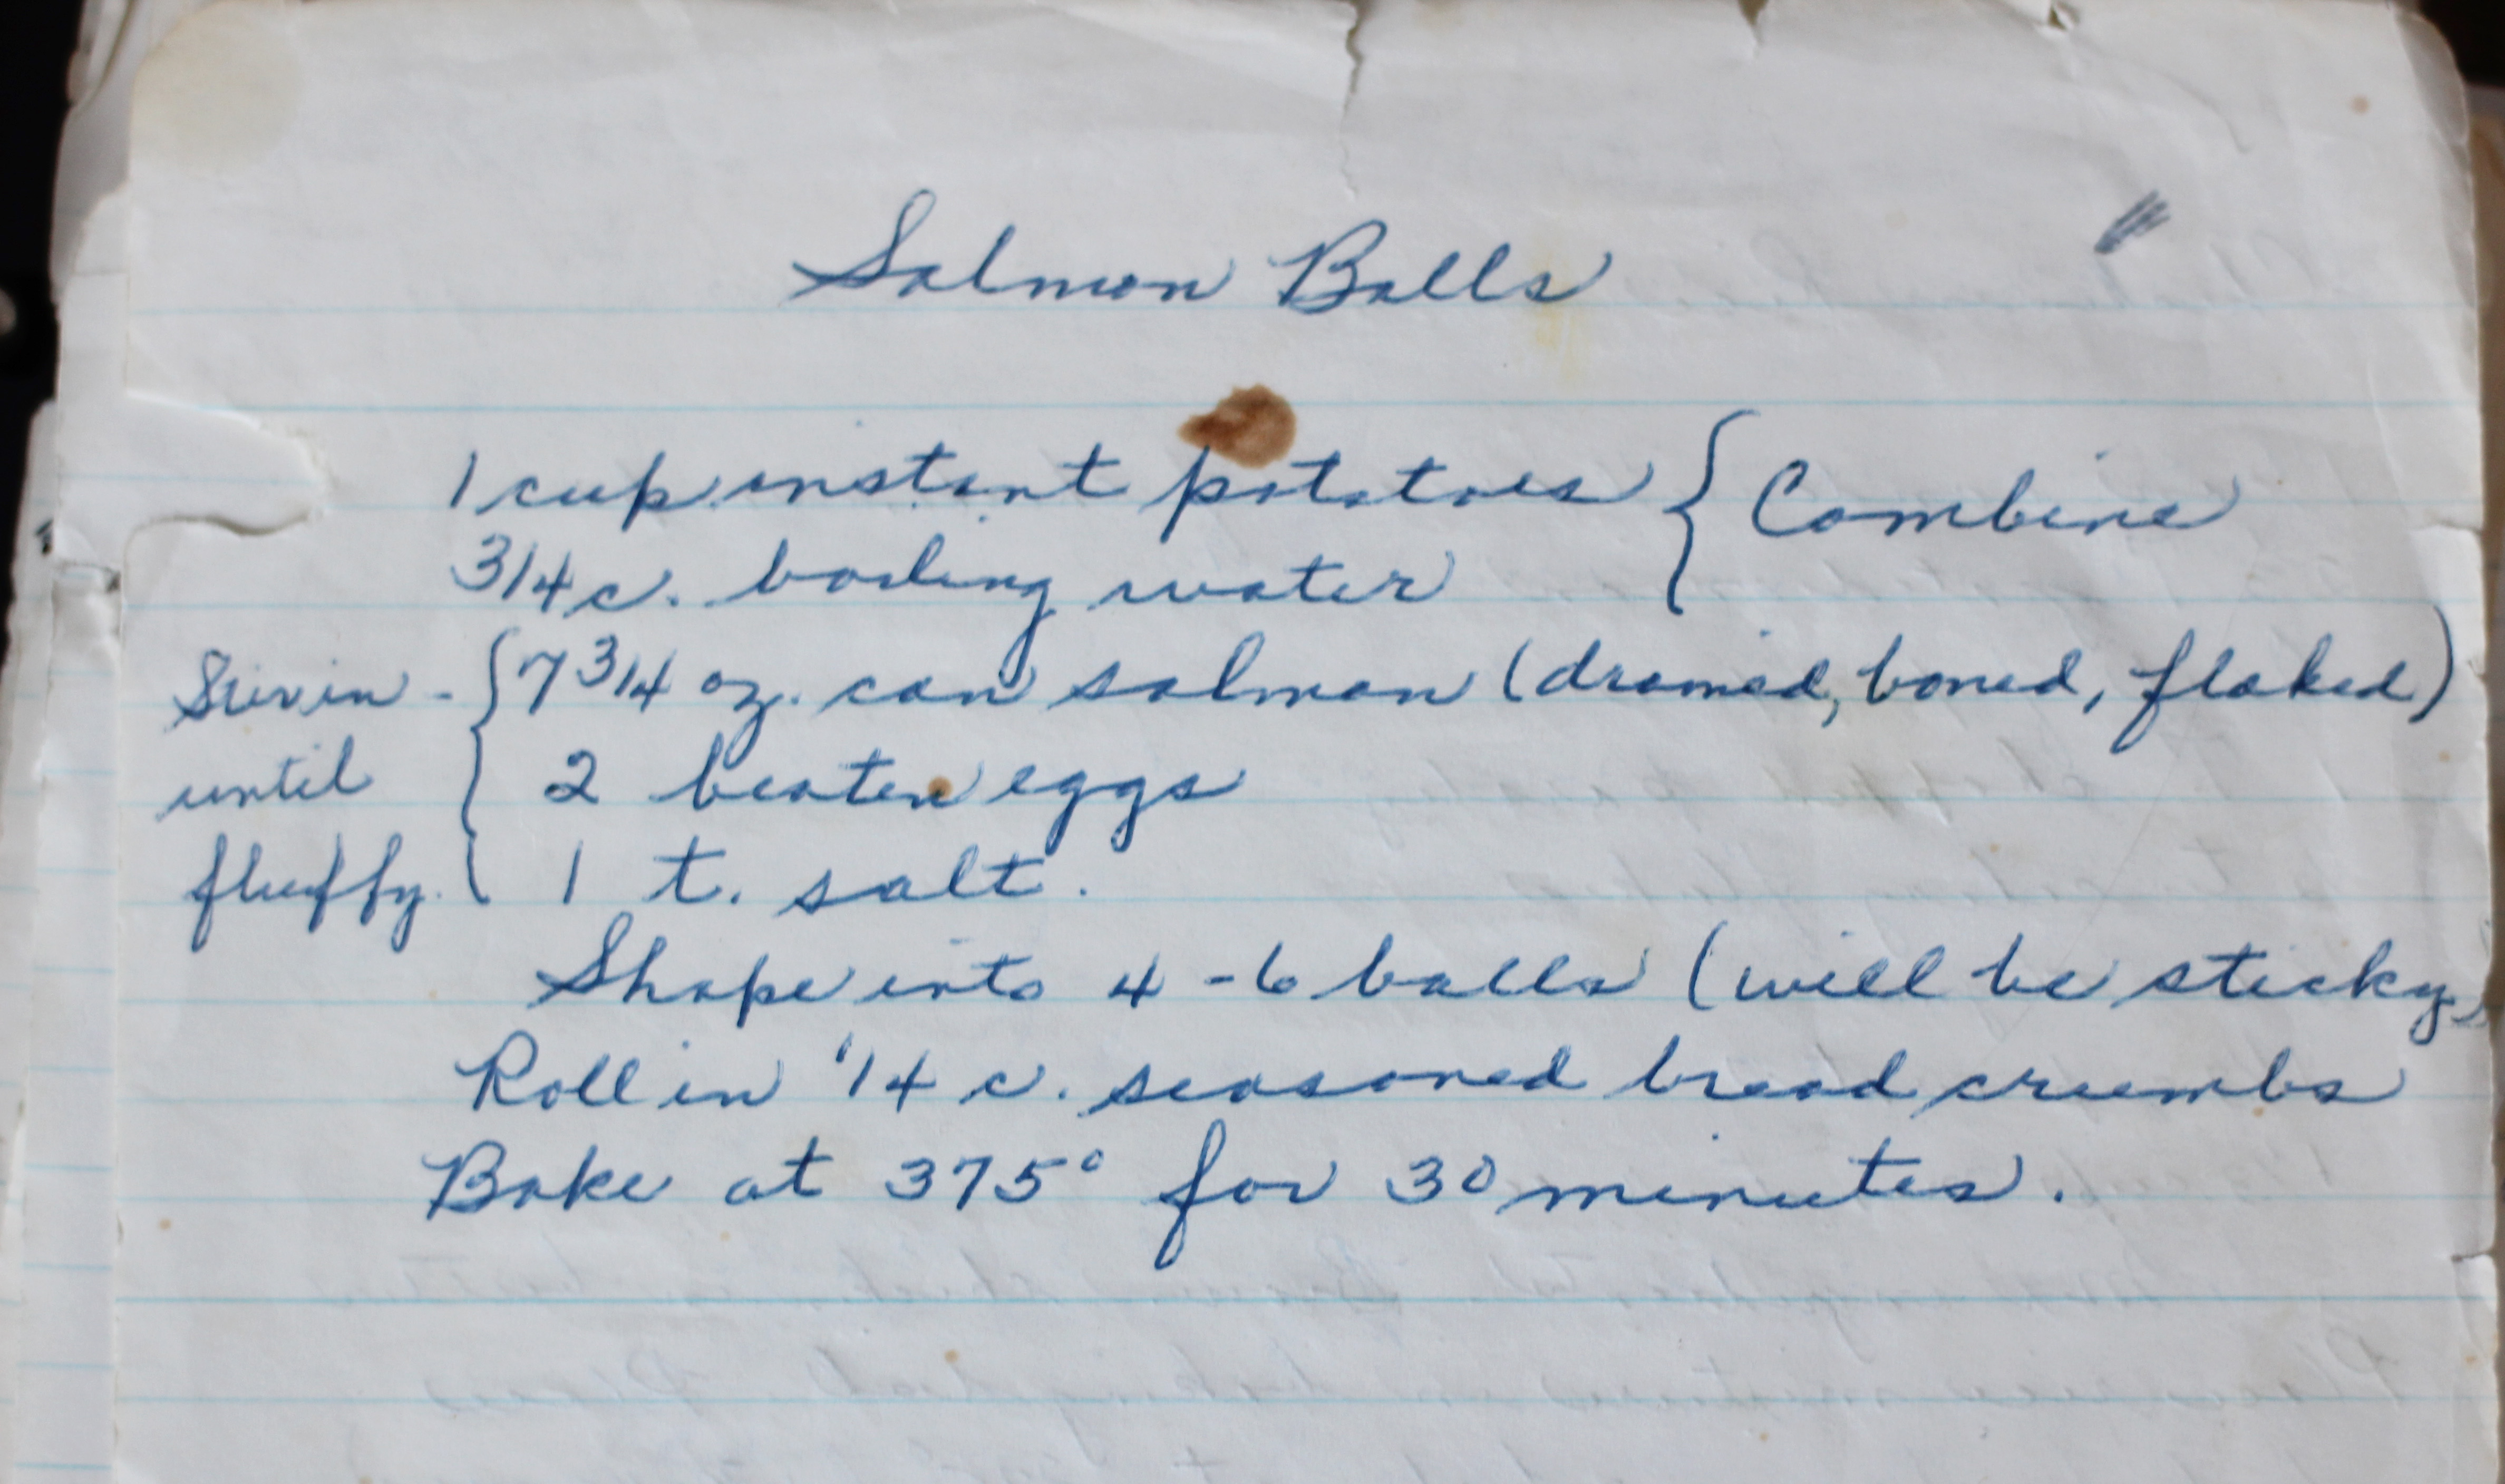
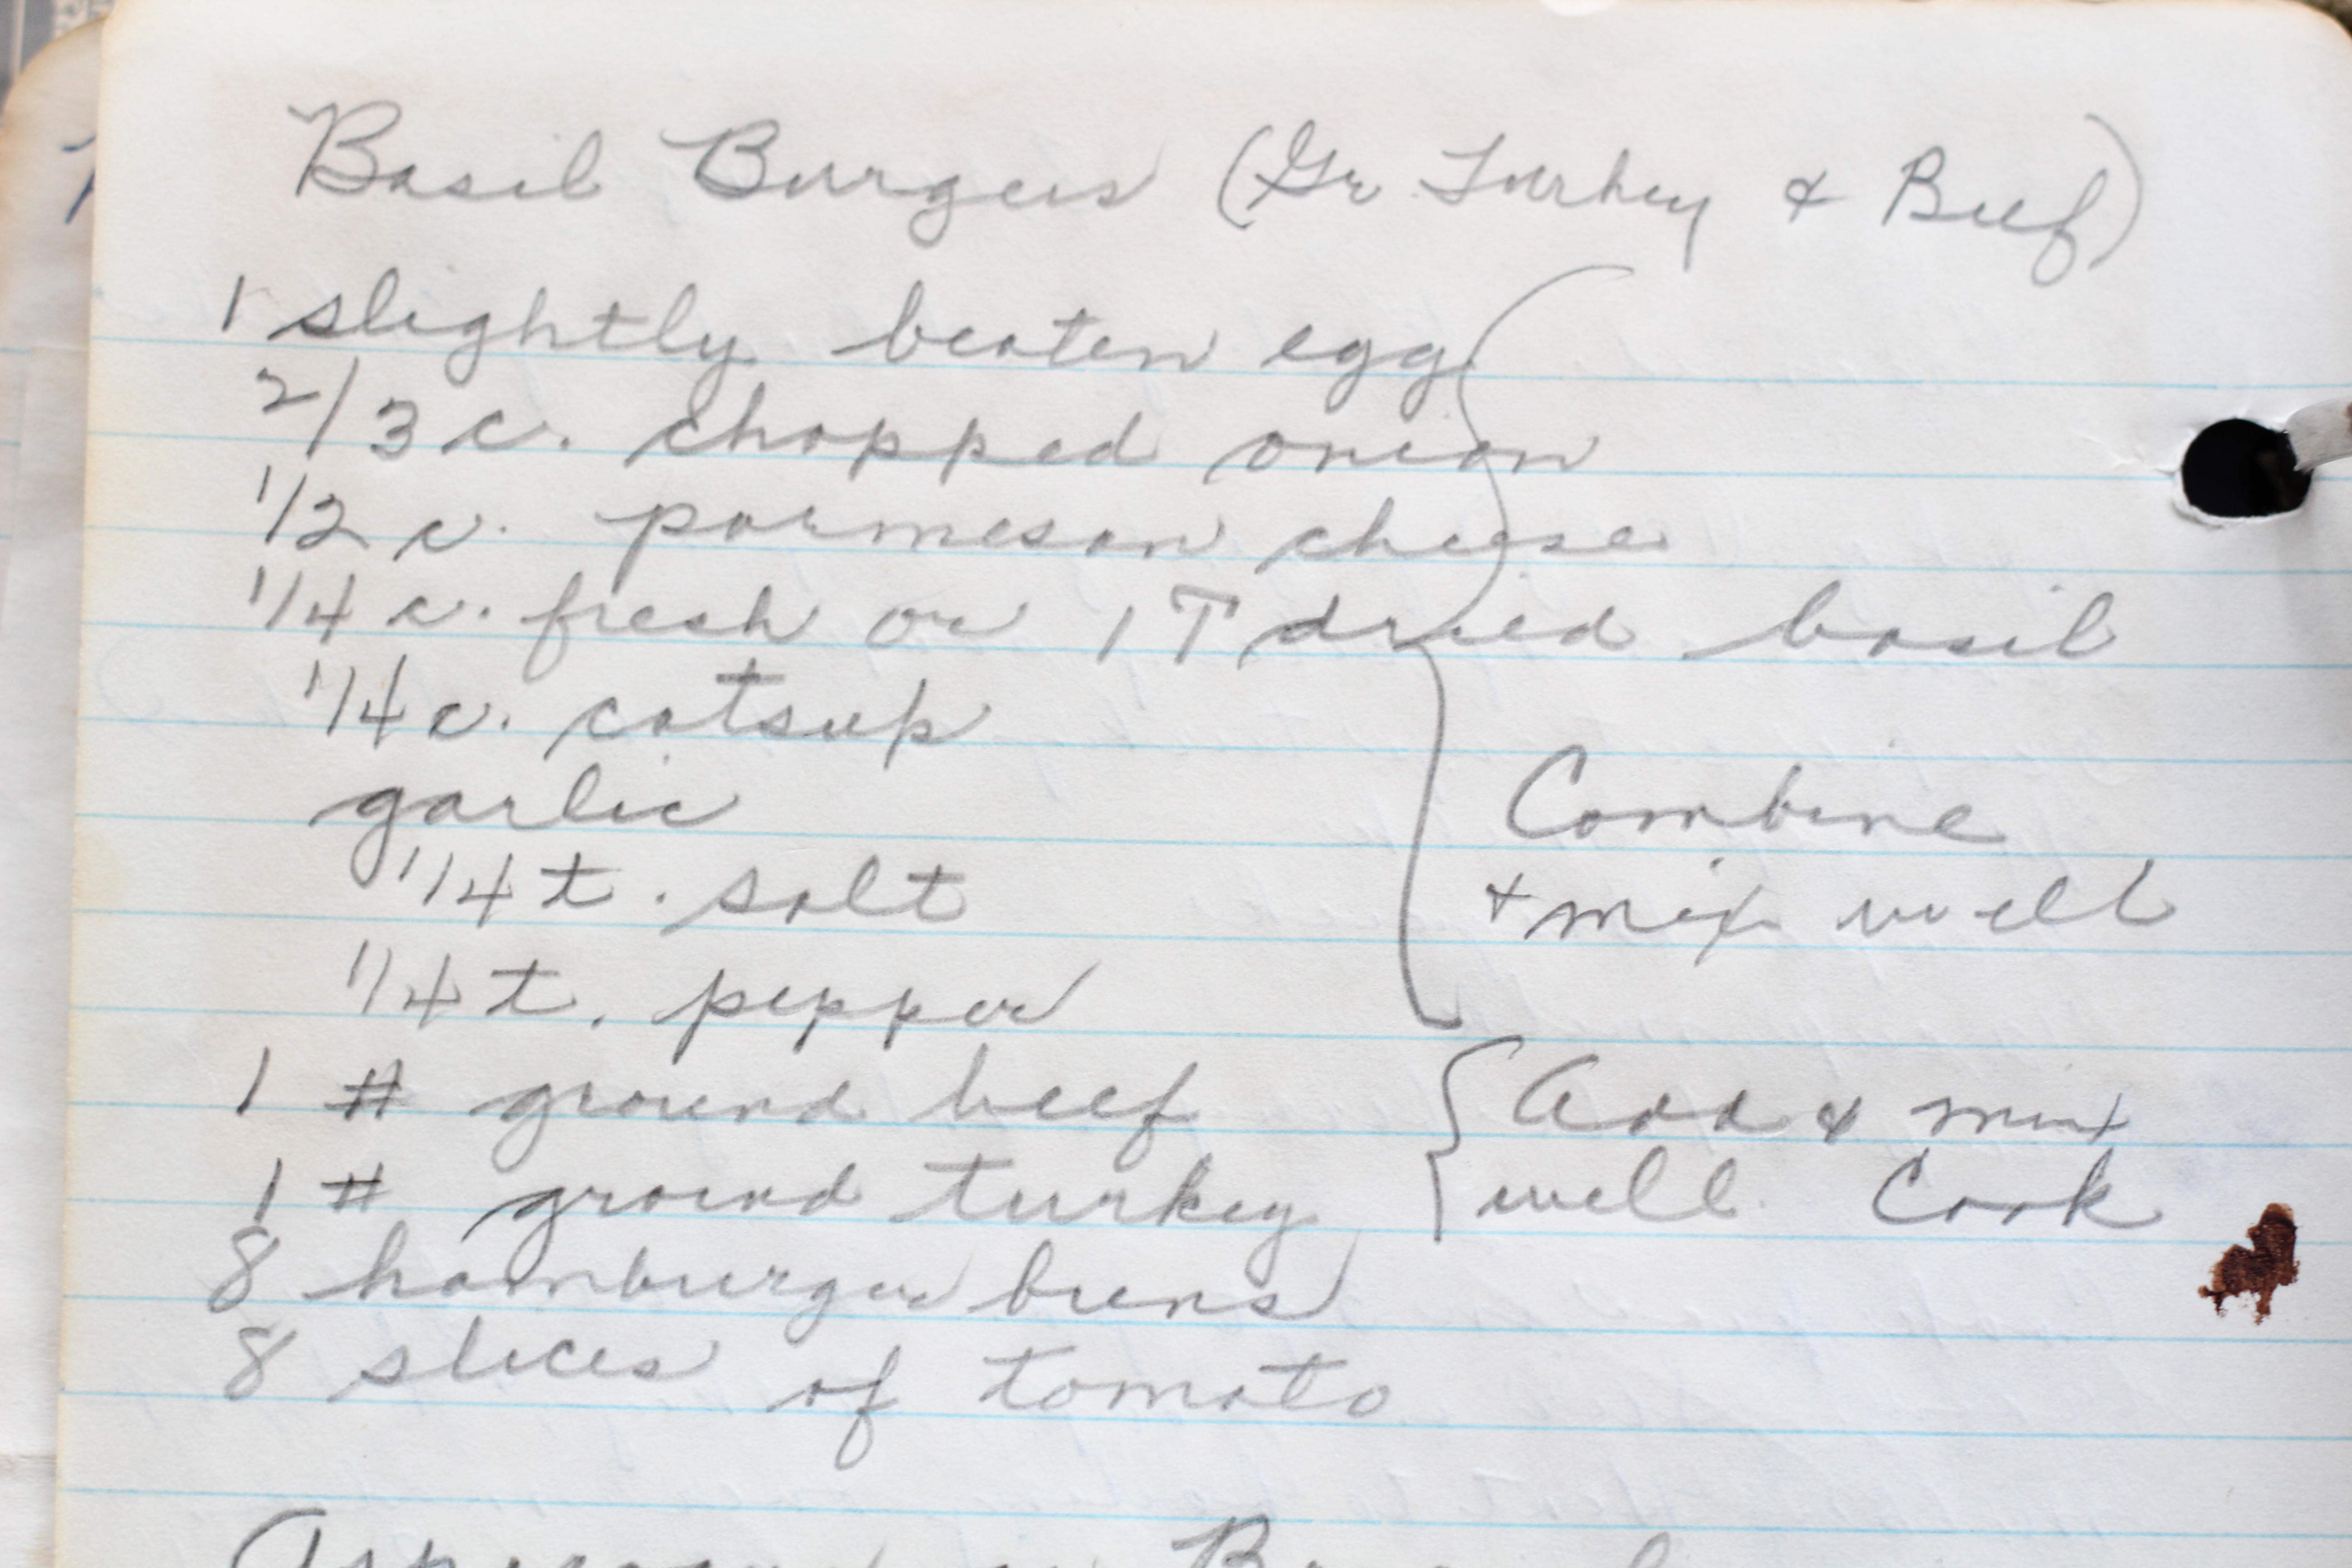
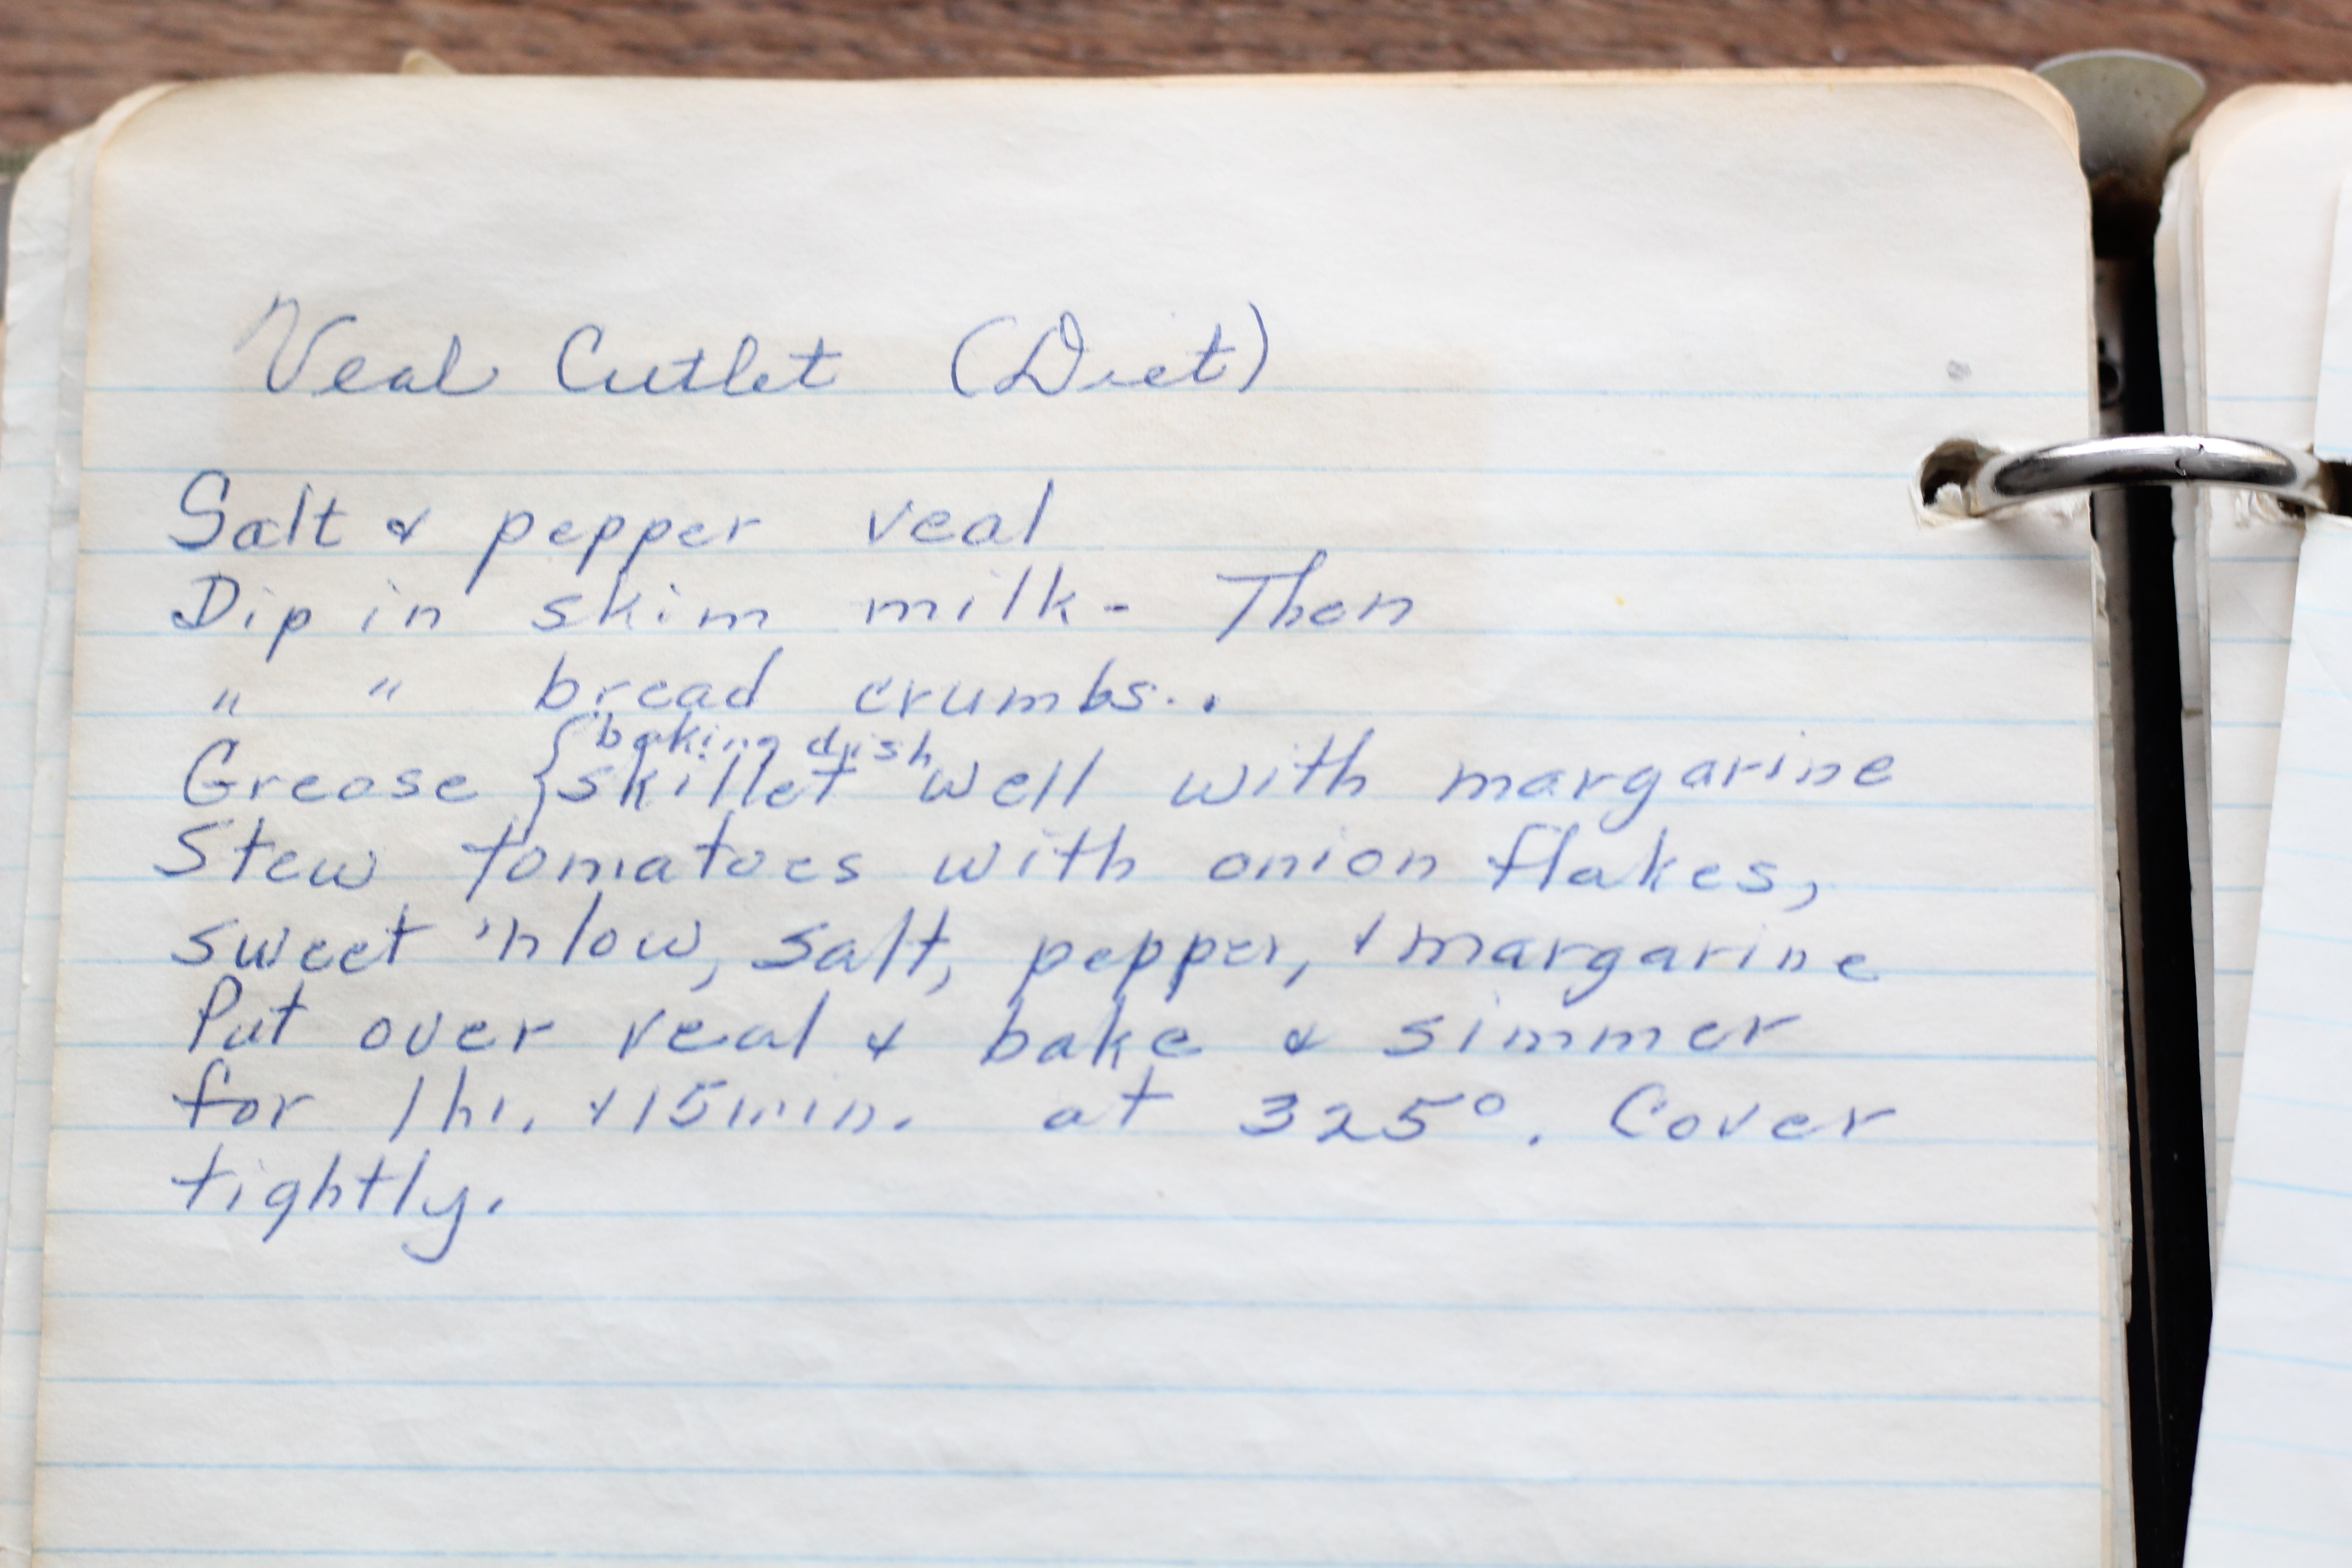
Here’s what Marguerite had to say:

Fish Fillets

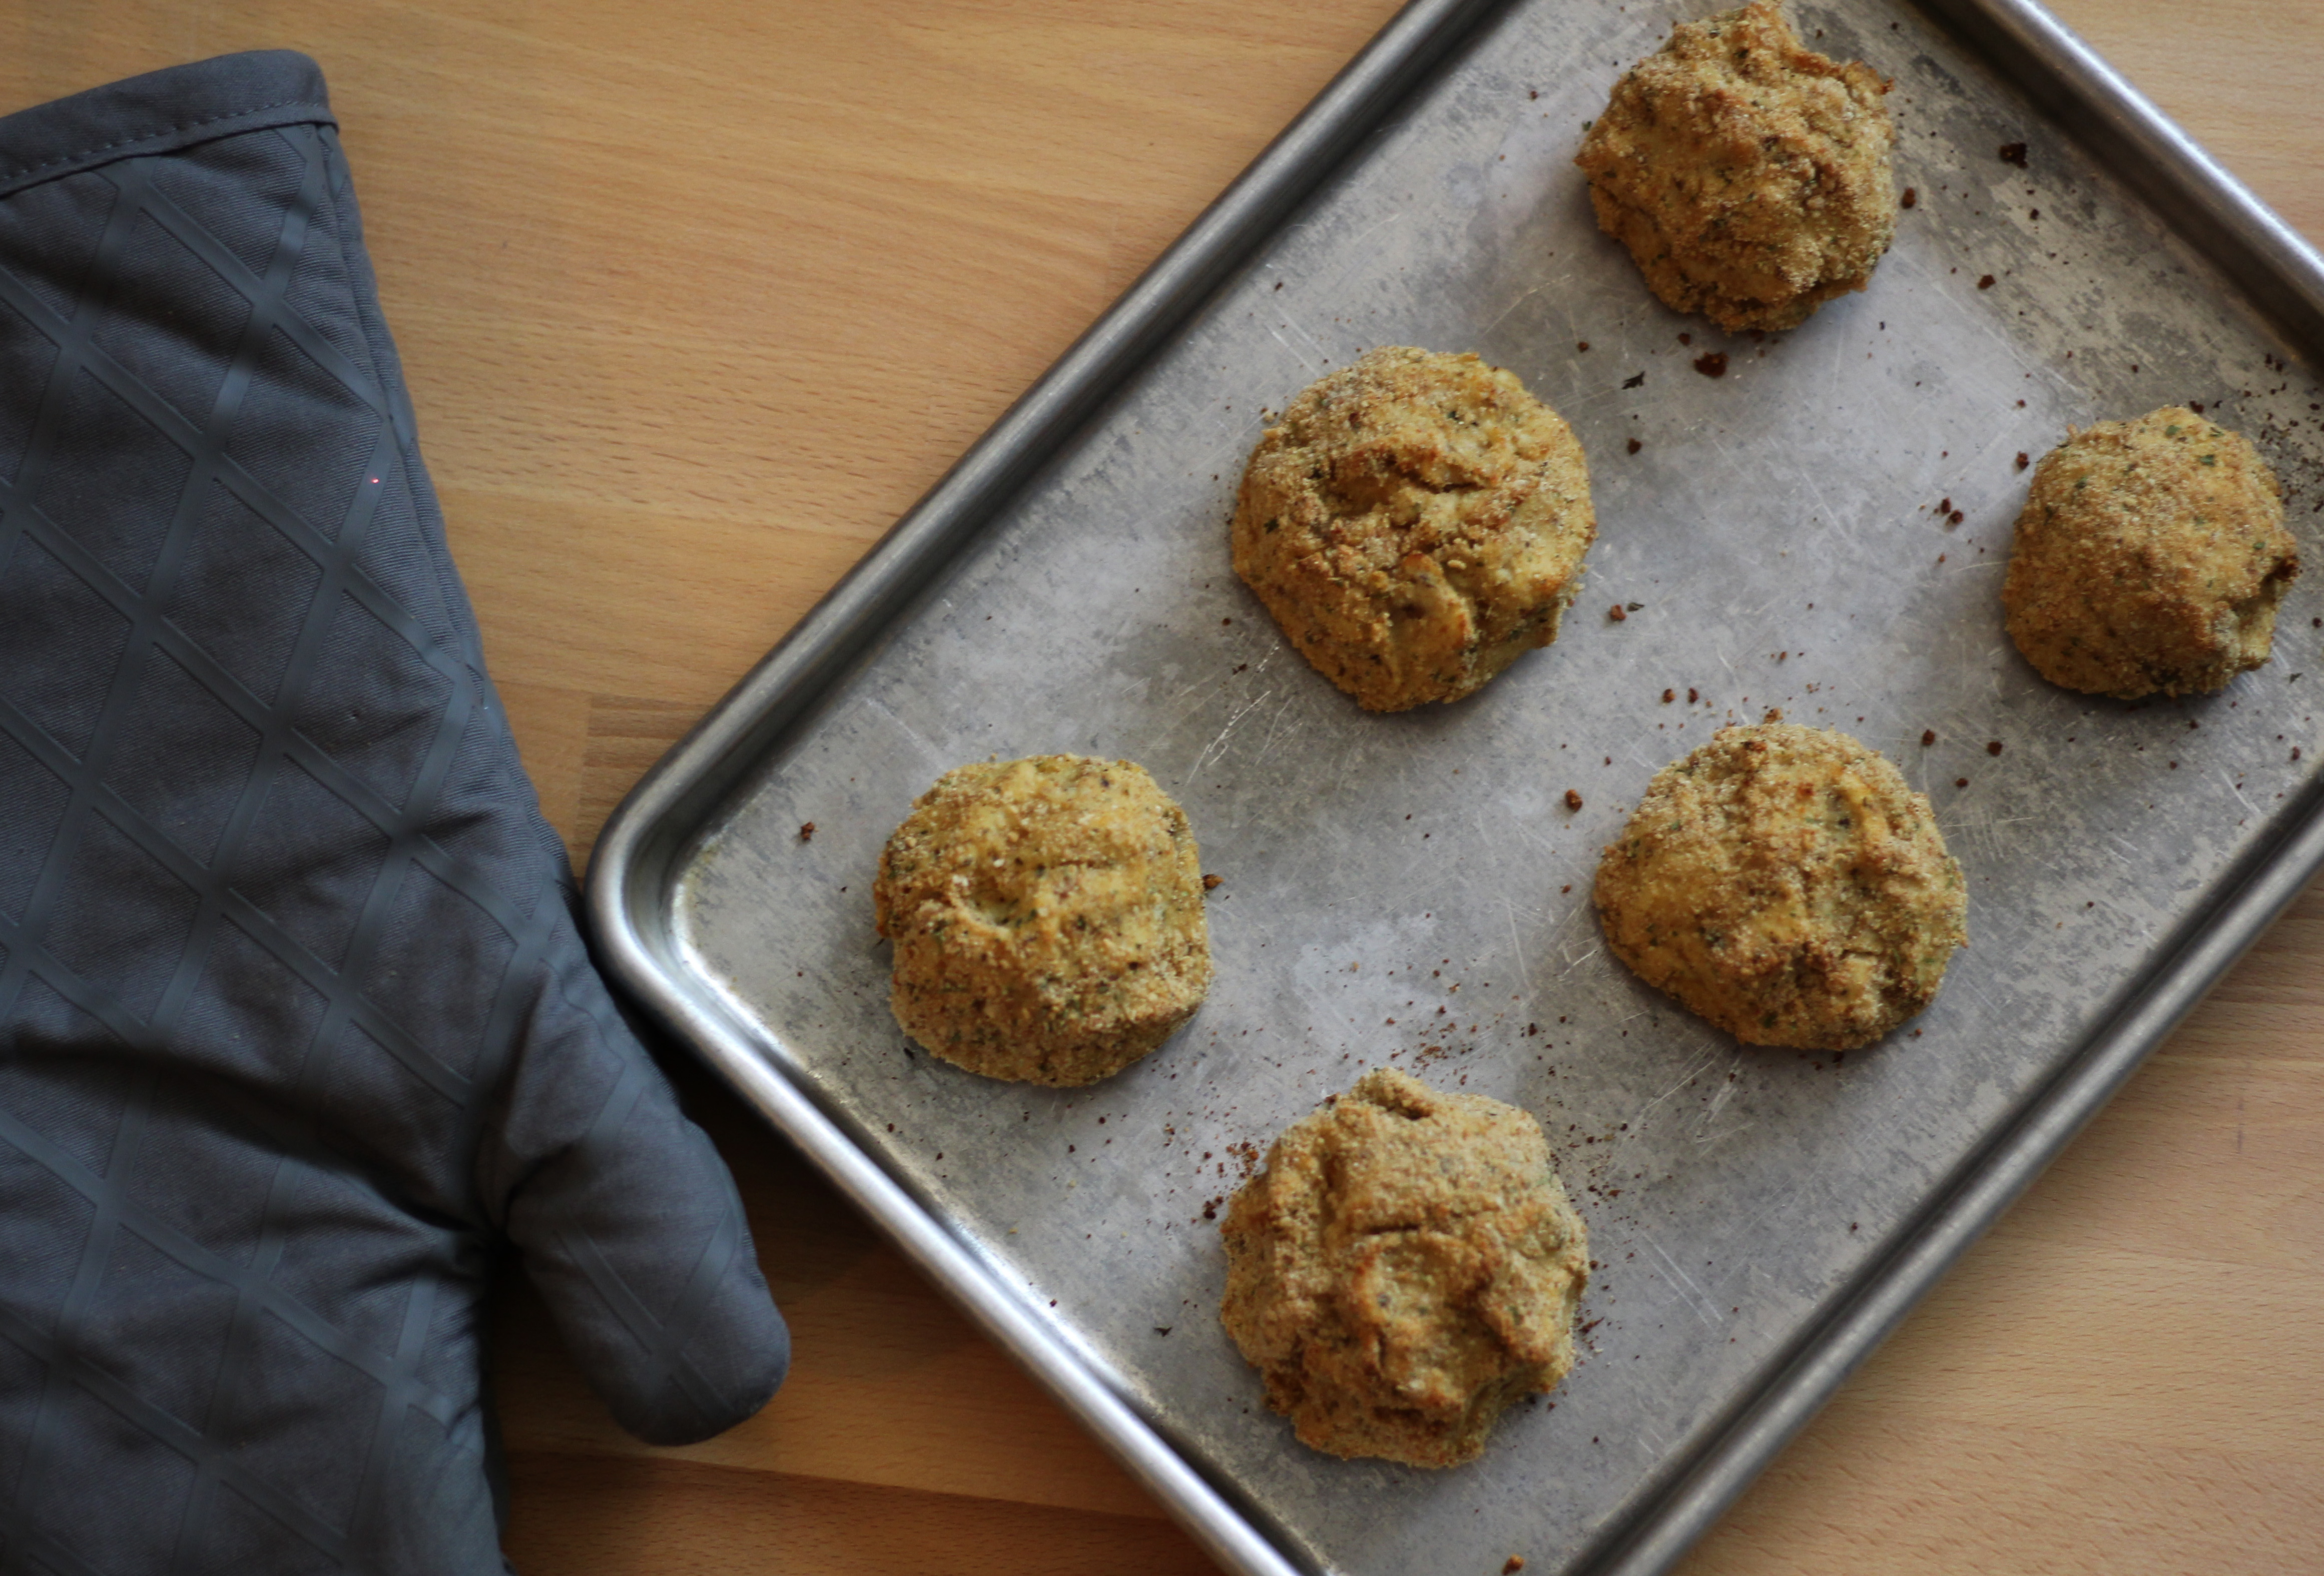
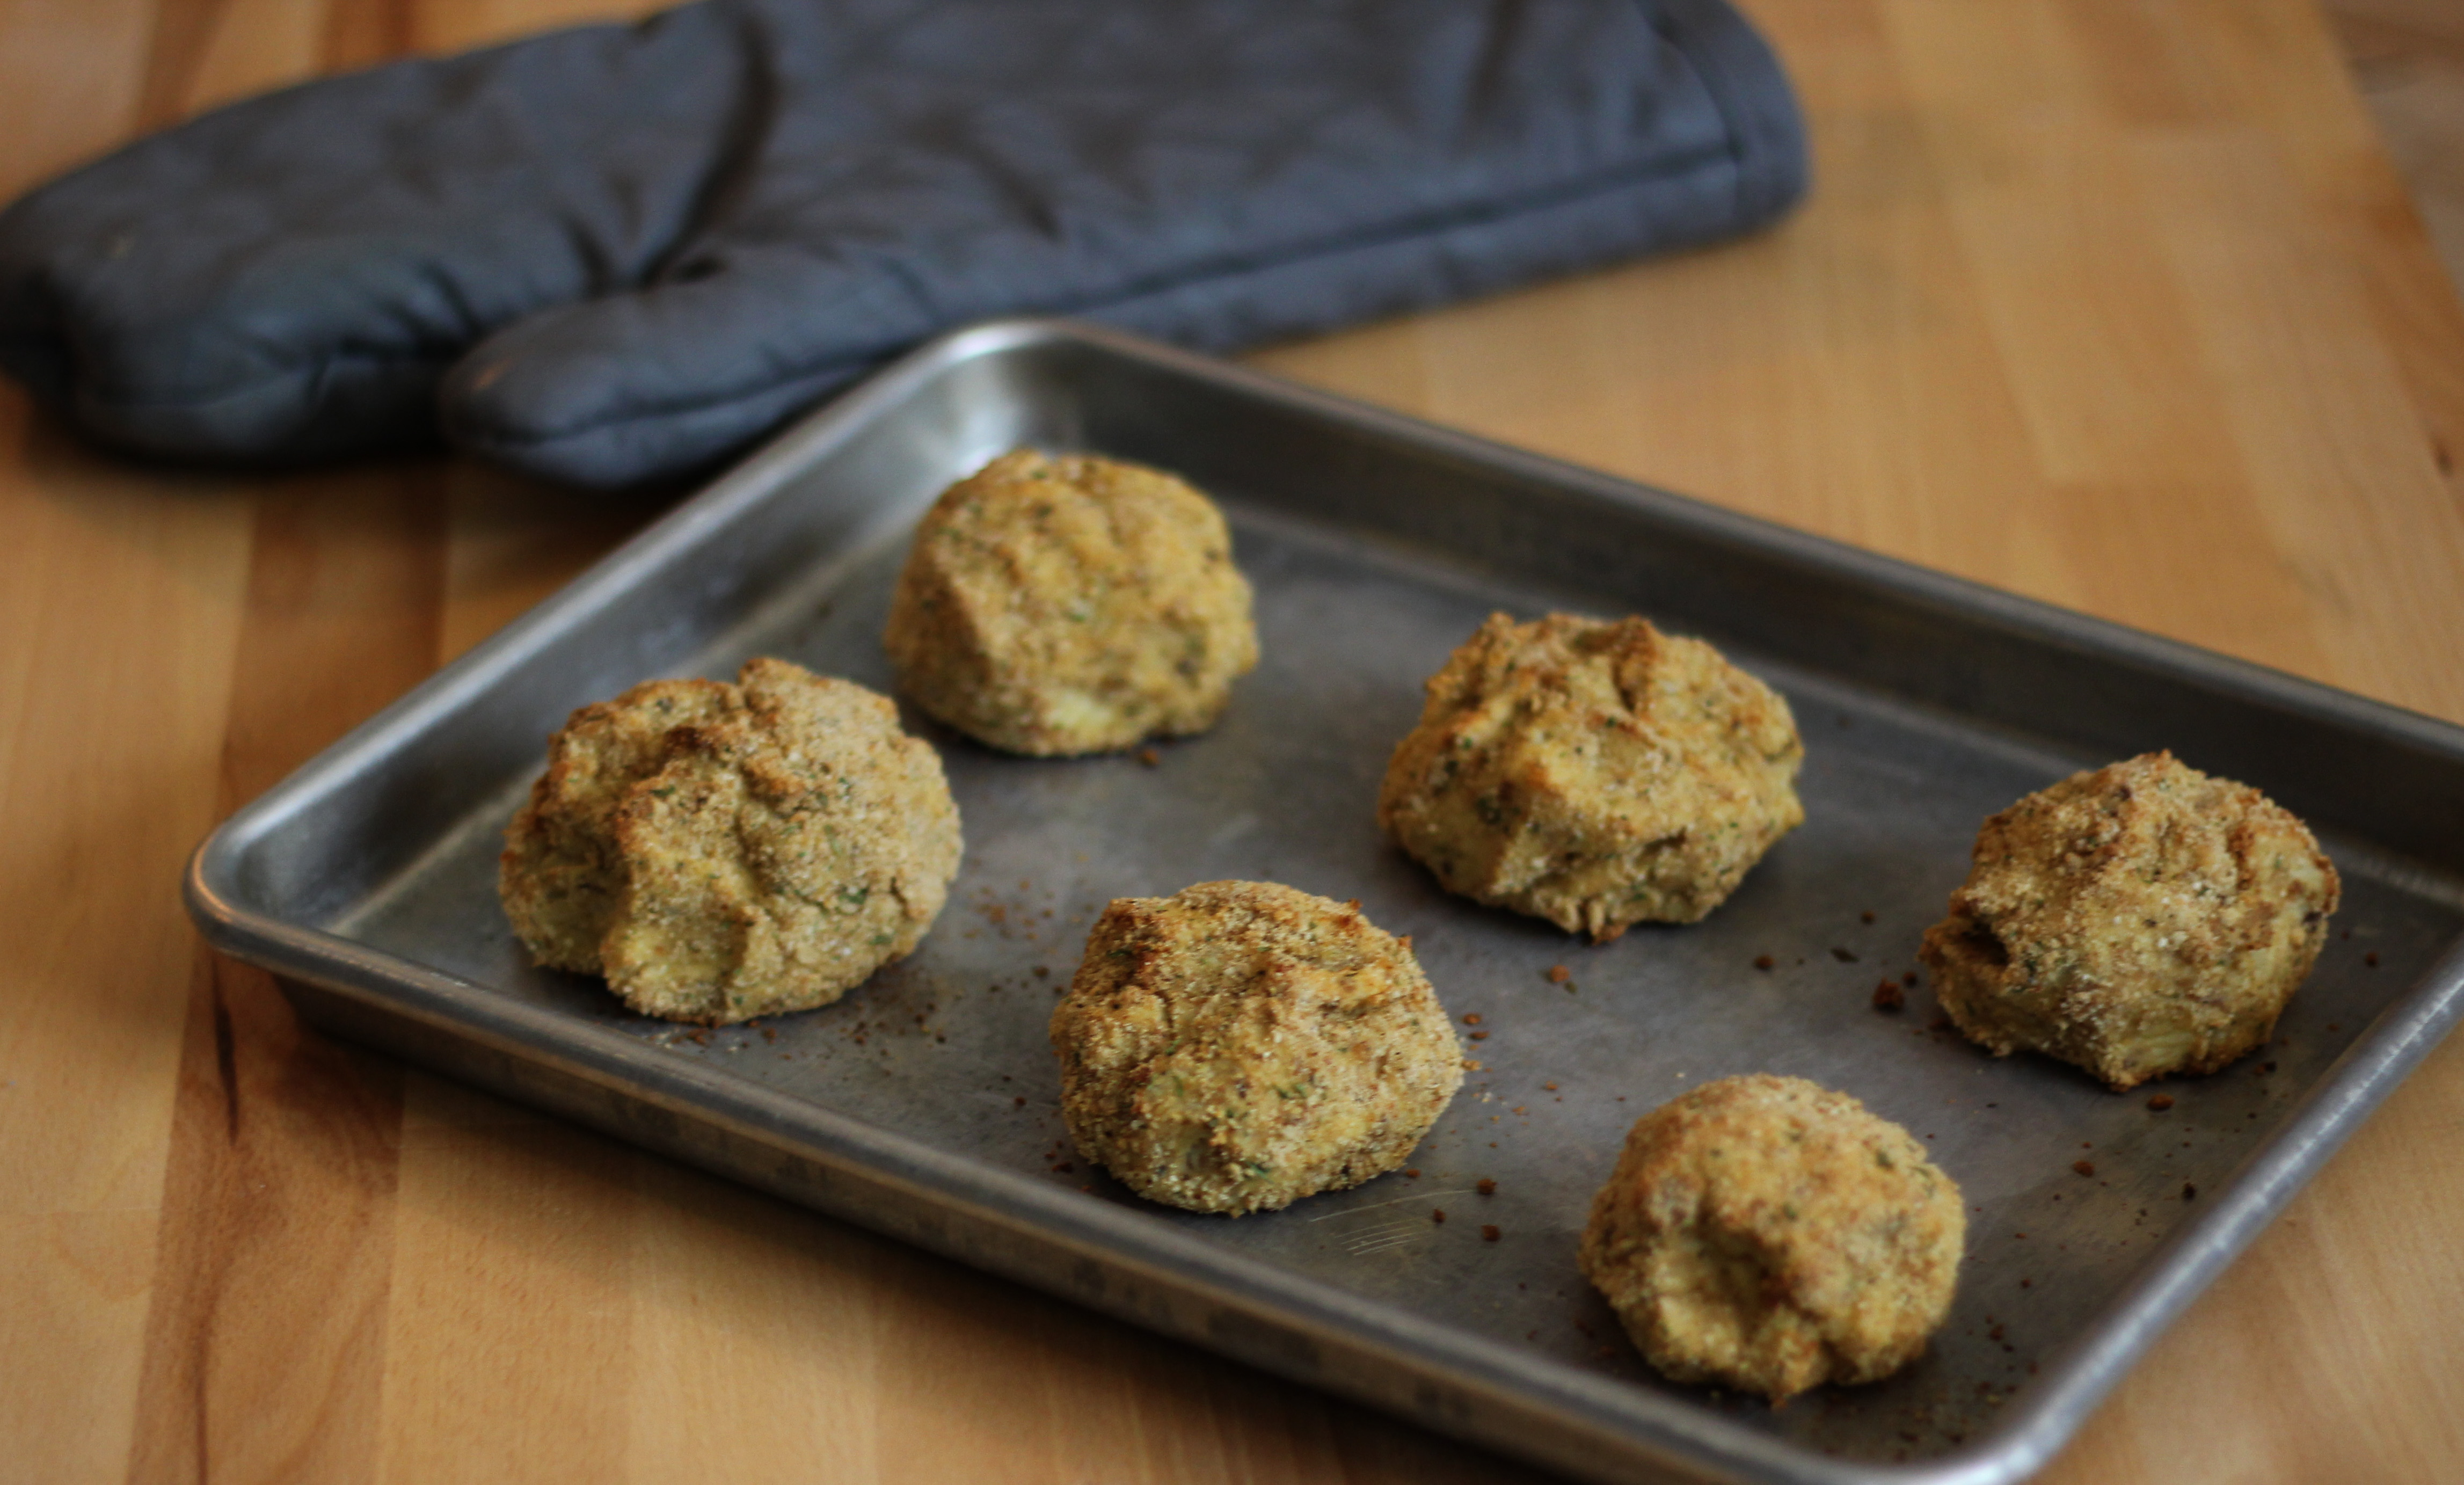
Aaron typically takes notes while making recipes to denote what time we started and any other pertinent information to refresh our memories when it comes time to write our posts.  This fish recipe was so simple, he completely forgot to write a single thing down!

Fish Fillets

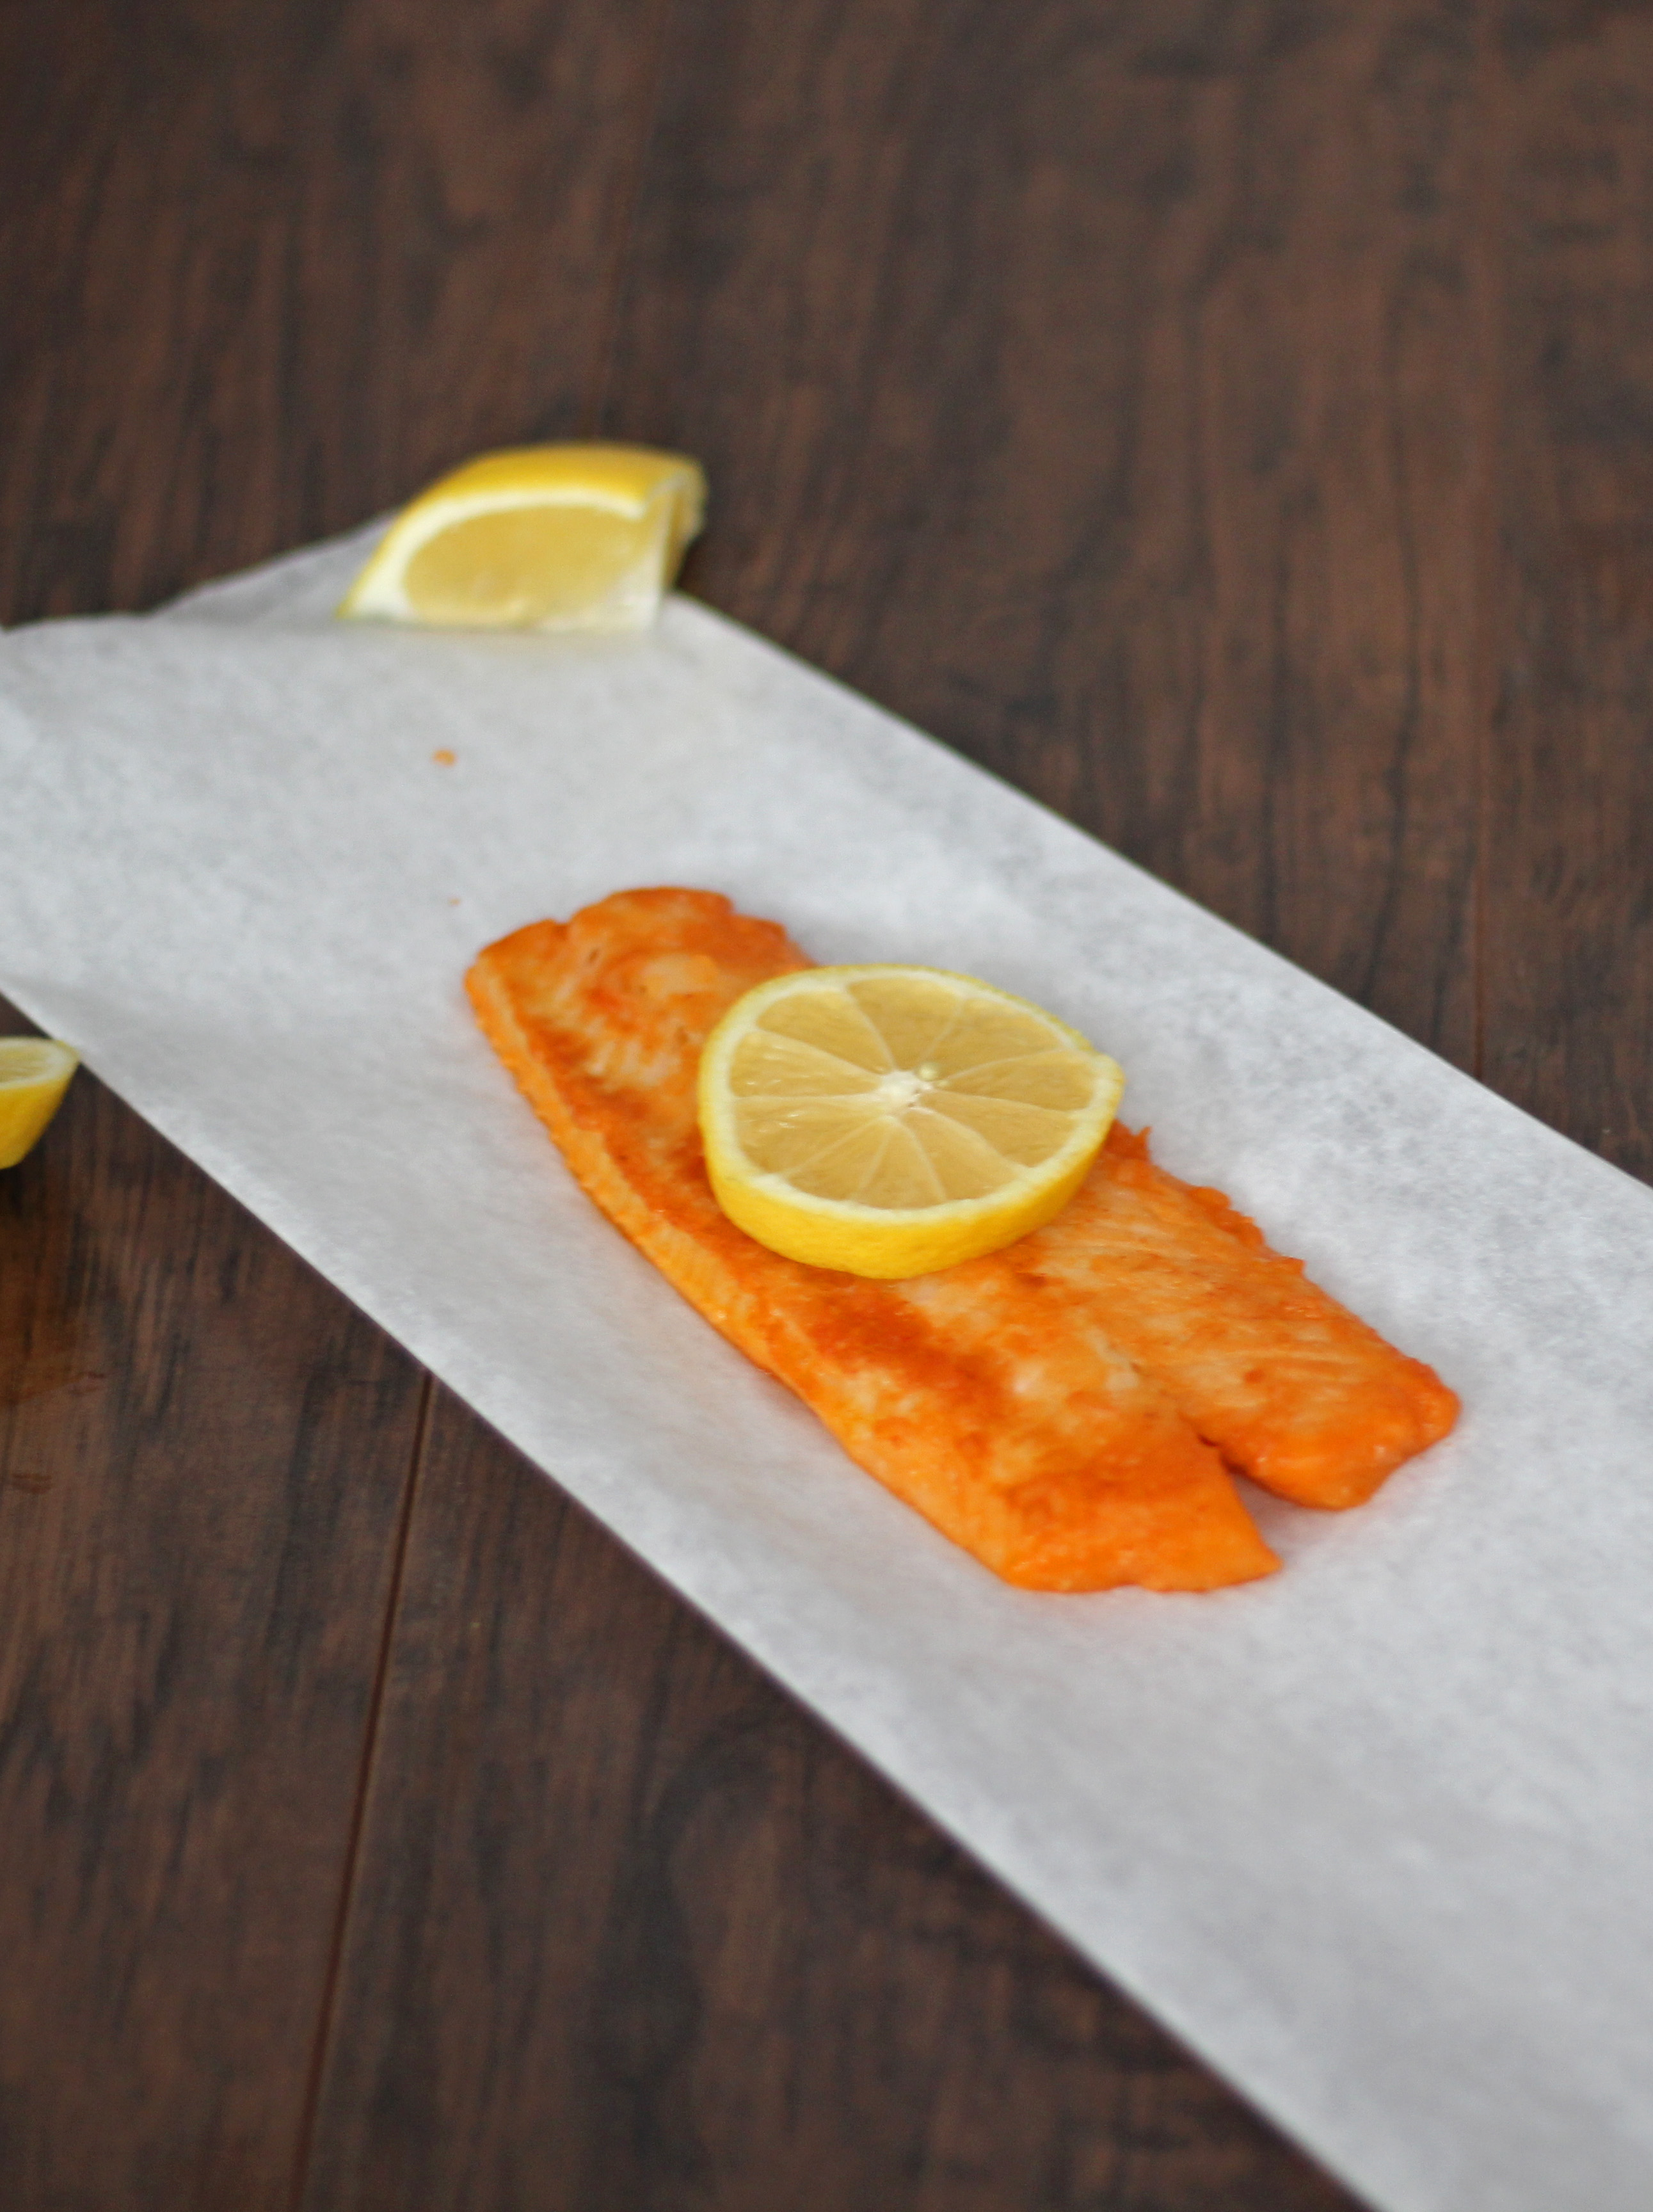
This fish fillet recipe was a little too basic. So much so, that I felt it was nothing special when it came time to try it.  I have since discovered that I don’t care for most mild fish and so far prefer salmon over most all others I’ve tried. It was “meh” enough that I almost wanted to put it on the dud list and not even write about it.

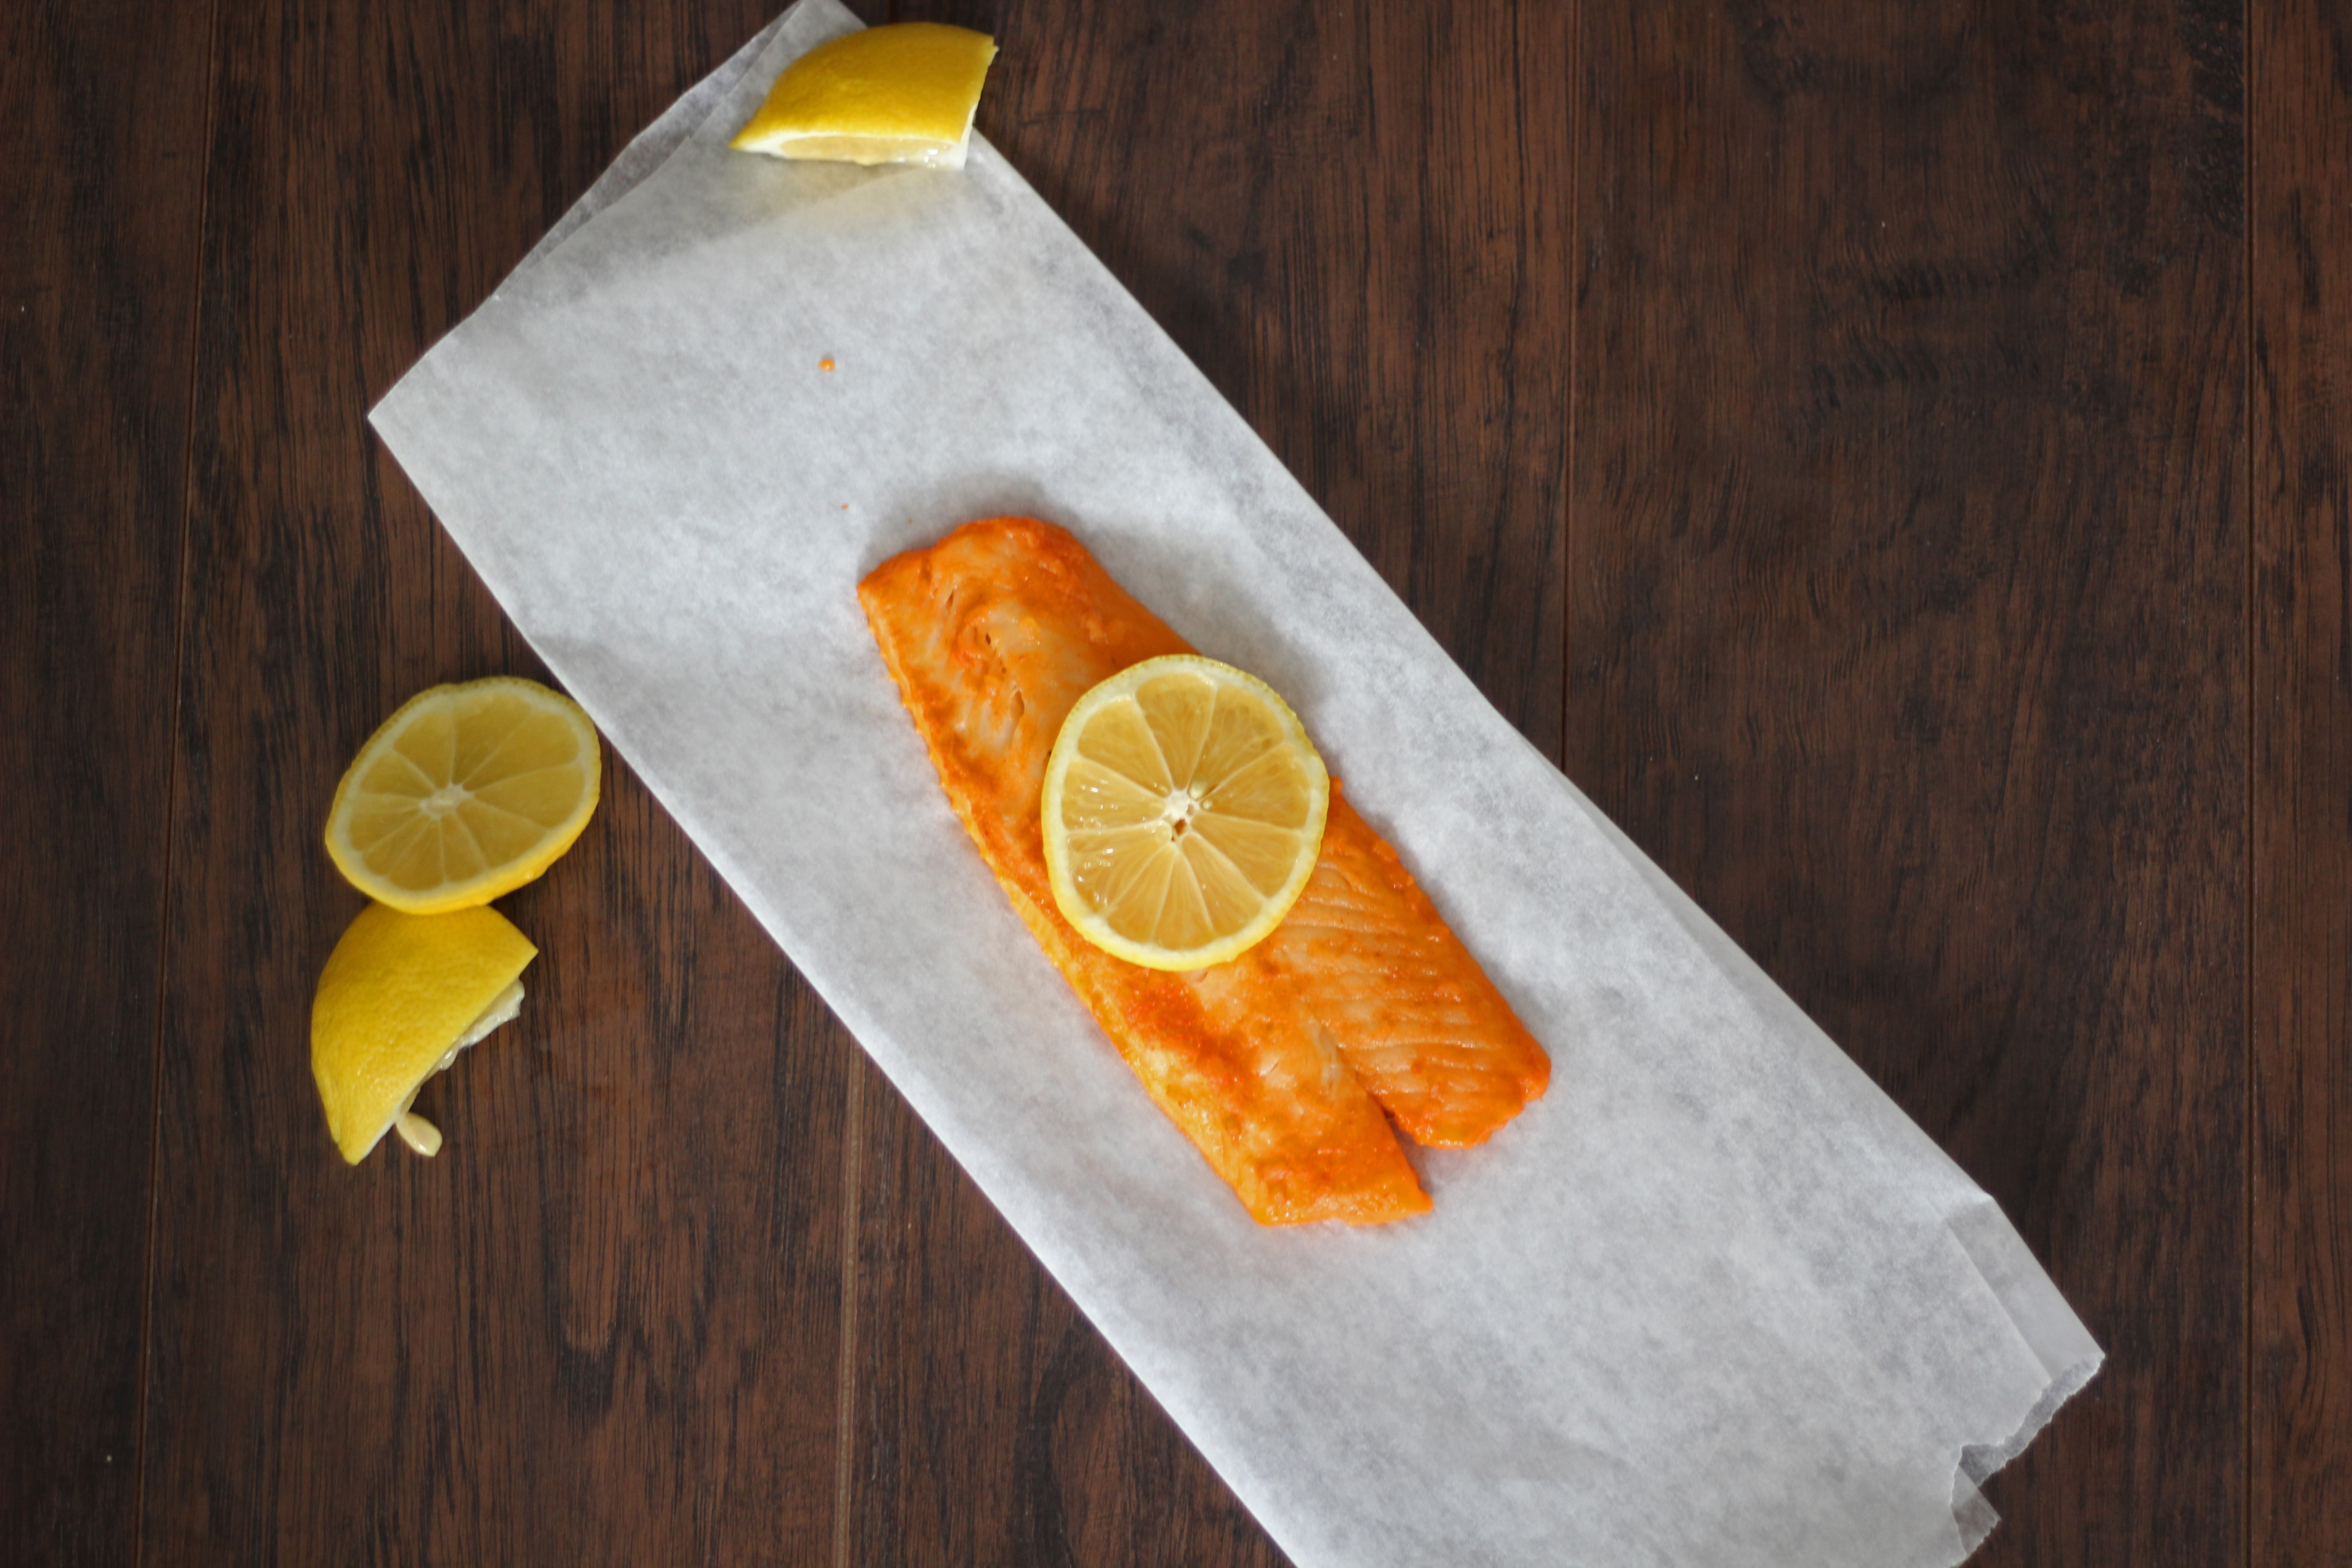
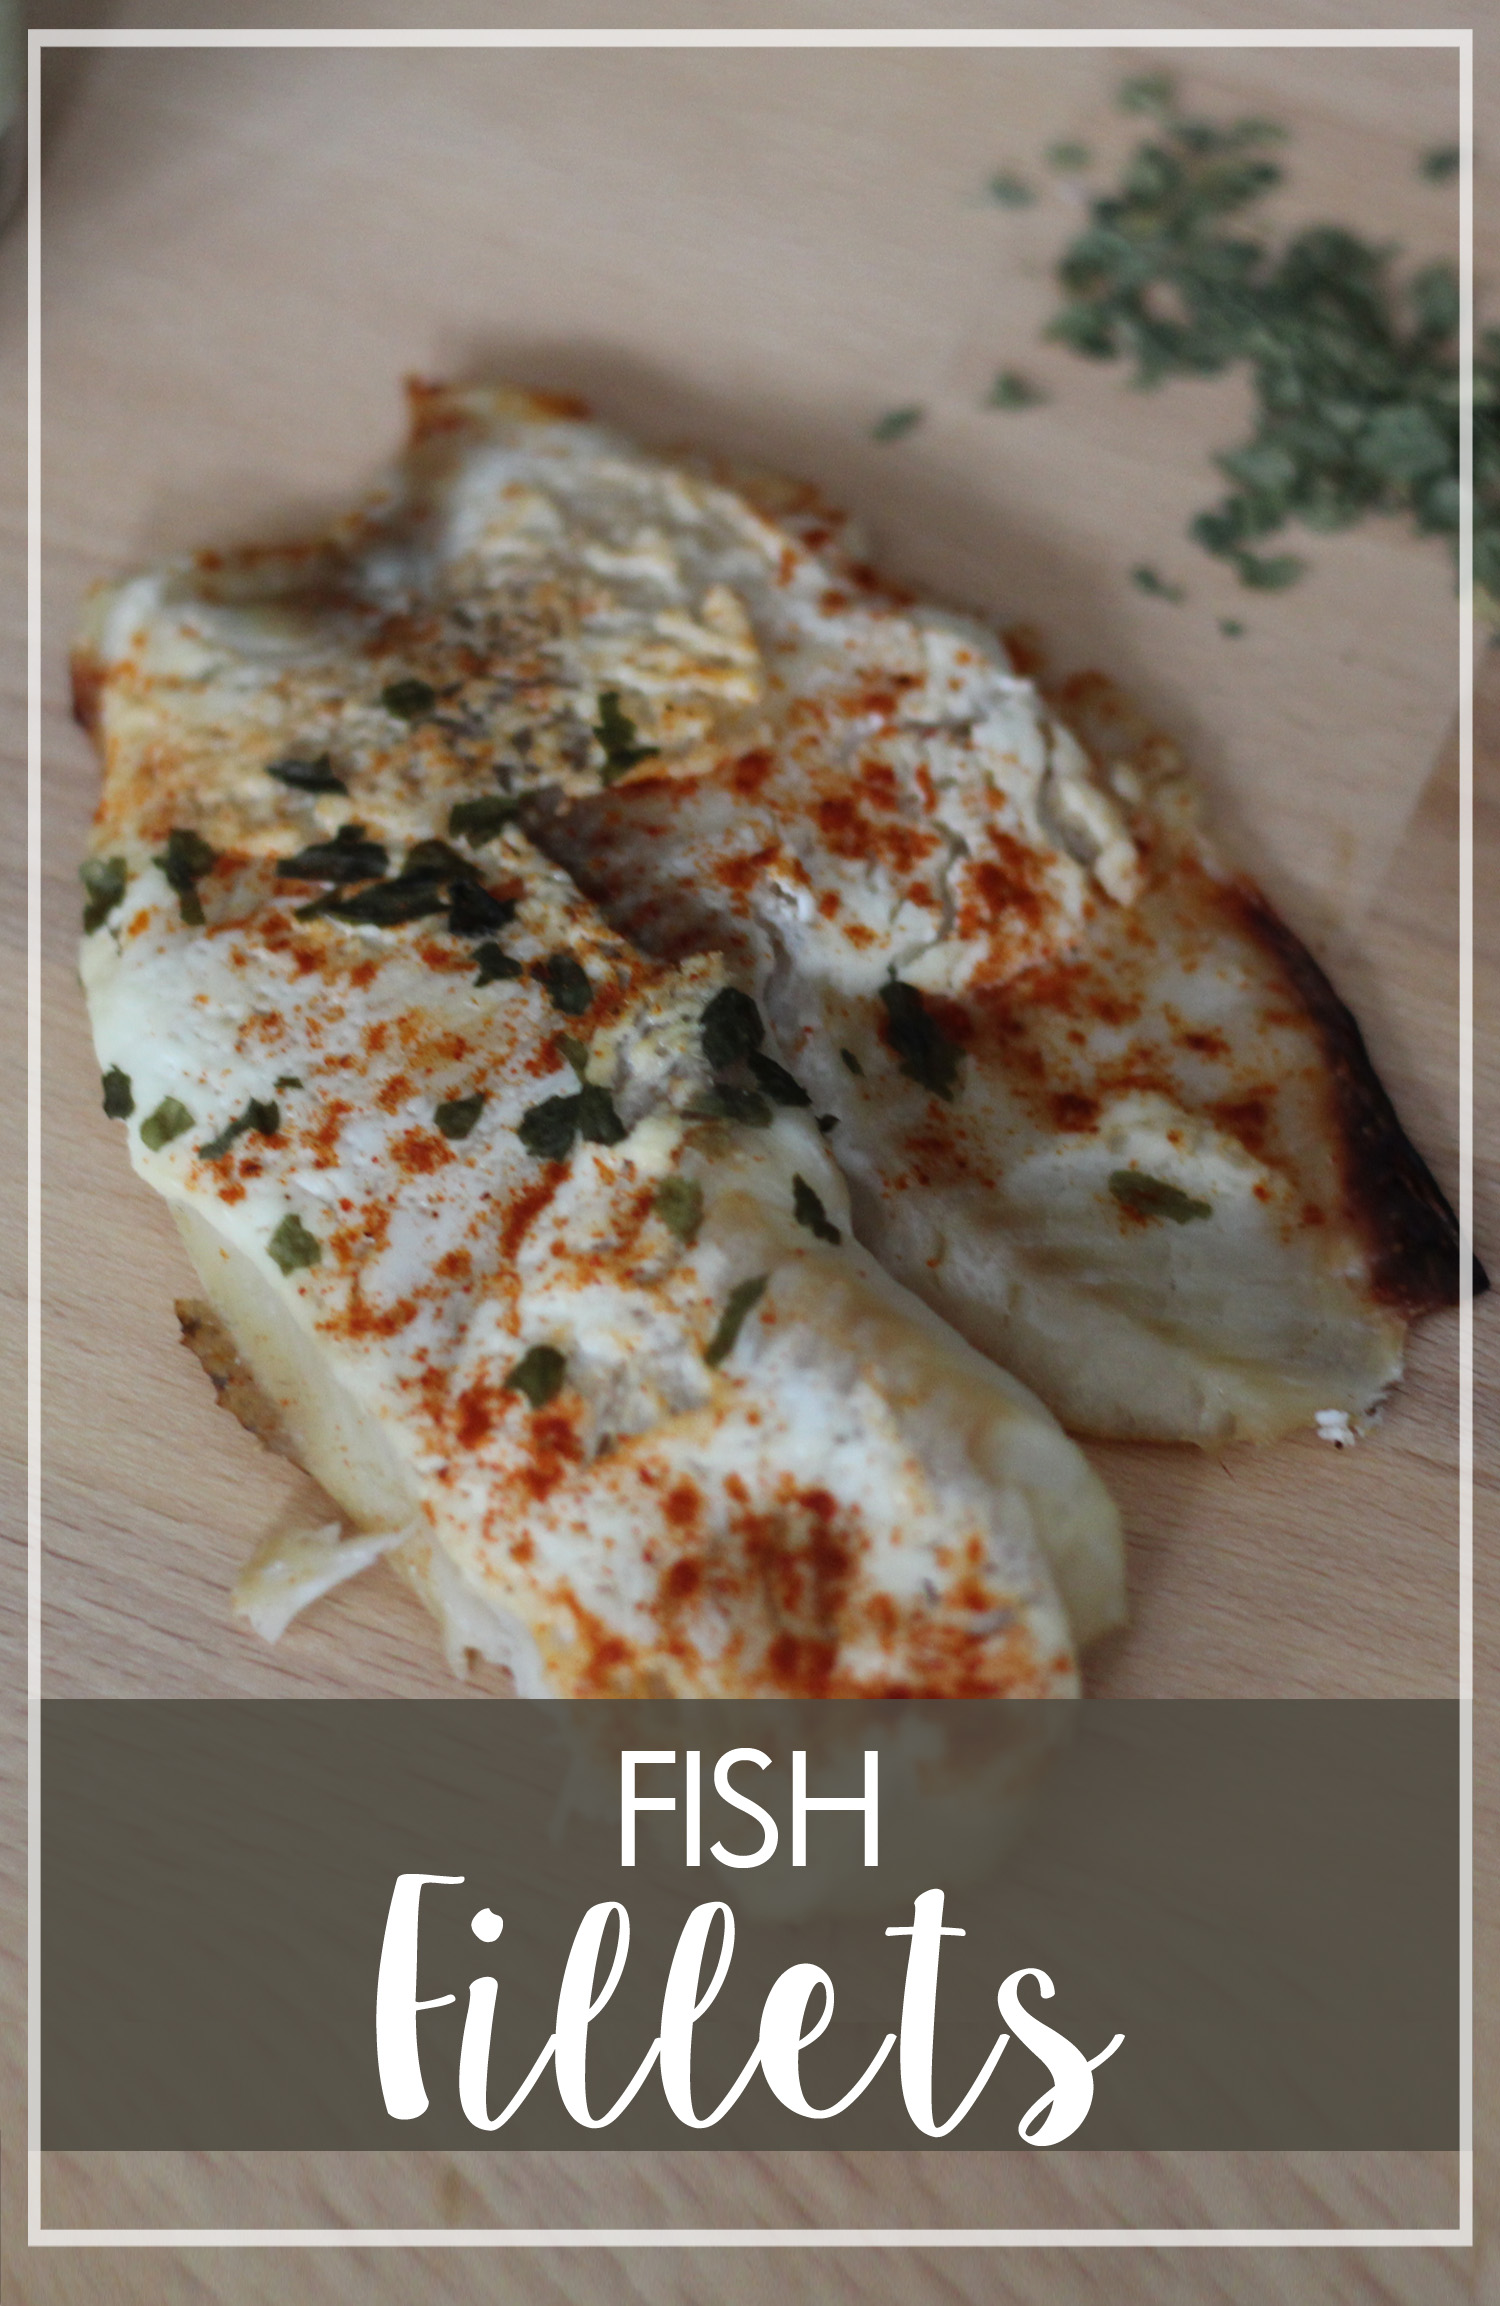
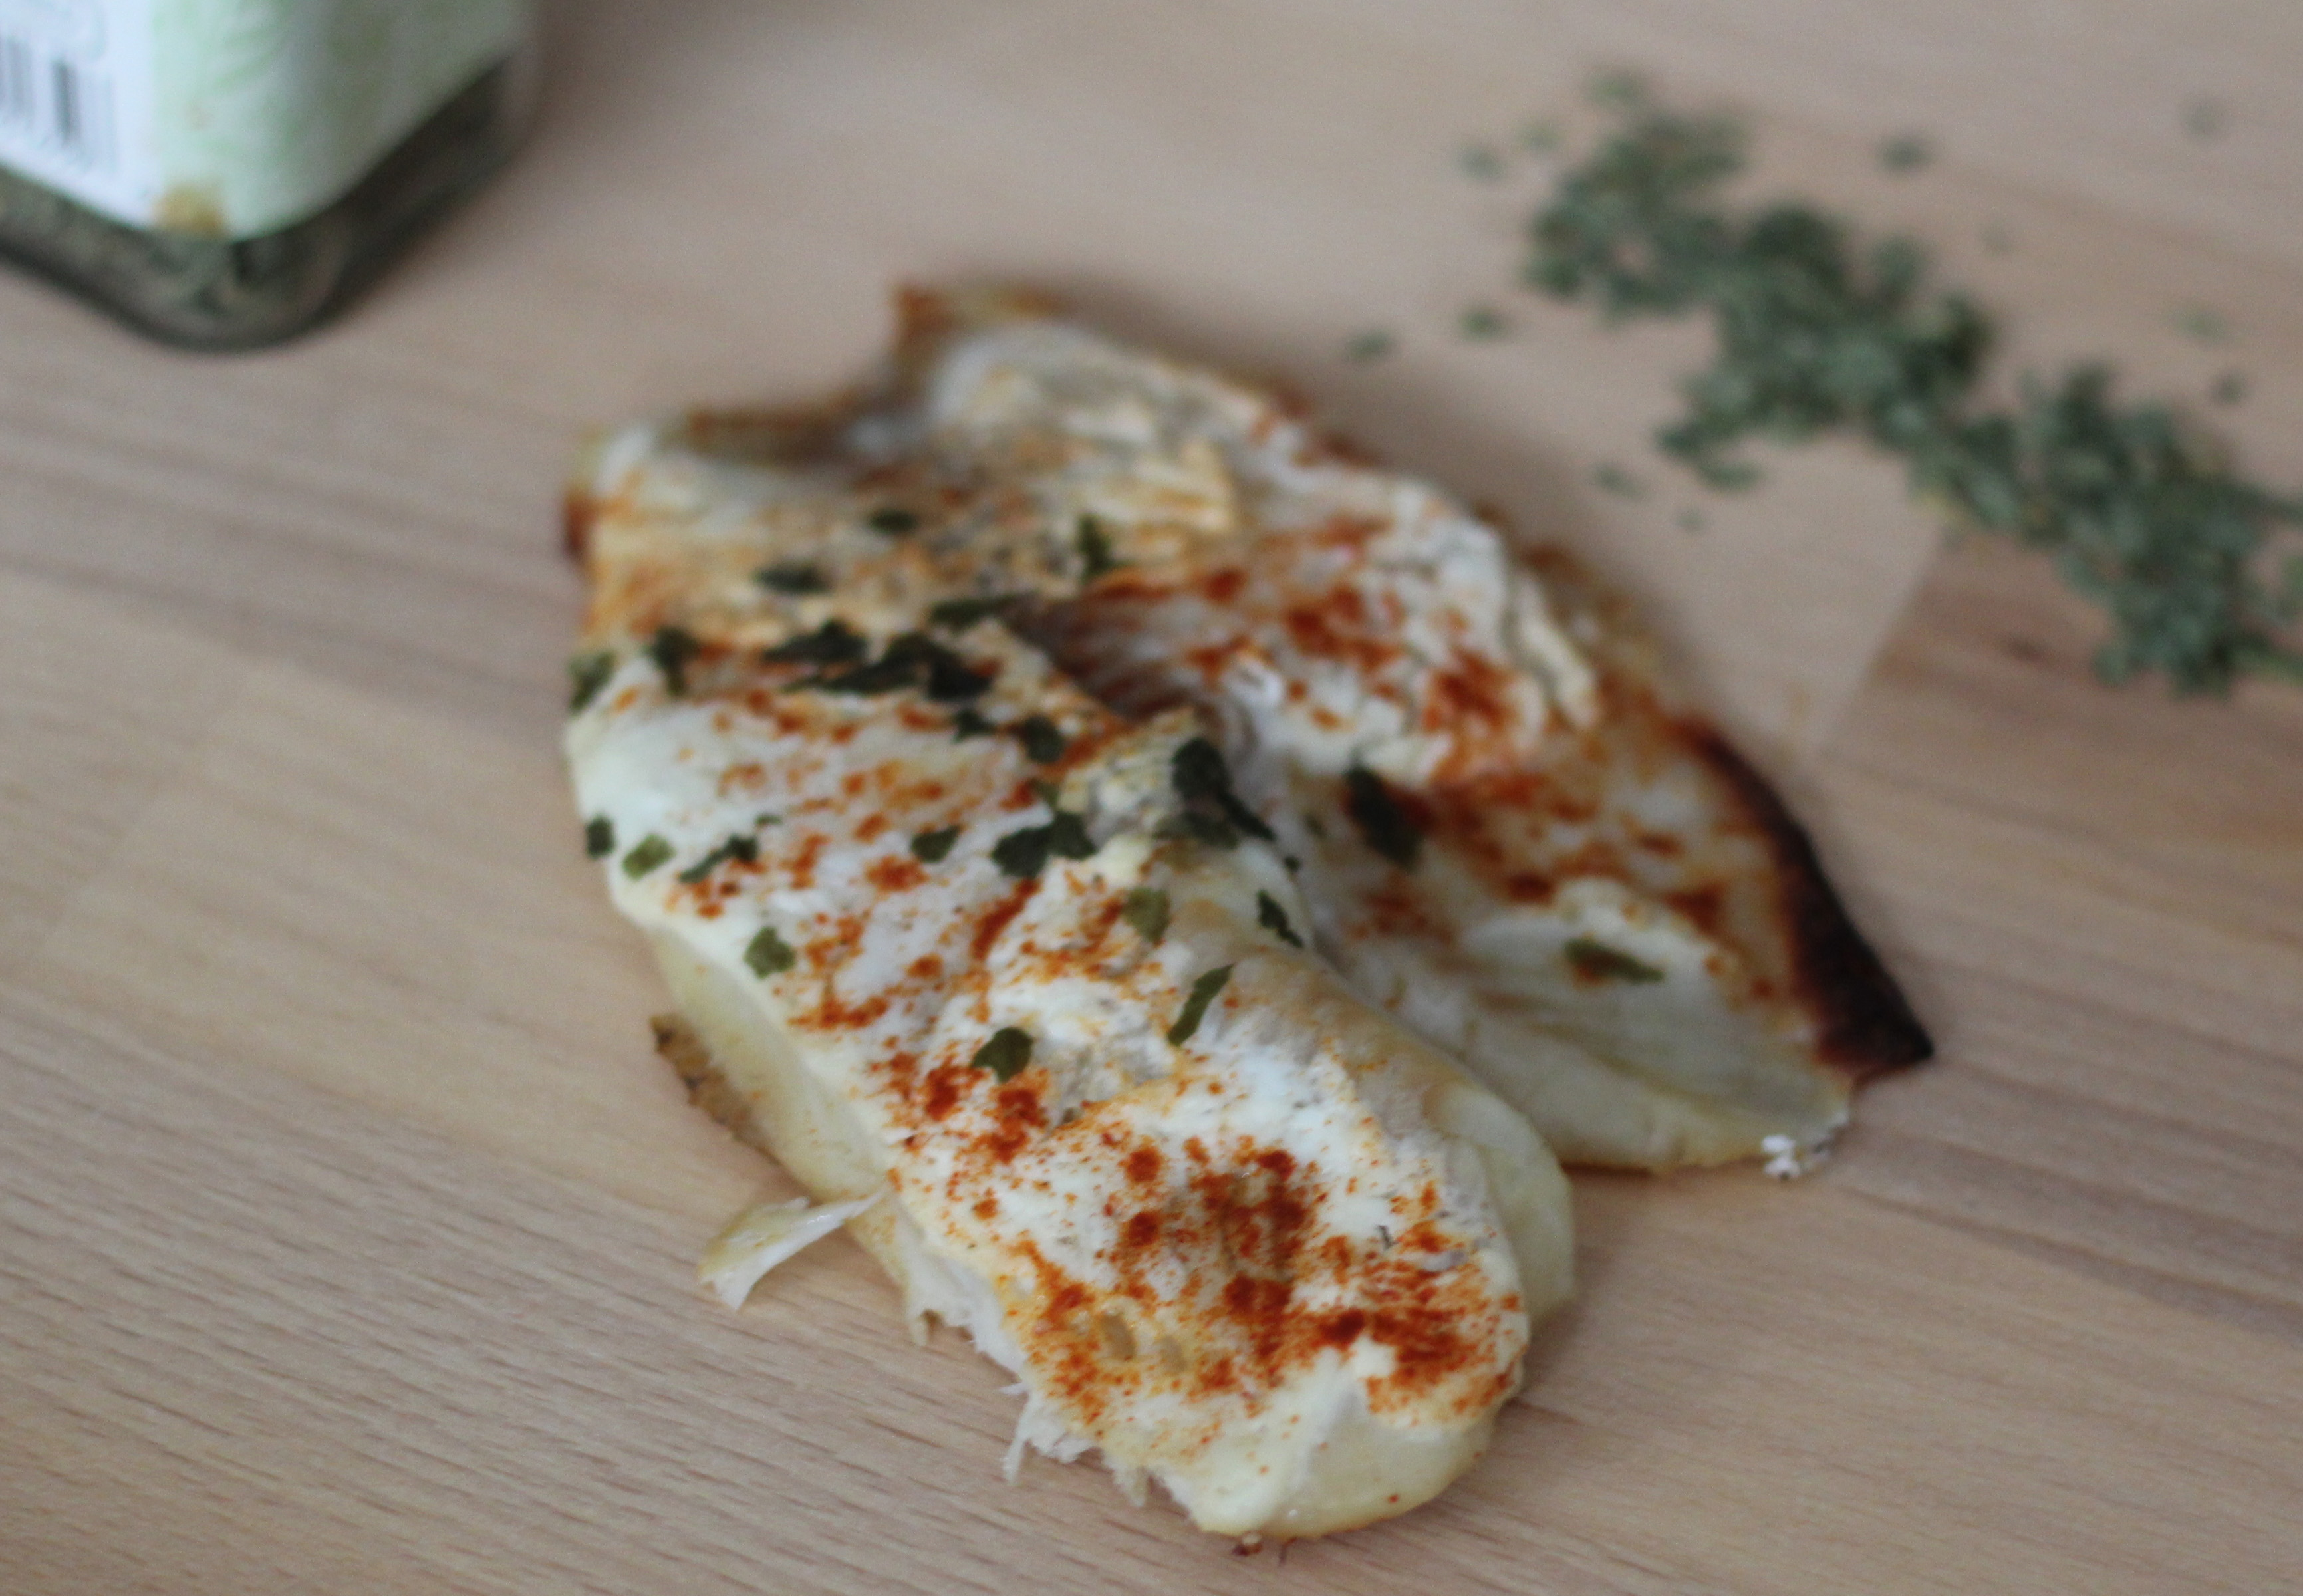
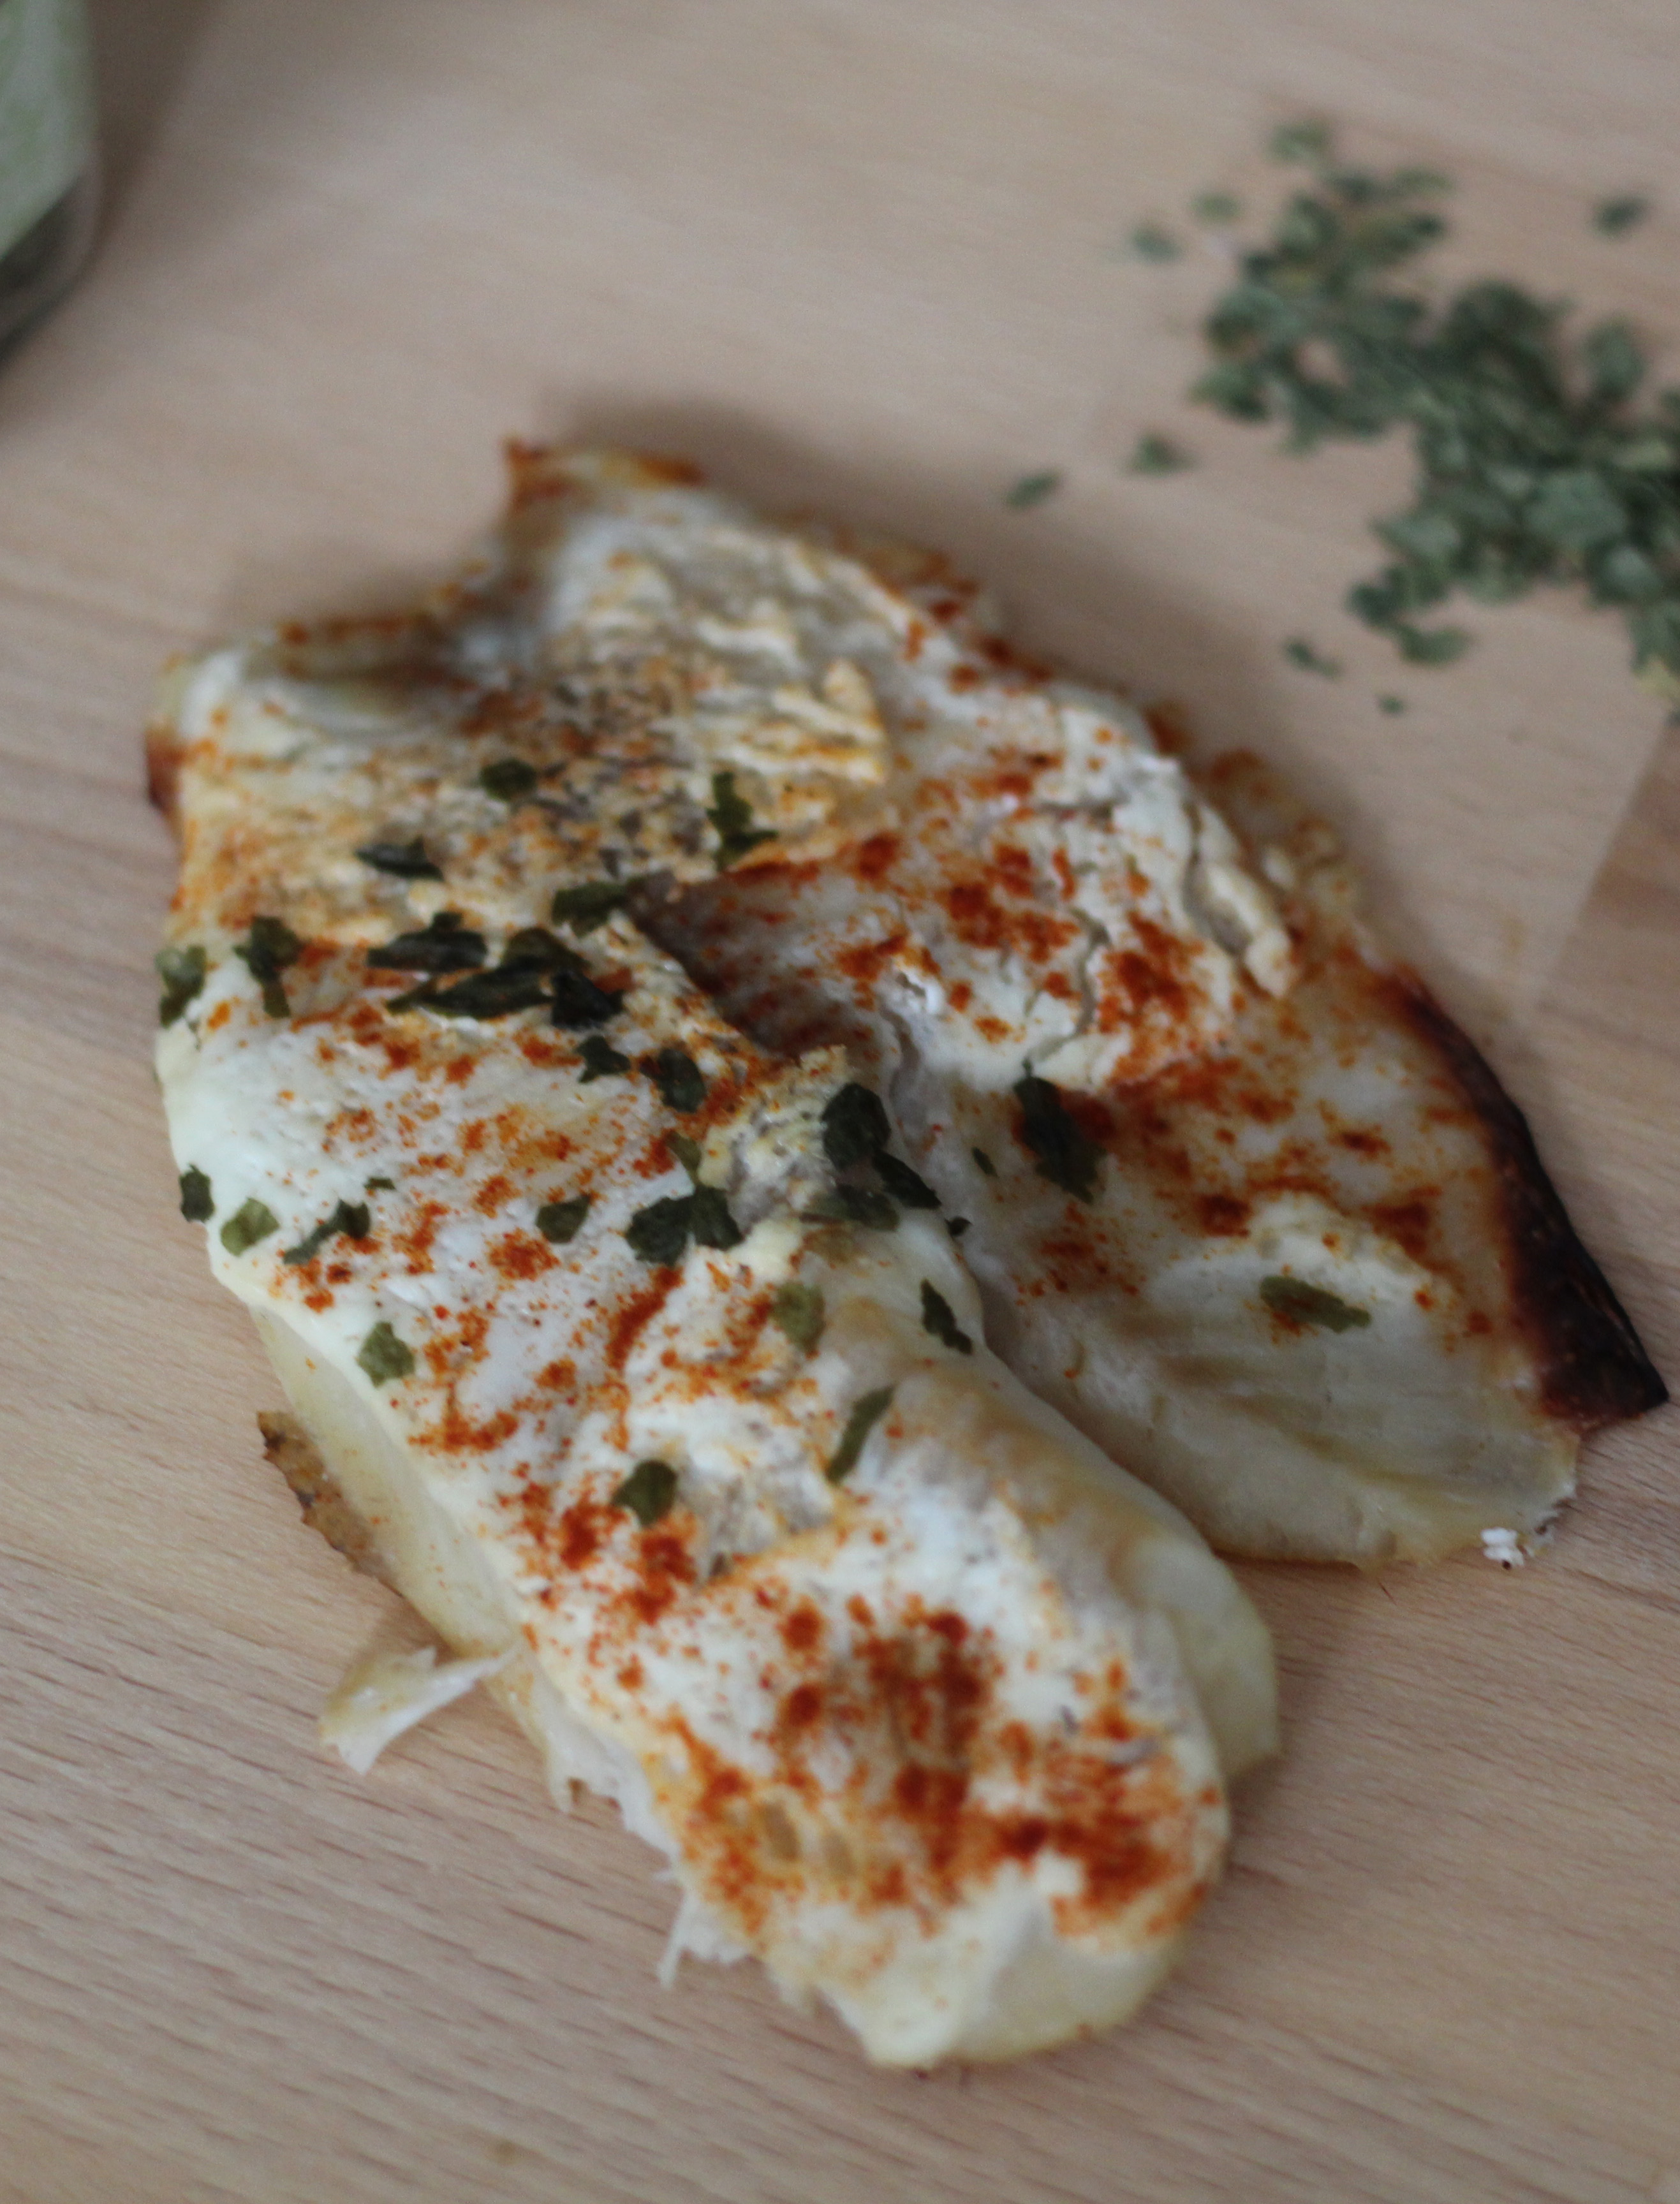
I don’t think Aaron would run out and buy tilapia (like we chose this time) in bulk to make this dish for himself every day, but he did like it more than I.  He enjoys the flavor and consistency that ingredients like sour cream give to a dish, and was very excited to be able to use one of our new found favorite spices, paprika, again.

Fish Fillets

This fish fillet recipe isn’t as healthy as a fillet with lemon juice, salt, and pepper, but it is just as quick and easy to prepare!  So if you want to try a new recipe that won’t take a lot of time, give this a try!
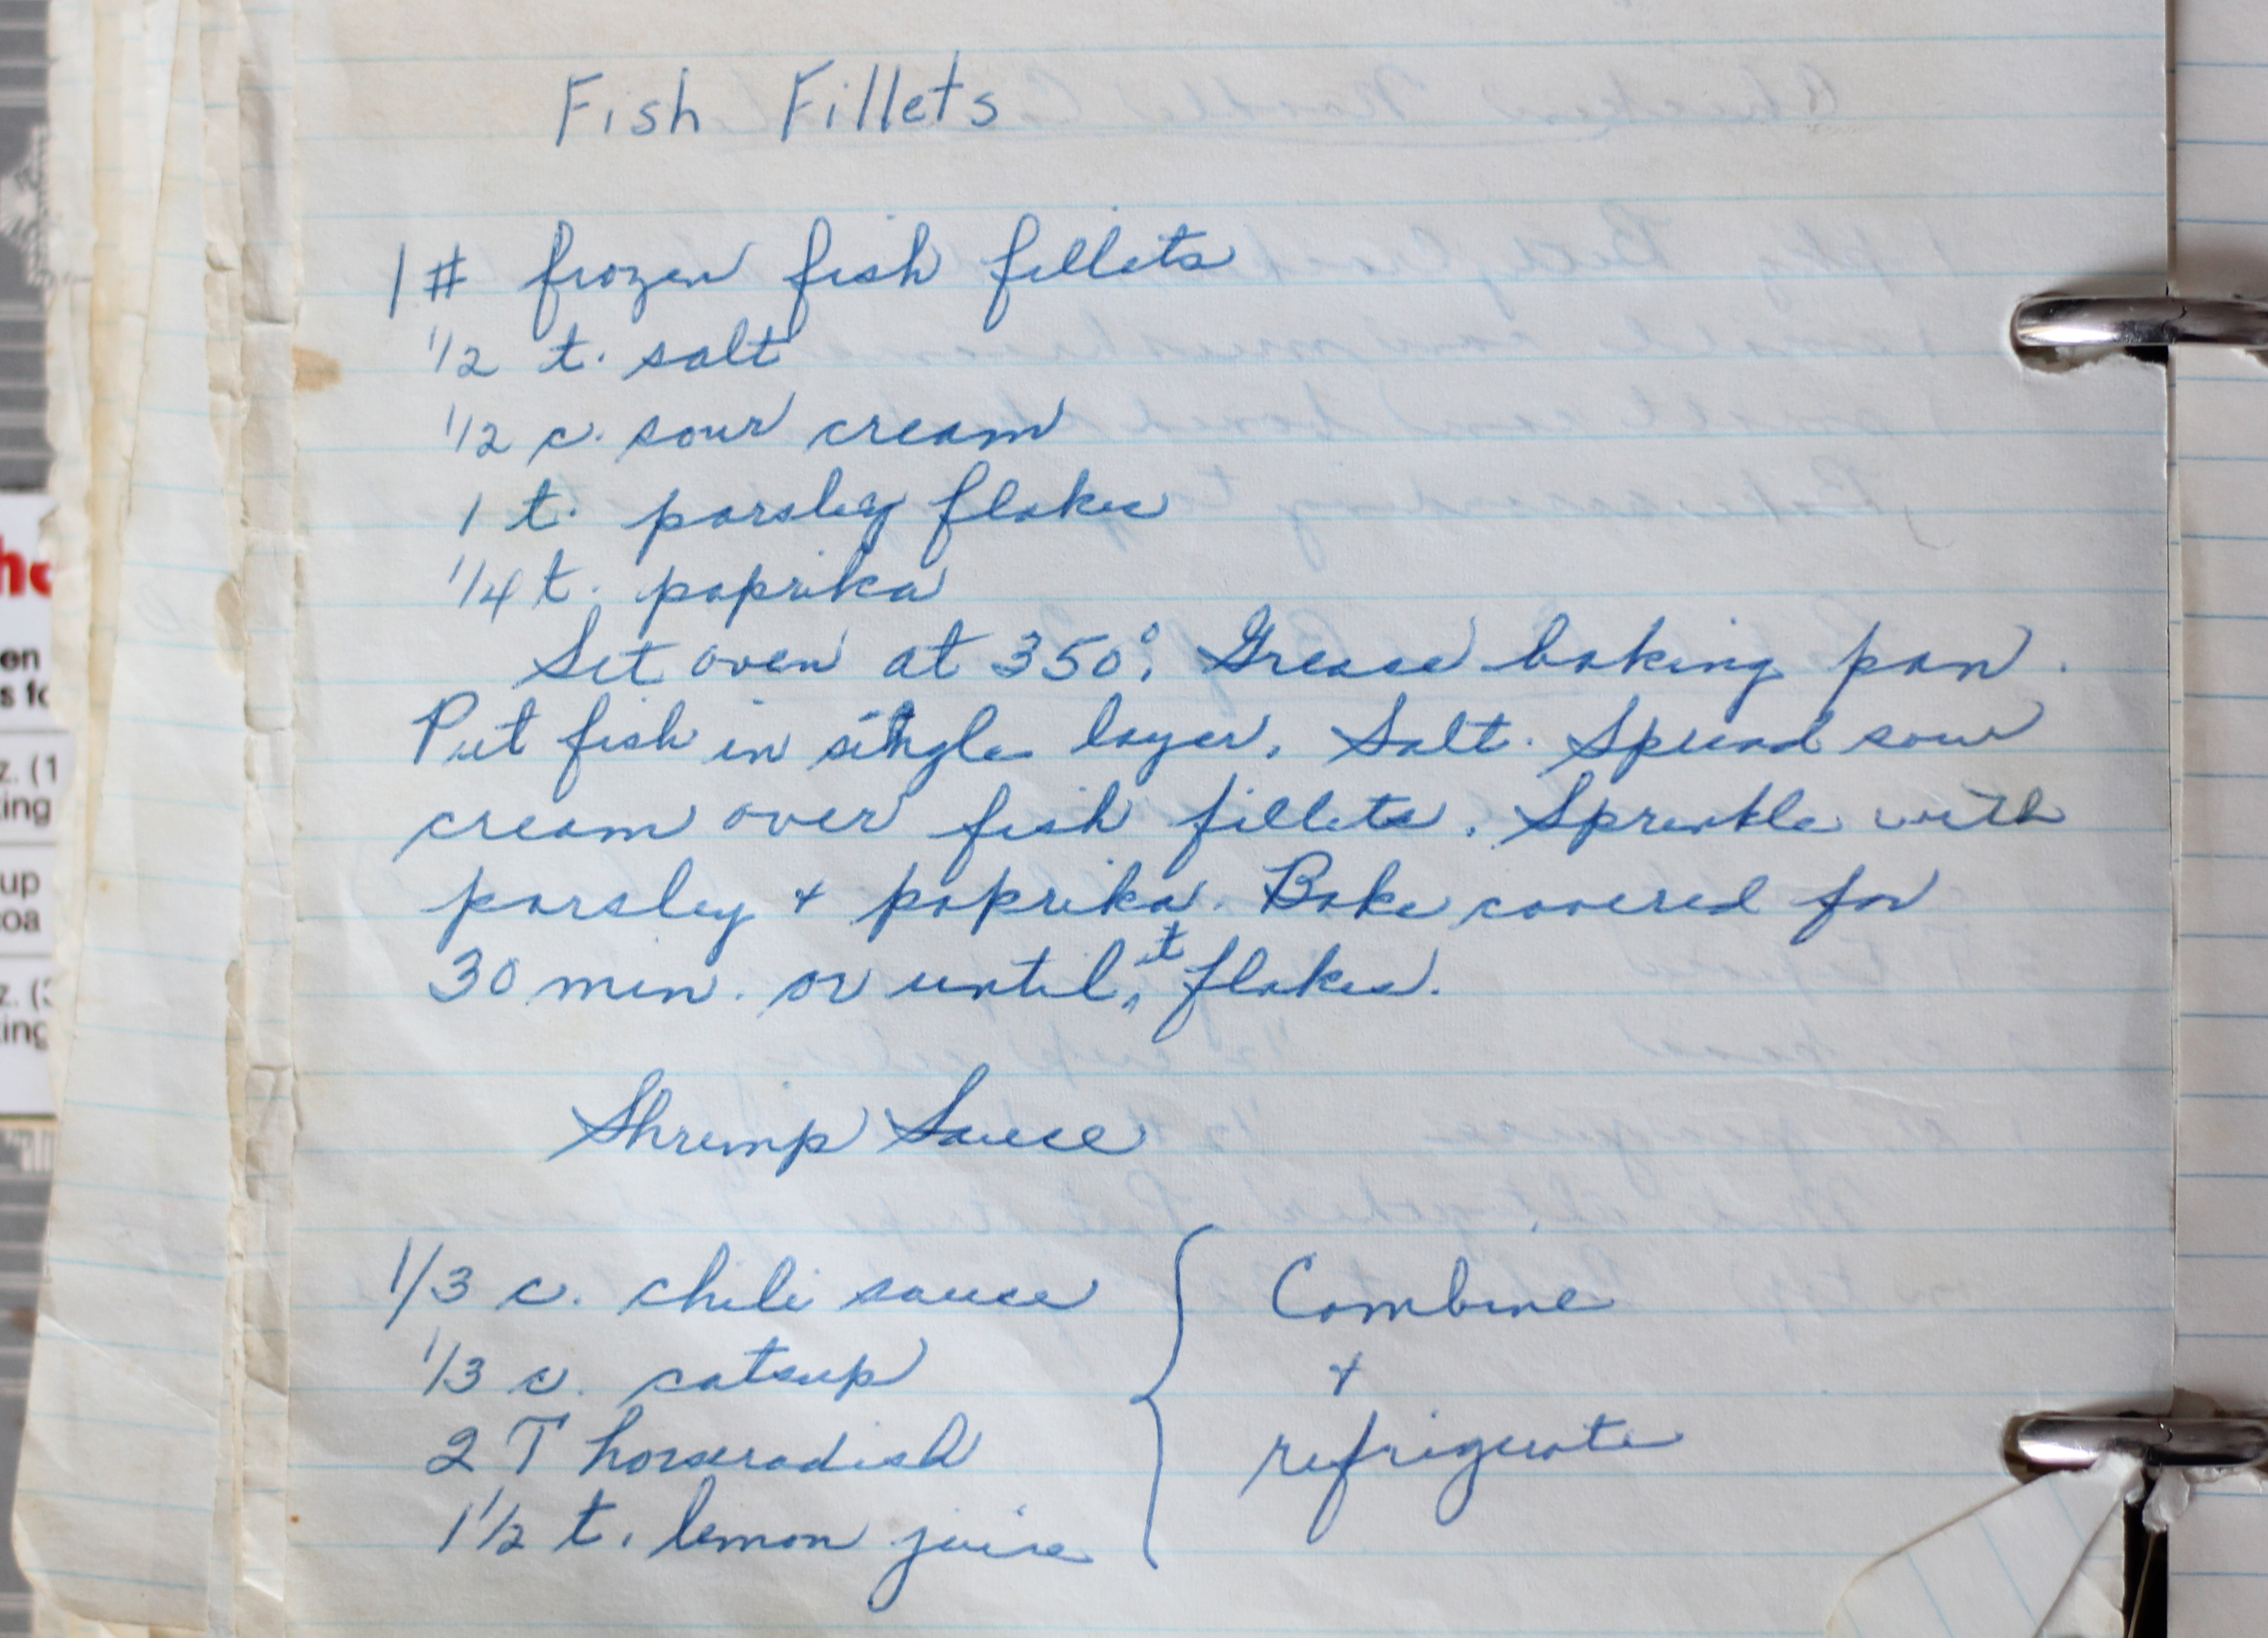
Fish Fillets
Print Recipe
  • CourseMain Dish
Servings Prep Time
4 5 minutes
Cook Time
30 minutes
Servings Prep Time
4 5 minutes
Cook Time
30 minutes
Fish Fillets
Print Recipe
  • CourseMain Dish
Servings Prep Time
4 5 minutes
Cook Time
30 minutes
Servings Prep Time
4 5 minutes
Cook Time
30 minutes
Ingredients
  • 1 lb fish fillets
  • 1/2 tsp salt
  • 1/2 cup sour cream
  • 1 tsp parsley flakes
  • 1/4 tsp paprkia
Servings:
Instructions
  1. Preheat oven to 350 degrees.
  2. Grease baking pan and arrange fish in single layer, salt.
  3. Spread sour cream over fish fillets.
  4. Sprinkle parsley and paprkia.
  5. Bake covered for 30 minutes or until it flakes.
Share this Recipe
 
Powered byWP Ultimate Recipe

May 7, 2016 by: Shannon and Aaron

Oven French Fries

Oven French Fries Header

I don’t know about you, but one side dish Aaron and I could eat always and forever are french fries. From fast food to handmade, french fries are a delicious way to prepare potatoes. In case you haven’t noticed a trend on this blog, we’re potato obsessed. These oven french fries combined flavors we never would have paired together and resulted in my favorite recipe so far (I’m pretty sure Aaron’s too.) They would also go great with the Pittsburgh Ham Barbecue Sandwiches that we made last week!


It’s also another “guest” post. Marguerite noted below that she got this recipe from Madaline, who was a long time friend of her’s. Here’s what she had to say:

Oven French Fries Recipe

One thing we have found in cooking through Marguerite’s cookbook, is that both Aaron and I like paprika much more than either of us realized. It has been one of the main spices we’ve used in quite a number of dishes, and it is something we both really enjoy. Now salt is really what makes any french fries, good, am I right? But the addition of the paprika and the parmesan cheese really create a much more exciting set of flavors for these oven french fries. Also, butter. ‘Nough said.

Oven French Fries

The thing Aaron enjoyed about making these fries is that it didn’t require any special equipment, or having cooking grease to fry them in. And, to be honest, I think he really liked the idea of being able to make the fries any shape and size he wanted.

Oven French Fries

In the end, both that unique, “homemade” fry look, and the delicious flavors I mentioned before, made these oven french fries a huge success with both of us. We have already made them several times, and plan on making them any time we need to finish off a bag of potatoes! Not so good for our waistlines, but who cares?

Oven French Fries Recipe

Oven French Fries
Print Recipe
  • CourseAppetizers and Sides
Servings Prep Time
2 15 minutes
Cook Time
25 minutes
Servings Prep Time
2 15 minutes
Cook Time
25 minutes
Oven French Fries
Print Recipe
  • CourseAppetizers and Sides
Servings Prep Time
2 15 minutes
Cook Time
25 minutes
Servings Prep Time
2 15 minutes
Cook Time
25 minutes
Ingredients
  • 4 Potatoes
  • butter
  • salt
  • pepper
  • paprika
  • Parmesan cheese
Servings:
Instructions
  1. Slice raw potatoes 1/8" thick.
  2. Melt butter and dip each potato slice. Shake excess off and place on a cookie sheet.
  3. Sprinkle with salt, pepper, paprika, and parmesan cheese.
  4. Bake in oven for 20-30 minutes (or until tender) at 375 degrees.
Share this Recipe
 
Powered byWP Ultimate Recipe

April 23, 2016 by: Shannon and Aaron

Cheesecake Recipe

Cheesecakeheader

I love cheesecake. Aaron’s mom makes great cheesecake, so I lucked out marrying into a family of great cheesecake. That being said, I was really excited to try out Marguerite’s cheesecake recipe!

Cheesecake Recipe

Here is what Marguerite’s cheesecake recipe looks like:

Cheesecake Recipe

Preparing the ingredients for the crust was a very time consuming process! It took us a full thirty minutes to crush up regular whole graham crackers into crumbs small enough for the crust. We did want to try to make it exactly as Marguerite would, so we went through all that trouble. What we did find out, as you can see, is that 20 graham crackers made a very thick crust.

Cheesecake Recipe Piece

Even though the crust was thick, it was delicious! The addition of walnuts and cinnamon in the crust made for a delicious extra boost of flavor that really complemented the plain flavor of the cheesecake.

Cheesecake Recipe

My other favorite thing about cheesecake is having strawberries with it. So we made some sugared strawberries to go on top of our cheesecake. At that point I was itching to have some of this cheesecake. And let me tell you, I was not disappointed! It was simply delicious. Aaron really enjoyed it too (is there anything he doesn’t enjoy though?)

Cheesecake Recipe

Our first attempt at cheesecake did not come without some difficulties. The cheesecake cracked across the top, and parts of the sides browned a little more than other parts. We consulted with our cheesecake expert, Aaron’s mom, and she let us know what she thought happened. First of all, even though Marguerite’s instructions said so, Aaron’s mom thought it was a little too high of a temperature in the oven.  She would suggest a lower temperature for a longer length of time. She also thought we could have over beaten our batter, could have had some difficulties due to it being the inaugural run of our spring form pan, or it could have been due to using an electric oven instead of gas. Regardless, this cheesecake was delicious and we will be making it again, probably halving the crust so it’s not as thick. Hope you enjoy it too!

Cheesecake Recipe

Cheesecake Recipe
Print Recipe
  • CourseDesserts
Servings Prep Time
1 Cheesecake 45 minutes
Cook Time Passive Time
35 minutes 5 hours
Servings Prep Time
1 Cheesecake 45 minutes
Cook Time Passive Time
35 minutes 5 hours
Cheesecake Recipe
Print Recipe
  • CourseDesserts
Servings Prep Time
1 Cheesecake 45 minutes
Cook Time Passive Time
35 minutes 5 hours
Servings Prep Time
1 Cheesecake 45 minutes
Cook Time Passive Time
35 minutes 5 hours
Ingredients
Crust
  • 20 graham crackers crumbs
  • 1/4 cup chopped walnuts
  • 1/2 tsp cinnamon
  • 1/2 cup butter melted
Filling
  • 3 eggs
  • 2 8 oz packages cream cheese softened
  • 1 cup sugar
  • 1/4 tsp salt
  • 2 tsp vanilla
  • 3 cups sour cream
Servings: Cheesecake
Instructions
Crust
  1. Mix graham cracker crumbs, chopped walnut and cinnamon. Add melted butter.
  2. Press into spring form pan.
Filling
  1. Combine all the filling ingredients except the sour cream. Mix until smooth.
  2. Add sour cream.
  3. Pour into crust.
Baking Instructions
  1. Bake at 375 degrees for 35 minutes.
  2. Let cool in the oven with the door open for one hour.
  3. Chill for at least four to five hours.
Share this Recipe
 
Powered byWP Ultimate Recipe

April 16, 2016 by: Shannon and Aaron

Salmon Balls

Salmon Balls

Like I said a few posts ago, if there is food everyone likes some version of, it is probably potatoes. Baked, mashed, fried – you name it – they’re delicious. So any recipe with potatoes in it is bound to be good. The salmon balls were no exception.

Salmon Balls

Here is what Marguerite had to say:

Salmon Balls

The most difficult part of this recipe was definitely preparing the canned salmon. We had never worked with canned salmon before, and neither of us really enjoyed it. Getting the bits of skin and bones out was a long and messy process. Other than that, it was a pretty simple recipe with just a few ingredients.

Salmon Balls

As you can see, the salmon balls are not the largest. For that reason we feel that they are best served as appetizers before a meal. I really like salmon, it is one of my favorite fish. I thought the combination of salmon with breading tasted good, and like I said before, who doesn’t love potatoes in a dish? Aaron also enjoyed them, referring to them as “a simple version of crab cakes.” Next time we try these I would prefer to try and use fresh salmon, as we felt the canned salmon did not taste as good as fresh.

Salmon Balls

We hope the next time you are looking for an interesting yet simple party food or appetizer, you keep these salmon balls in mind!

Salmon Balls
Print Recipe
  • CourseAppetizers and Sides
Servings Prep Time
4-6 20 minutes
Cook Time
30 minutes
Servings Prep Time
4-6 20 minutes
Cook Time
30 minutes
Salmon Balls
Print Recipe
  • CourseAppetizers and Sides
Servings Prep Time
4-6 20 minutes
Cook Time
30 minutes
Servings Prep Time
4-6 20 minutes
Cook Time
30 minutes
Ingredients
  • 1 cup instant potatoes
  • 3/4 cup water
  • 7 3/4 oz canned salmon drained, boned, and flaked
  • 2 eggs
  • 1 tsp salt
  • 1/4 cup bread crumbs seasoned
Servings:
Instructions
  1. Boil the water and add the instant potatoes.
  2. After draining, boning, and flaking the salmon, combine with the two eggs and salt.
  3. Stir the salmon mixture into the instant potatoes until fluffy.
  4. Shape into 4-6 balls (they will be sticky.)
  5. Roll the balls in bread crumbs.
  6. Bake at 375 for 30 minutes.
Share this Recipe
 
Powered byWP Ultimate Recipe

March 5, 2016 by: Shannon and Aaron

Grilled Flounder

Grilled Flounder

This is a great flounder recipe that can be either baked or grilled. We choose to do a baked version of this recipe, but it can be made on a Foreman or a regular grill.

Grilled Flounder

Here is what Marguerite had to say:

Grilled Flounder

One of the best parts of this grilled flounder recipe is how few ingredients it takes to make the sauce. Simplicity is always a plus for us. Aaron was surprised that cocktail sauce plus mustard equaled barbecue flavor, however he hates flounder. He wants to try it again on another white fish. I want to try it again on a grill.

Grilled Flounder

This grilled flounder has a nice, tangy consistency to it. It’s the perfect flavor for a summer meal and definitely one we’ll try again as the weather warms up.

Grilled Flounder

Grilled Flounder
Print Recipe
  • CourseMain Dish
Servings Prep Time
4 4 oz 10 minutes
Cook Time
20 minutes
Servings Prep Time
4 4 oz 10 minutes
Cook Time
20 minutes
Grilled Flounder
Print Recipe
  • CourseMain Dish
Servings Prep Time
4 4 oz 10 minutes
Cook Time
20 minutes
Servings Prep Time
4 4 oz 10 minutes
Cook Time
20 minutes
Ingredients
  • 3 Tbsp cocktail sauce
  • 3 Tbsp water
  • 1 tsp lemon juice
  • 1/2 tsp prepared mustard
  • 2 tsp minced onion
  • 1/4 tsp salt
  • 1 pound flounder
Servings: 4 oz
Instructions
  1. Lay fish in baking dish.
  2. Mix other ingredients and spread on fish.
  3. Bake 20 minutes at 450 degrees.
Share this Recipe
 
Powered byWP Ultimate Recipe

February 27, 2016 by: Shannon and Aaron

Ham Cheese Strata

Ham and Cheese Strata

When we started this recipe, neither of us really knew what to expect.  But, I thought, “Bread and cheese and warm, maybe it’ll be like grilled cheese and I’ll love it!”  That’s not quite how it turned out, and since I love a good grilled cheese sandwich, was a little disappointed.

Ham and Cheese Strata

We really couldn’t discern a lot of details about what this recipe had in store for us from just what Marguerite wrote.  Take a look for yourself:

Original Ham and Cheese

It really started to make sense when Aaron called his mother to ask her opinion about part of the recipe.  After getting our question answered, Aaron asked her if she remembered having it.  She did remember.  Although not well, she did recall it tasting like and reminding her of quiche.  Of course, soaking the whole thing in an egg mixture, it does start to make sense as a breakfast dish once it is pointed out to you.  Upon further research, it turns out that the Strata is a layered casserole dish, whose most common modern variation is a brunch dish similar to a quiche or frittata!

Ham and Cheese Strata

I was not a fan, although I couldn’t tell you why exactly.  However, Aaron loves breakfast foods, and was pleasantly surprised that this dish tasted quiche-like.  He actually heated it up almost every morning the week we made it and had some for breakfast.  A few improvements he would make:

  • More Meat: The recipe had no instruction on the amount of ham to put in.  Aaron put in less than one pound and found it to be a pitiful amount, so we have suggested two pounds in the recipe
  • More Cheese: Because, why not?  But really, it lacked overall in cheesy-ness as well.

Ham and Cheese Strata

Aaron’s mom also told us this was a dish Marguerite would often prepare the night before an let saturate overnight (as the recipe suggests.)  All in all, this is a simple dish to make that you can prepare the night before, and then pop in the oven in the morning before the kiddos (or your husband or wife) wake up.  Enjoy!

Ham Cheese Strata
Print Recipe
Servings Prep Time
6-12 10 minutes
Cook Time Passive Time
1 hour 2-8 hours
Servings Prep Time
6-12 10 minutes
Cook Time Passive Time
1 hour 2-8 hours
Ham Cheese Strata
Print Recipe
Servings Prep Time
6-12 10 minutes
Cook Time Passive Time
1 hour 2-8 hours
Servings Prep Time
6-12 10 minutes
Cook Time Passive Time
1 hour 2-8 hours
Ingredients
  • 12 slices bread with or without crusts (your choice)
  • 6 slices American cheese
  • 2 lbs ham diced
  • dried minced onion
  • 5 eggs slightly beaten
  • 3 1/4 cups milk
  • 1/2 tsp salt
  • dash pepper
Servings:
Instructions
  1. Arrange six slices of bread in a 9 x 13 pan.
  2. Cover with slices of American cheese.
  3. Scatter diced ham over each slice.
  4. Sprinkle a little dried minced onion over each slice.
  5. Cover with six more slices of bread.
  6. Mix slightly beaten eggs with milk. Add salt and pepper. Pour over sandwiches.
  7. Refrigerate at least two hours or even overnight.
  8. Bake 1 hour at 350 degrees. Let set 10 minutes before serving.
Share this Recipe
 
Powered byWP Ultimate Recipe

February 13, 2016 by: Shannon and Aaron

Basil Burgers

Basil Burgers

A flavorful burger in the middle of winter? Why not!

As excited as we are to try these again in the summer, these basil burgers were a great meal to enjoy on a cold, Chicago night. We also live in an apartment and have no outdoor space to grill, so trying these in the summer won’t make a huge difference.

Here is what Marguerite had to say:

Basil Burgers Original

Last week I mentioned we hosted our parents for a “try our blog food” dinner. Technically, my mother hosted and we cooked because we live 500ish miles away from our parents and needed a place to host while we were in town. In addition to the zucchini bread, the basil burgers were on the menu for the main course. Again, total hit. That was a huge compliment especially from my dad who is the grill master.

Basil Burgers

These burgers have a nice hint of basil which compliments the onion flavor. Neither Aaron nor myself is a huge fan of heavy onion, but paired with the ground beef and turkey it packed a positive punch.

The addition of parmesan cheese “made it” for Aaron. He loved how that flavor worked with the basil and felt like it added that something special to the burgers.

I loved how the basil burgers were 50% beef and 50% turkey, making them just a little leaner and  healthier.

Basil Burgers

When we made these for ourselves, we cooked them in a skillet on the stove. For our parents, we used my mother’s George Foreman grill. We also have one at our place, but forgot to use it until after dinner was ready. Both methods of cooking worked well and there wasn’t a noticeable difference in the flavor, however the grilled burgers had a more consistent texture. Which is to say they were less charred on the outside. If you prefer a more blackened burger, go for the skillet!

Basil Burger

Again, I have a feeling we’ll be throwing this recipe into the regular dinner rotation.

Basil Burgers
Print Recipe
A simple yet flavorful burger recipe.
Servings Prep Time
8 Burgers 20 minutes
Cook Time
10-15 minutes
Servings Prep Time
8 Burgers 20 minutes
Cook Time
10-15 minutes
Basil Burgers
Print Recipe
A simple yet flavorful burger recipe.
Servings Prep Time
8 Burgers 20 minutes
Cook Time
10-15 minutes
Servings Prep Time
8 Burgers 20 minutes
Cook Time
10-15 minutes
Ingredients
  • 1 egg slightly beaten
  • 2/3 cup chopped onion
  • 1/2 cup Parmesan cheese
  • 1/4 cup fresh basil OR
  • 1 Tbsp dried basil
  • 1/4 cup ketchup
  • garlic
  • 1/4 tsp salt
  • 1/4 tsp pepper
  • 1 lbs ground beef
  • 1 lbs ground turkey
  • 8 Hamburger buns
  • 8 slices tomato
Servings: Burgers
Instructions
  1. Combine and mix well the following ingredients: Egg, onion, parmesan cheese, basil, ketchup, garlic, salt, and pepper.
  2. Add the ground beef and ground turkey and mix well.
  3. Cook.
Share this Recipe
 
Powered byWP Ultimate Recipe

February 6, 2016 by: Shannon and Aaron

Zucchini Bread Recipe

Zucchini Bread

Zucchini + Bread is the way to a girl’s heart. More specifically Shannon’s heart. I love bread and zucchini dishes get me hyped up. Needless to say, I was excited for this recipe.
When we initially picked this, I browsed over it quickly and saw “bread” and “zucchini.” I actually thought we were making breaded/fried zucchini. Oops.

I was disappointed for a hot second, but then I got very excited to try something new.

Here is what Marguerite had to say:

Original Zucchini Bread

The best way to describe this bread is a flavor-packed, fluffy slice of deliciousness. Seriously, if you want an appetizer that’s rich and easy to make, try this zucchini bread.

Zucchini BreadNot only did we enjoy this zucchini bread, but we shared it twice with friends and family over the past month and it was a smash success both times.

Aaron took the leftovers of our first attempt to work and his co-workers raved. Then we hosted my parents and Aaron’s mom for dinner so that we could share some of the cool things Marguerite’s book has been teaching us. Again, the bread was a hit. The other dishes were also enjoyed, but more on those later.

Zucchini Bread

Our favorite thing about this bread was how easy it was to make and how moist it turned out. Based on our very limited cooking knowledge, we believed achieving moistness in bread to be a difficult thing to do. If that is the case, this zucchini bread recipe is the exception.

Zucchini Bread

As much as I love zucchini dishes, I actually felt like this was just a little too heavy on the zucchini flavor. Say what? I guess I was expecting more of a bread with a hint of zucchini, instead of the packed in flavor this bread delivers. It may just be a personal preference as well.

Aaron loved the consistency of the bread. Each time we made it, he was in charge of zucchini prep and felt chopping it then blending it was “tedious.” I think he just wanted to try it sooner…

Other than a somewhat laborious prep (if you have a food processor, this won’t be as much of an issue) this bread is very easy to make. Once you’ve got everything chopped up, it’s as simple as mixing and throwing it in the oven.

PinterestBread
Zucchini Bread
Print Recipe
  • CourseAppetizers and Sides
Servings Prep Time
2 loaves 30 minutes
Cook Time
45-60 minutes
Servings Prep Time
2 loaves 30 minutes
Cook Time
45-60 minutes
Zucchini Bread
Print Recipe
  • CourseAppetizers and Sides
Servings Prep Time
2 loaves 30 minutes
Cook Time
45-60 minutes
Servings Prep Time
2 loaves 30 minutes
Cook Time
45-60 minutes
Ingredients
  • 3 large eggs
  • 2 cups sugar
  • 1 cup salad oil
  • 2 tsp vanilla
  • 3 cups flour
  • 1 tsp salt
  • 1 tsp cinnamon
  • 1 tsp baking soda
  • 1 tsp baking powder
  • 3 cups grated raw zucchini
Servings: loaves
Instructions
  1. Grate the zucchini to whatever thickness you'd like. For this, very fine works best.
  2. Beat eggs until light and foamy.
  3. Add oil, sugar, vanilla, and grated zucchini.
  4. Mix together dry ingredients and add to egg and zucchini mixture.
  5. Put in two greased loaf pans.
  6. Bake at 325 degrees for 45-60 minutes or until lightly browned. Test to see if done. Remove from pan at once and cool on rack.
Share this Recipe
 
Powered byWP Ultimate Recipe

January 30, 2016 by: Shannon and Aaron

Breaded Veal Cutlets

Breaded Veal Cutlets

As far as easy dinners go, these veal cutlets definitely make the list.

In an attempt to be real adults, we’re always on the lookout for “real” food to make for dinner. By real food we mean basically anything that isn’t EasyMac. This veal recipe is one to add to our regular dinner rotation and not just as part of our adventure in cooking through Marguerite’s book. Few ingredients, lots of flavor, and a quick prep time equate to a perfect meal for us and this veal brings it.

Veal Cutlets

Here is what Marguerite had to say:

IMG_0262

Another reason we love this recipe is because it could be very easy to try with other kinds of meats. Veal is pricey and we usually have other meats in our freezer for everyday use. Basically any kind of beef cut would compliment this recipe well, as well as chicken. Pork perhaps? We’ll have to try a few and report back.

Veal Cutlet Recipe

The preparation of the meat was very simple, which is a huge factor for us when making dinner every night. It was also super flavorful, despite the meat being a little tough. That, of course, had to do with the meat we selected, and not the recipe itself.  All-in-all, another success!

Breaded Veal

The only issue we ran into with this dish was actually finding veal cutlets. Hence why the meat we picked was so tough. We went to 3 grocery stores before we found anything, and even then the selection was not so fabulous. So if anyone is aware of a good butcher in the Chicago area, let us know!


Breaded Veal Cutlets


Breaded Veal Cutlets
Print Recipe
  • CourseMain Dish
Servings Prep Time
4 People 10 minutes
Cook Time
1 hr 15 minutes
Servings Prep Time
4 People 10 minutes
Cook Time
1 hr 15 minutes
Breaded Veal Cutlets
Print Recipe
  • CourseMain Dish
Servings Prep Time
4 People 10 minutes
Cook Time
1 hr 15 minutes
Servings Prep Time
4 People 10 minutes
Cook Time
1 hr 15 minutes
Ingredients
  • 16 oz veal
  • skim milk
  • bread crumbs
  • 2 tomatoes
  • onion flakes
  • salt
  • pepper
  • 1 tbsp sugar
  • margarine
Servings: People
Instructions
  1. Salt and pepper veal to taste.
  2. Dip in skim milk then dip in break crumbs.
  3. Grease baking dish well with margarine and place veal in dish.
  4. Grease skillet well with margarine.
  5. Stew tomatoes with onion flakes, sugar, salt, pepper, and margarine.
  6. Put over veal and back for one hour and 15 minutes at 325 degrees. Cover tightly.
Share this Recipe
 
Powered byWP Ultimate Recipe

January 23, 2016 by: Shannon and Aaron

Cranberry Cherry Pie

Cranberry Cherry Pie

This Cranberry Cherry Pie is the perfect pairing to any Thanksgiving dinner. We made this recipe twice: the first time for Aaron’s family on Thanksgiving and the second time just for the two of us to enjoy.

Cranberry Cherry Pie

This will also be the first of many dessert recipes here on Marguerite’s Cookbook.  Dessert recipes were the most popular in Marguerite’s collection and the cookbook is about 50% desserts. Her pies were one of the best desserts to have, because she was so good at hand making pie crust.  For as long as Aaron can remember, his mother and other members of their family always talked about how no one could make pie crust like Marguerite.  When Marguerite tried to teach Aaron’s mom how to perfect the pie crust, the main advice she gave was “touch the dough as little as possible.”

Here is what the original recipe said:

Cranberry Cherry Pie Original

First to tackle was the crust itself, the previously mentioned hardest part.  Marguerite used a standard Crisco pie crust recipe, which we have included below.  When we made it the first time for Thankgiving, the family commented that the cranberry and cherry filling, along with the topping, tasted delicious.  Aaron’s mom, who was the best one to judge the crust, said that while it was good, it was not as soft and flakey as Marguerite’s.

Darn.

We attributed this to over handling the crust, as well as not putting enough water in it.  We also over baked the pie because there were no baking instructions on Marguerite’s recipe.  We were determined to get it right, so we tried it again.

Cranberry Cherry Pie

Despite being advised to, we didn’t chill the Crisco the second time. This seemed to make it much easier to play with the crust less. More water was also added.

In both attempts we omitted the Tapioca pudding from her recipe because neither of us care for it and we decided that it wouldn’t negatively affect the recipe to skip it.

Slice of Cranberry Cherry Pie

The other challenge with this recipe: Marguerite left no instructions on how long to bake the pie and at what temperature! For the first attempt we baked it for too long.  The second time turned out much better!

Cranberry Cherry pie and slice

I’m not a huge fan of pie, so I only sampled a small amount. Not the worst pie I’ve ever tried though.

Aaron loved it, despite not being a huge fan of cranberries.

Slice of PieWe hope you attempt this recipe for your next holiday to share with your family!


Cranberry Cherry Pie
Cranberry Cherry pie and slice
Cranberry Cherry Pie
Print Recipe
A berry pie recipe with a crumble topping
  • CourseDesserts
Servings Prep Time
1 Pie 30 minutes
Cook Time Passive Time
30 minutes 30 minutes
Servings Prep Time
1 Pie 30 minutes
Cook Time Passive Time
30 minutes 30 minutes
Cranberry Cherry pie and slice
Cranberry Cherry Pie
Print Recipe
A berry pie recipe with a crumble topping
  • CourseDesserts
Servings Prep Time
1 Pie 30 minutes
Cook Time Passive Time
30 minutes 30 minutes
Servings Prep Time
1 Pie 30 minutes
Cook Time Passive Time
30 minutes 30 minutes
Ingredients
Crust
  • 1 1/3 cup flour
  • 1/2 tsp salt
  • 1/2 stick Crisco OR
  • 1/2 cup Crisco
  • 3-6 Tbps ice cold water
Pie Filling
  • 1 can cherry pie filling
  • 1 can whole cranberry sauce 14 or 16 oz. can
  • 1/4 cup sugar
  • 1 tsp lemon juice
  • 2 Tbps margarine
Topping
  • 3/4 cup flour
  • 1/4 cup sugar
  • 1/4 cup brown sugar
  • 1/3 cup margarine room temperature
Servings: Pie
Instructions
Crust
  1. Blend flour and salt in large bowl. Cut shortening into flour mixture using pastry blender or fork. Stir in just enough water with fork until dough holds together.
  2. TIP Test dough for proper moistness by squeezing a marble-sized ball of dough in your hand. If it holds together firmly, do not add any additional water. If the dough crumbles, add more water by the tablespoonful, until dough is moist enough to form a smooth ball when pressed together.
  3. Shape dough into a ball. Flatten ball into a 1/2 inch round disk.
  4. Chill for 30 minutes or up to two days.
  5. Roll dough from center outward into a circle 2-inches wider than pie plate on lightly floured surface. Transfer dough to pie plate.
Filling and Topping
  1. Mix the cherry pie filling, cranberry sauce, sugar, and lemon juice.
  2. Pour the filling mixture into the crust.
  3. Dot with margarine
  4. Mix the flour, sugar, brown sugar, and margarine for the topping with a blender.
  5. Sprinkle the topping on top of the pie.
  6. Bake at 350 for 25-30 minutes
Share this Recipe
Powered byWP Ultimate Recipe
  • « Previous Page
  • 1
  • 2
  • 3

Hey There!

We're Aaron and Shannon, the cooks behind Marguerite’s Cookbook. We are a husband and wife cooking/blogging team who love food, fun, and family.

Give us a follow

Twitter

Sign up for our monthly newsletter and receive exclusive content from us in your inbox once a month.

  • Policies
  • Contact

© 2026 · Fun Genesis WordPress Theme by, Pretty Darn Cute Design