Marguerites Cookbook

A cooking blog all about making vintage recipes from a cookbook we inherited from our grandmother

  • Home
  • Recipes
    • Main Dishes
    • Appetizers and Sides
    • Desserts
    • Breakfast
  • About
  • Contact

July 9, 2016 by: Shannon and Aaron

Crab Meat Ramekins

crabmeatramekins

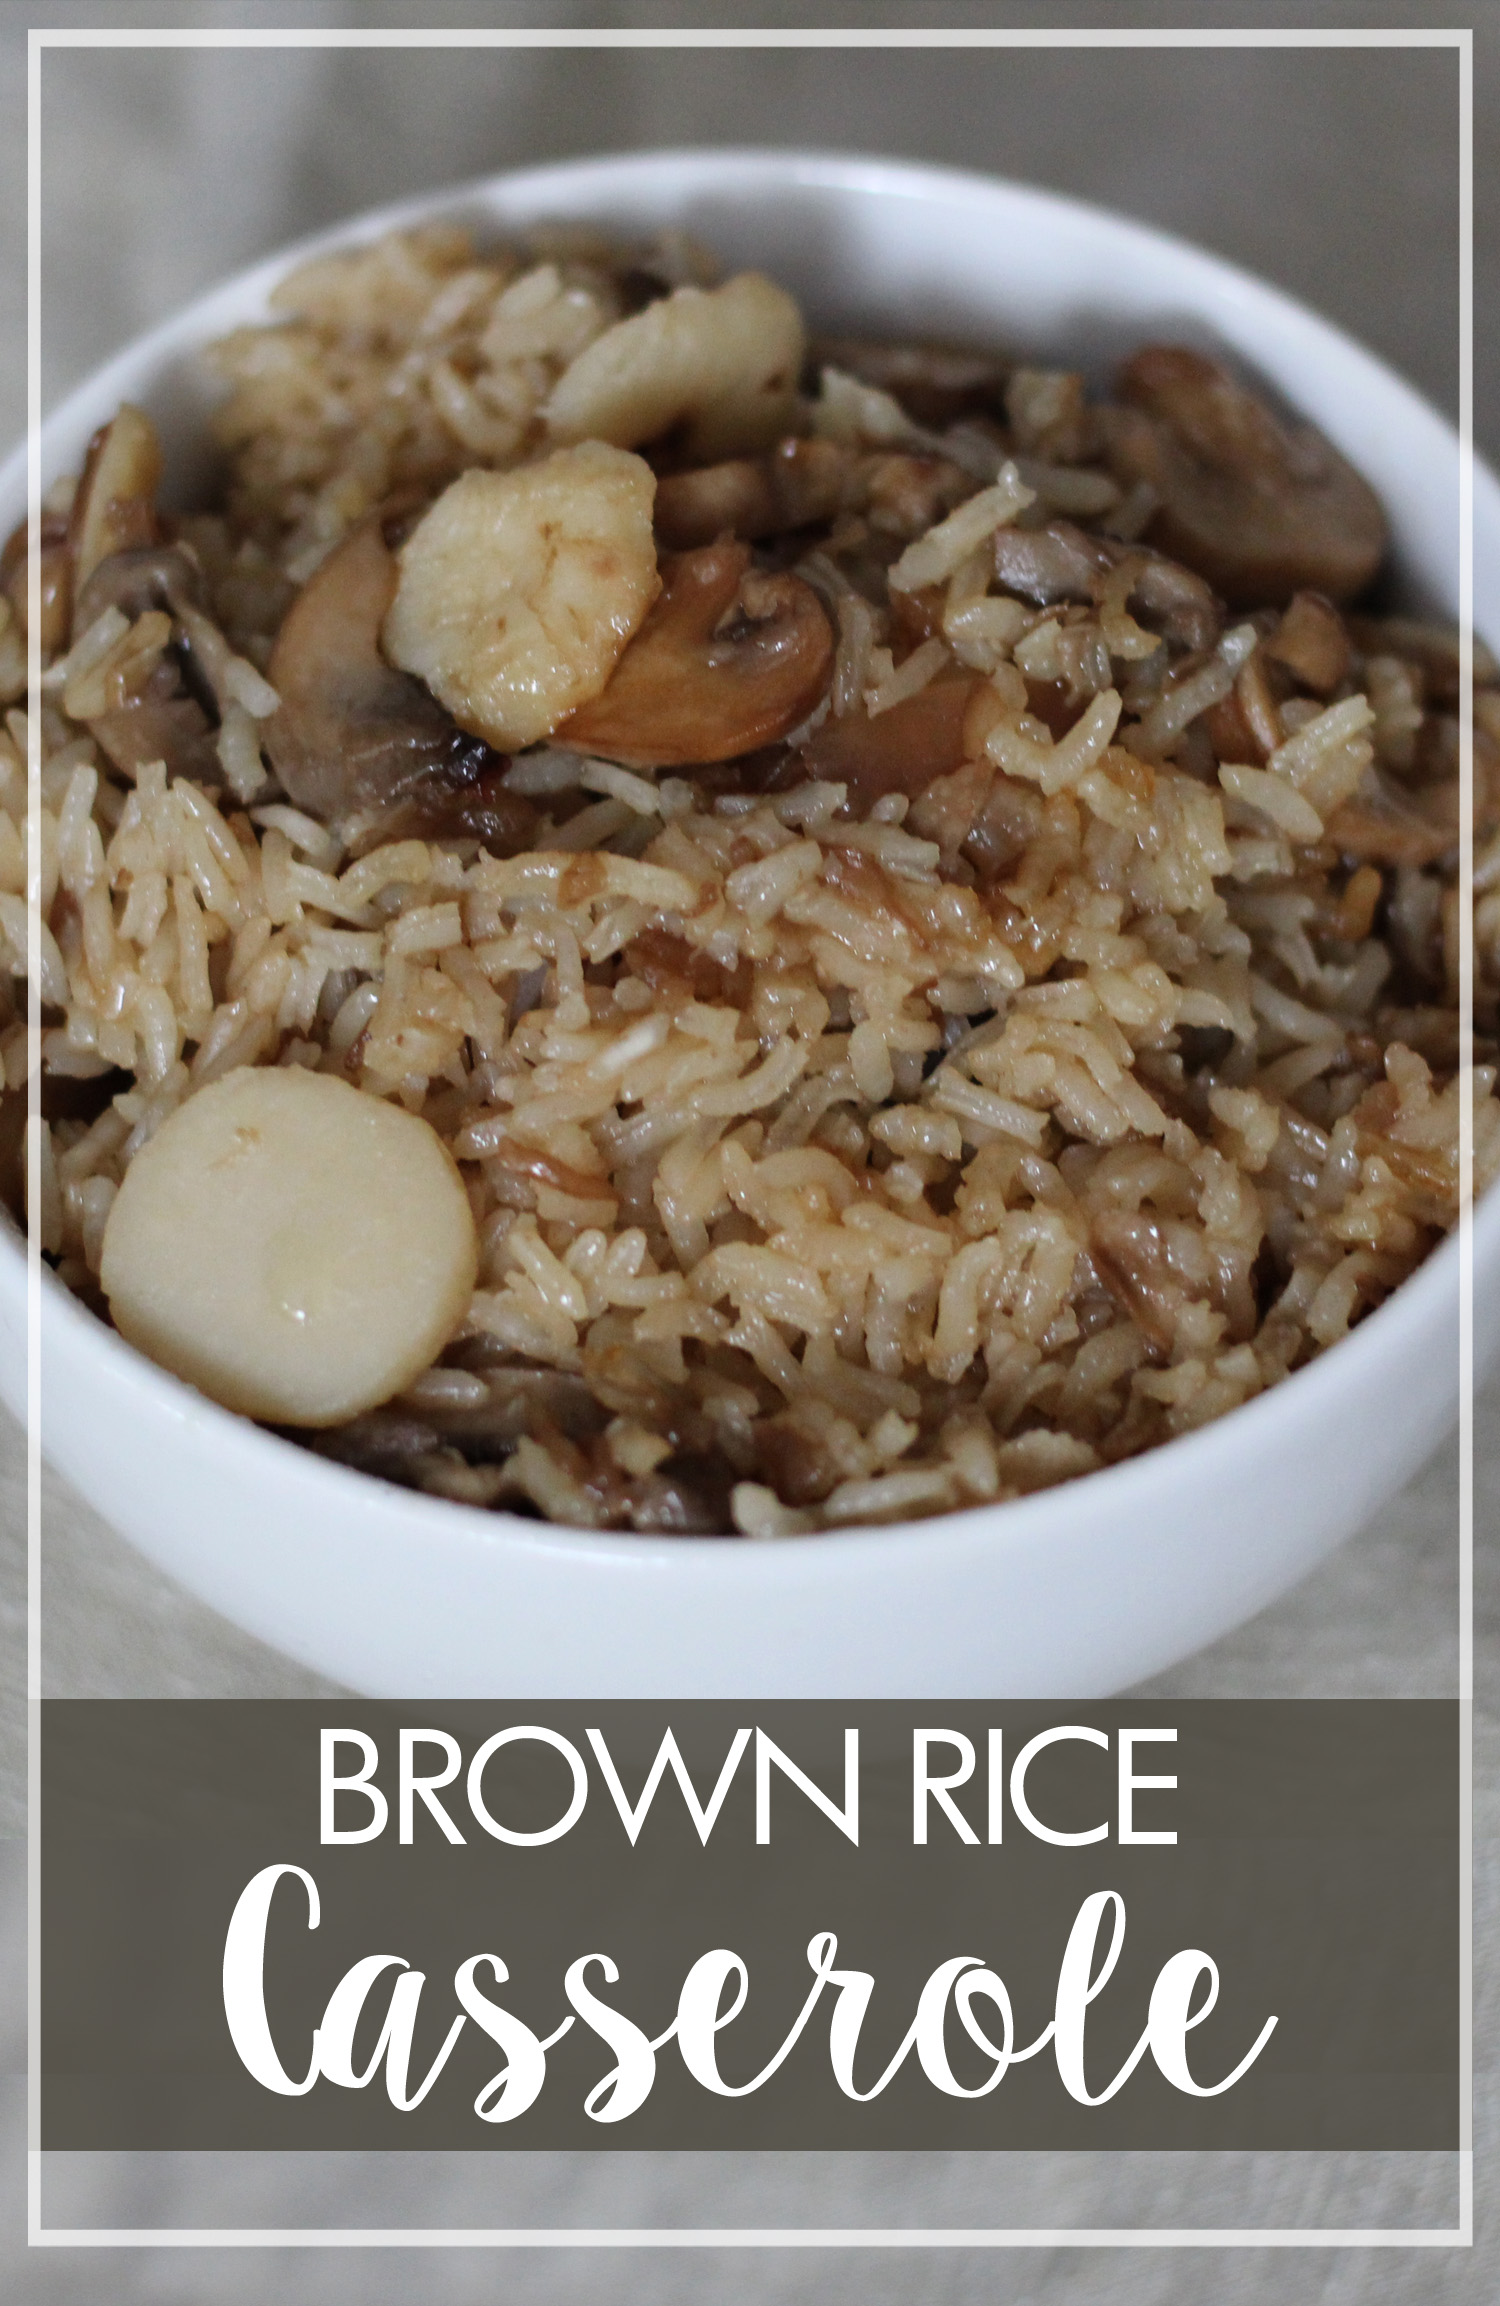
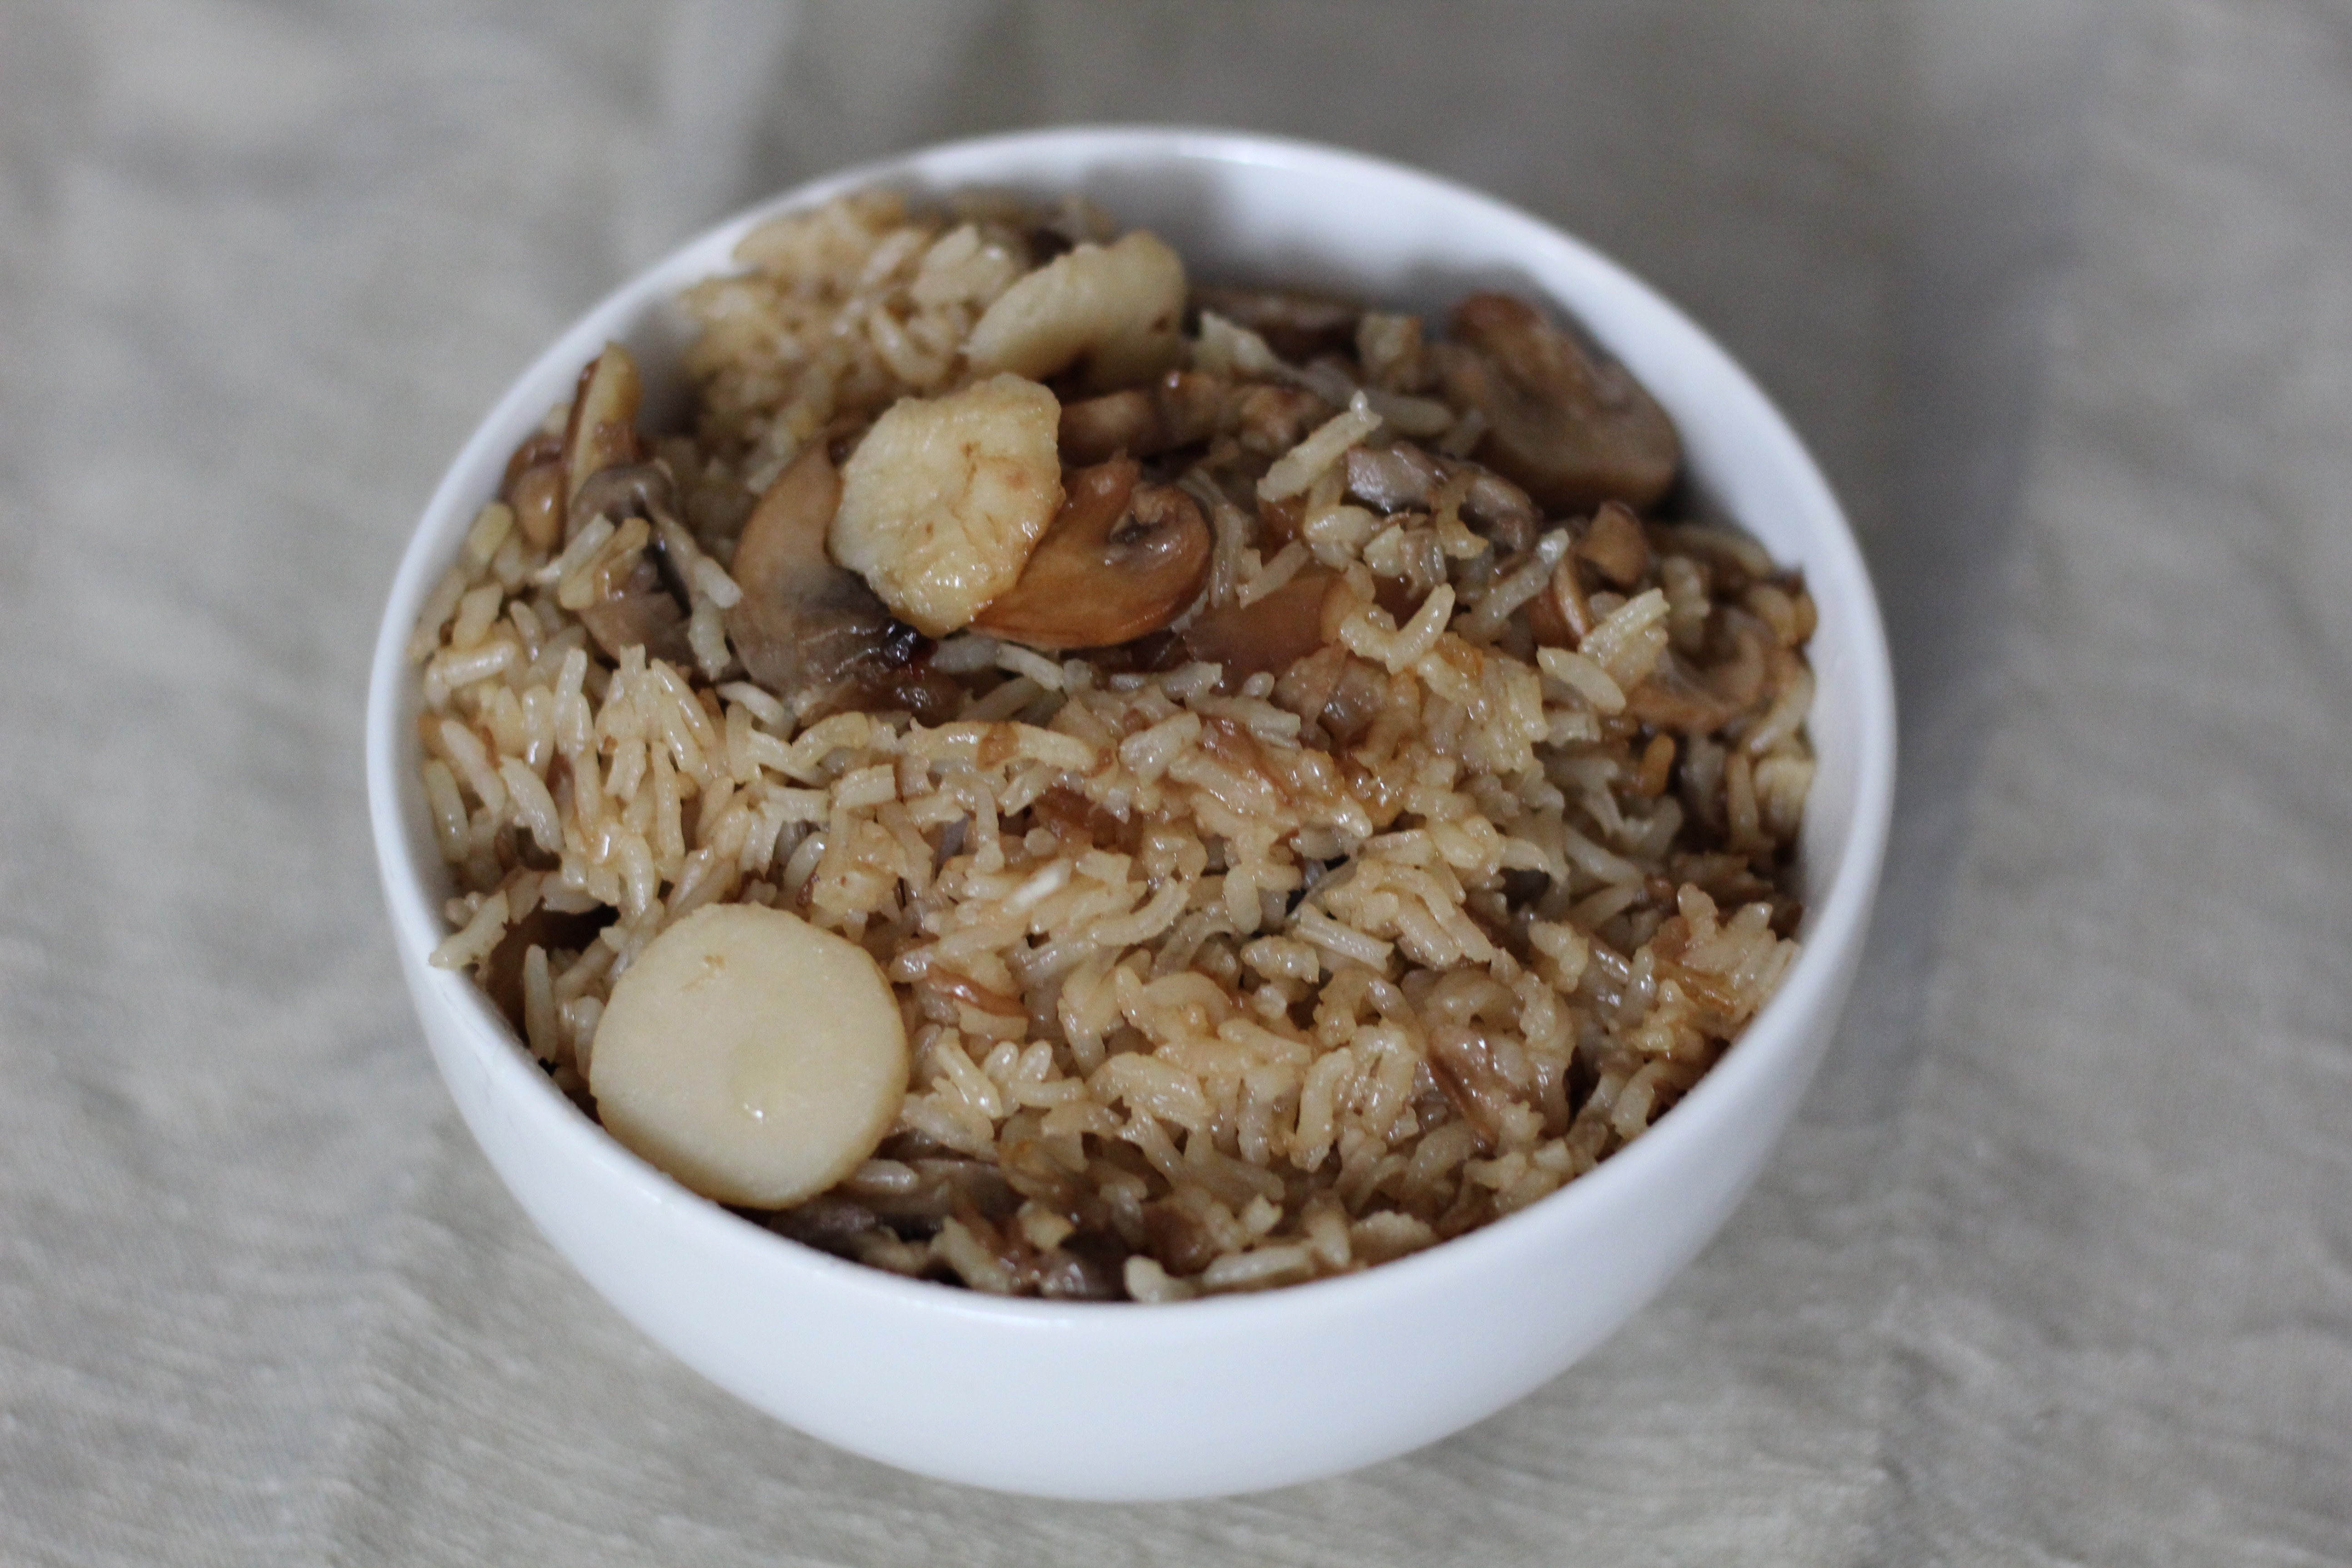
When we chose this recipe, we thought it would be fun to try something pretty different than the rest of the cookbook. When we actually made it, we found out something even cooler. This was one of Aaron’s mom’s favorite recipes. Marguerite made it a lot for her because she liked it. It was also another semi-diet recipe Marguerite had in her cookbook.

crabmeatramekins

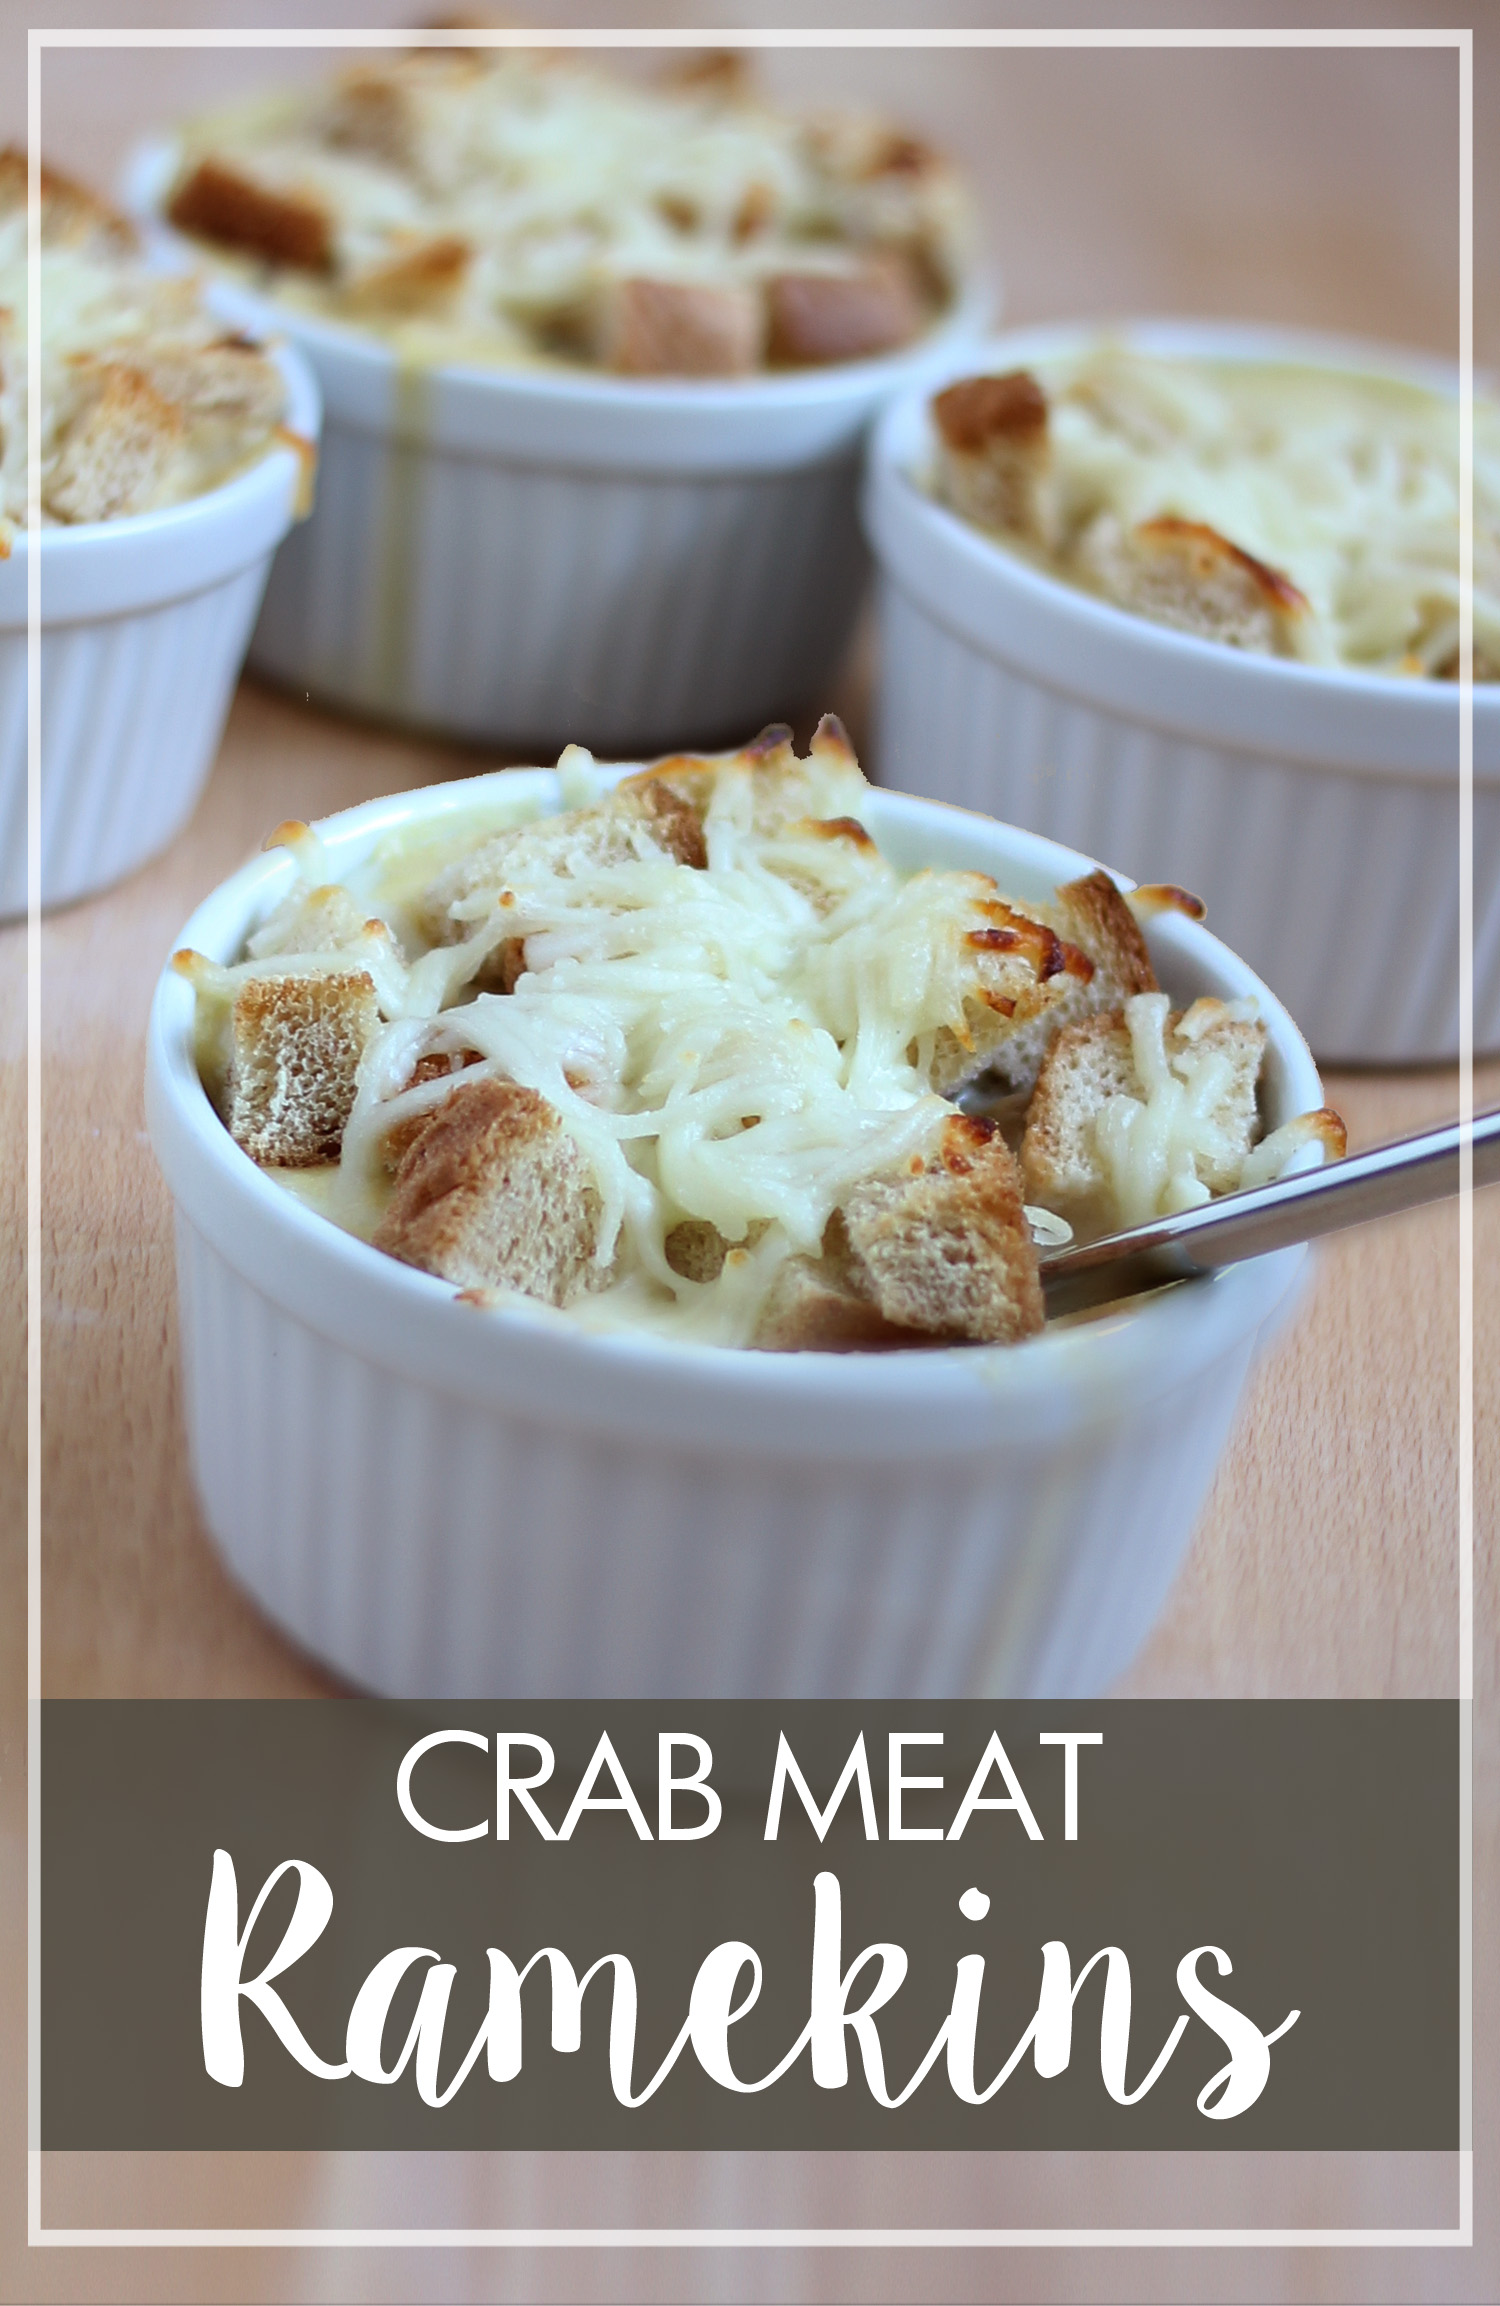
When we chose it, neither of us knew what a ramekin was. We picked up a few from Sur la Table to make this recipe. I love the simplicity of the white ramekins. They are going to make great cookware for other recipes in the future I’m sure! But for now, back to the crab meat ramekins.

Here is what Marguerite had to say:

crabmeatramekinsrecipe

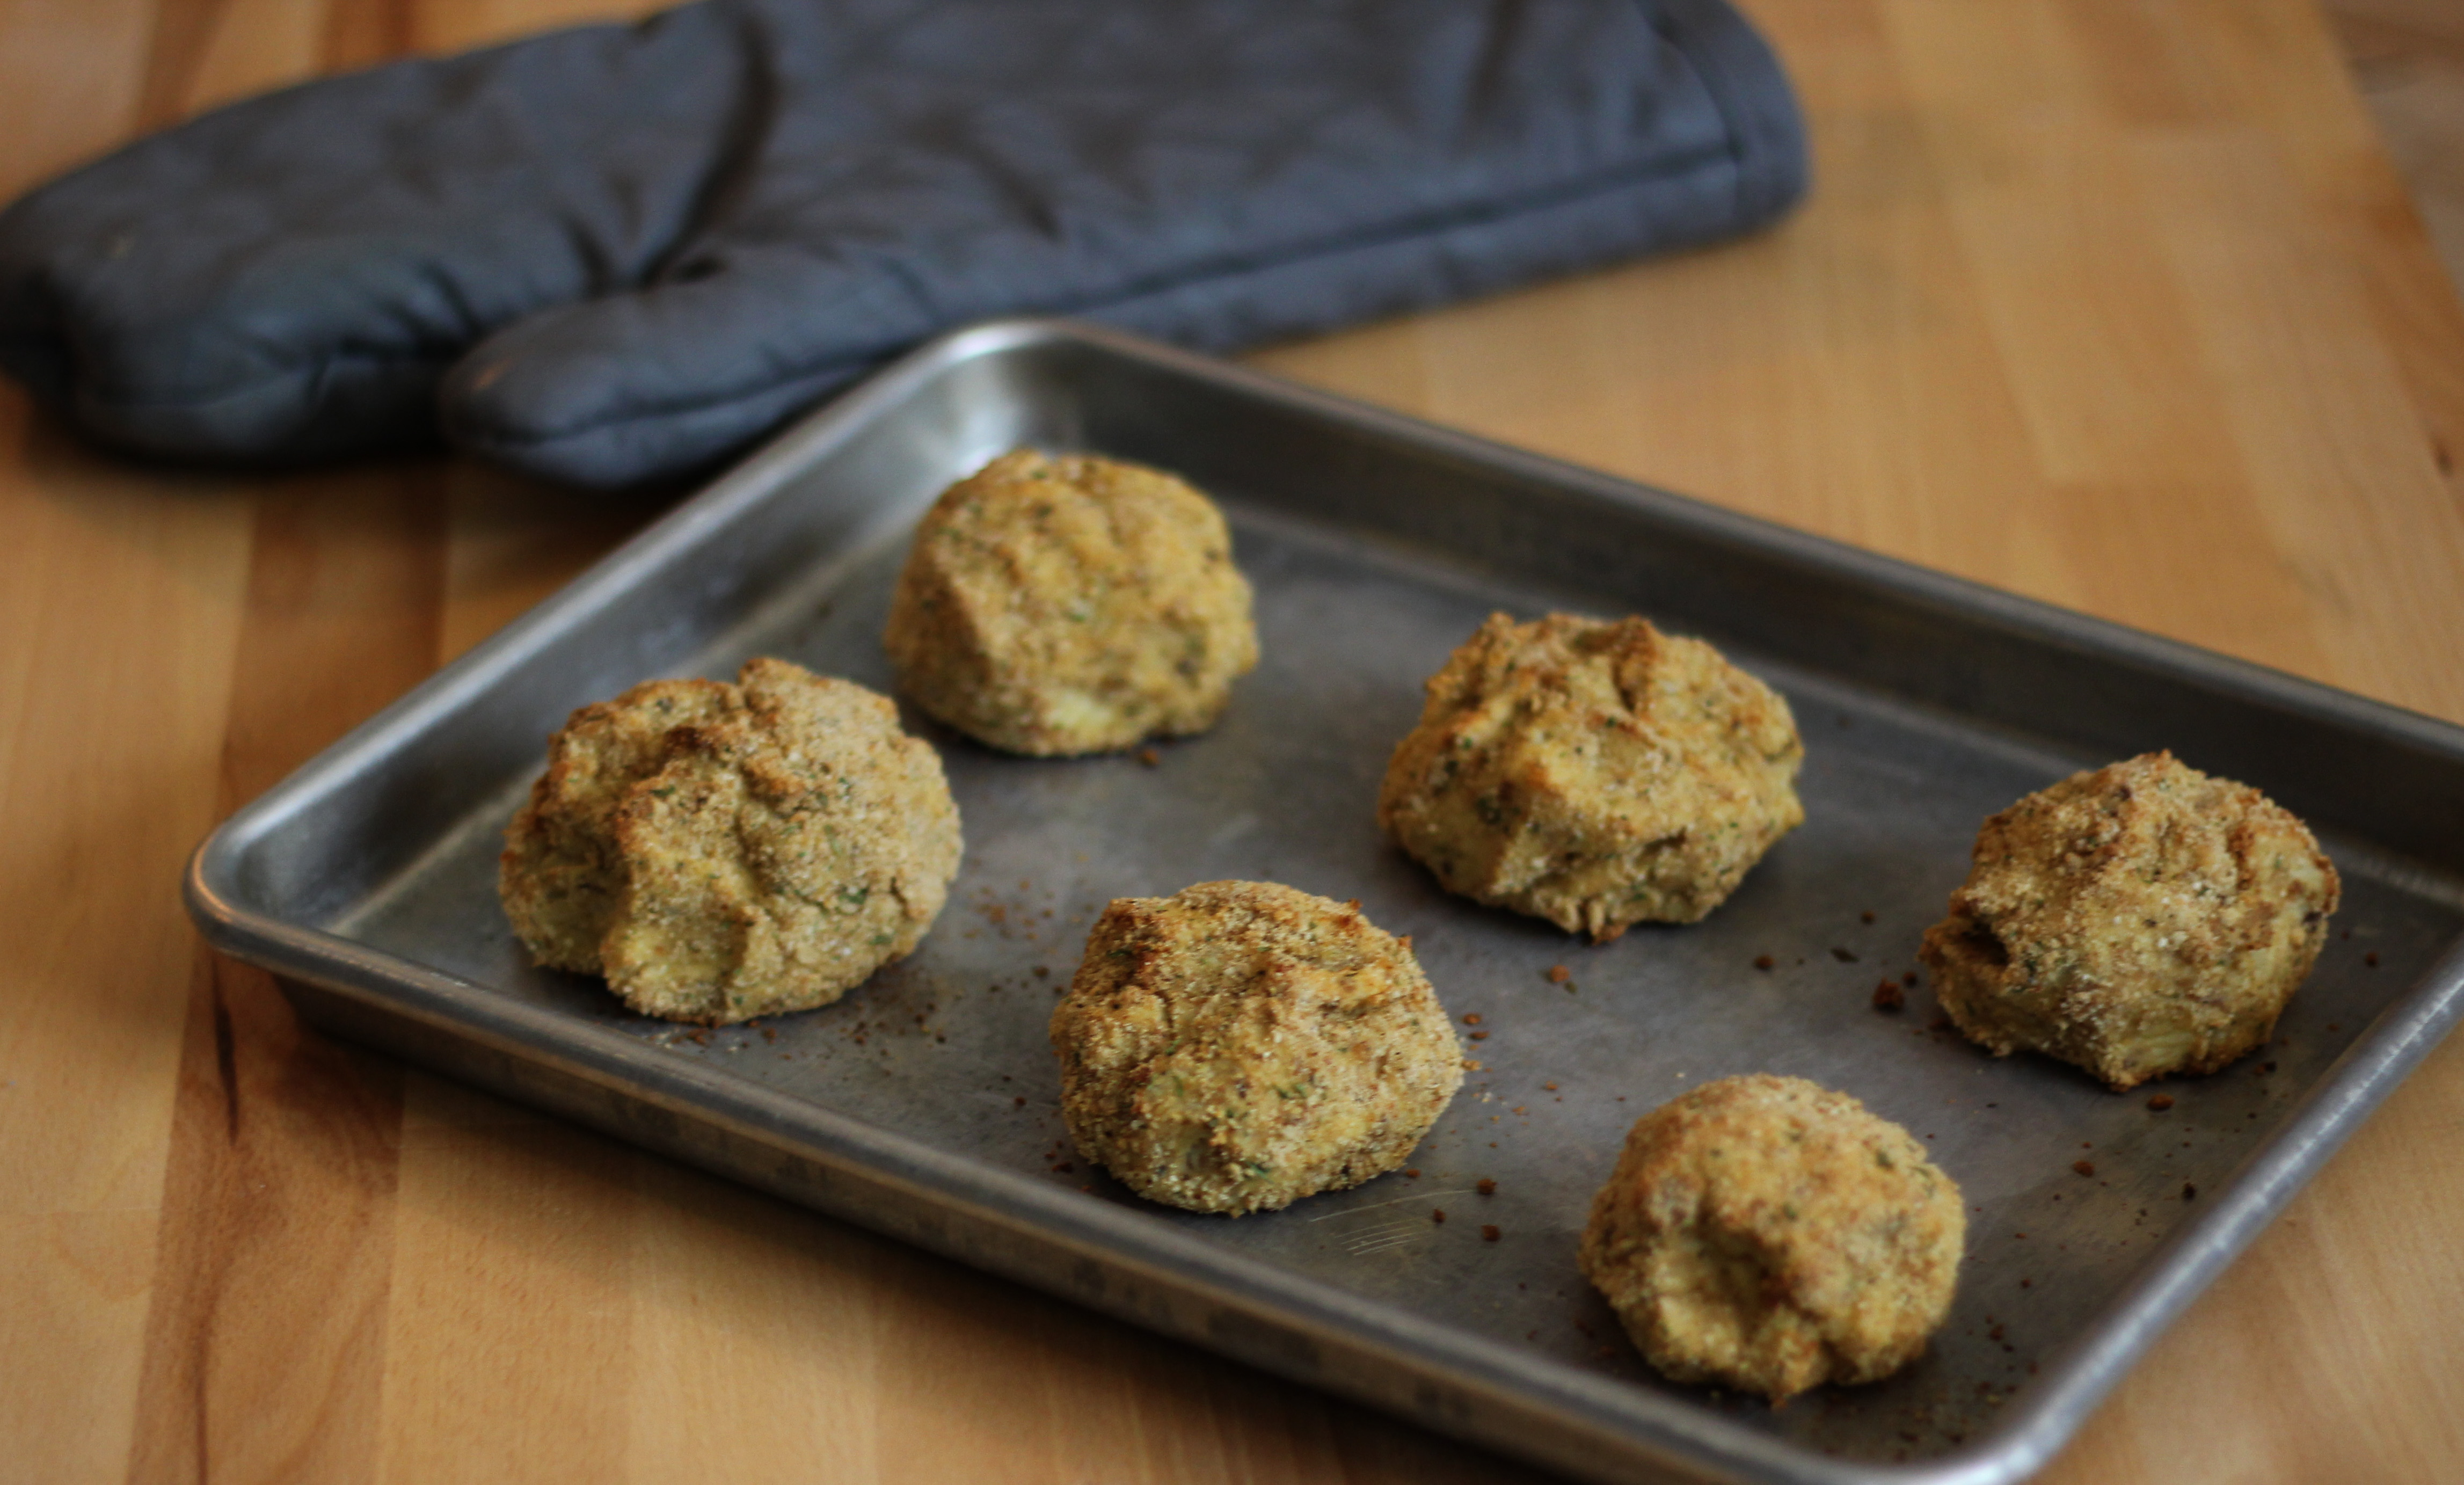
As you can see, there were NO instructions with this “recipe!” Upon consulting some other sources we figured out how we wanted to prepare the crab meat ramekins. We started by putting the ingredients in a saucepan to heat everything up. When doing that, Aaron thought that one 6 oz can of crab meat might not be enough. It turned out that the single can of crab meat was plenty.crabmeatramekins


We did have to change the amounts some in the recipe, specifically the bread and cheese for the top. In discussing the recipe with Aaron’s mom, she told him that she remembered the little brown ramekins that Marguerite used to make them in. She also commented that the tops of those were tapered and smaller than the rest of the ramekin. That made needing more bread and cheese to cover our ramekins make total sense!

crabmeatramekins

I prefer lobster, especially since I spent a summer in Maine, but thought these crab meat ramekins were delicious! (It may have been the cheese and bread.) All jokes aside, I did really enjoy this recipe, and so did Aaron. He did think that if we tried it again he may want to use lump crab instead. If you’re somewhere you can use fresh crab this summer, we hope you give that a try!

Crab Meat Ramekins
Print Recipe
  • CourseAppetizers and Sides
Servings Prep Time
4 ramekins 15 minutes
Cook Time
8-10 minutes
Servings Prep Time
4 ramekins 15 minutes
Cook Time
8-10 minutes
Crab Meat Ramekins
Print Recipe
  • CourseAppetizers and Sides
Servings Prep Time
4 ramekins 15 minutes
Cook Time
8-10 minutes
Servings Prep Time
4 ramekins 15 minutes
Cook Time
8-10 minutes
Ingredients
  • 1 can crab meat
  • 1 can cream of celery soup
  • 1 can mushrooms
  • 1/3 cup skim milk
  • lemon juice
  • 2 slices bread cubed
  • 1/2 cup shredded cheese
Servings: ramekins
Instructions
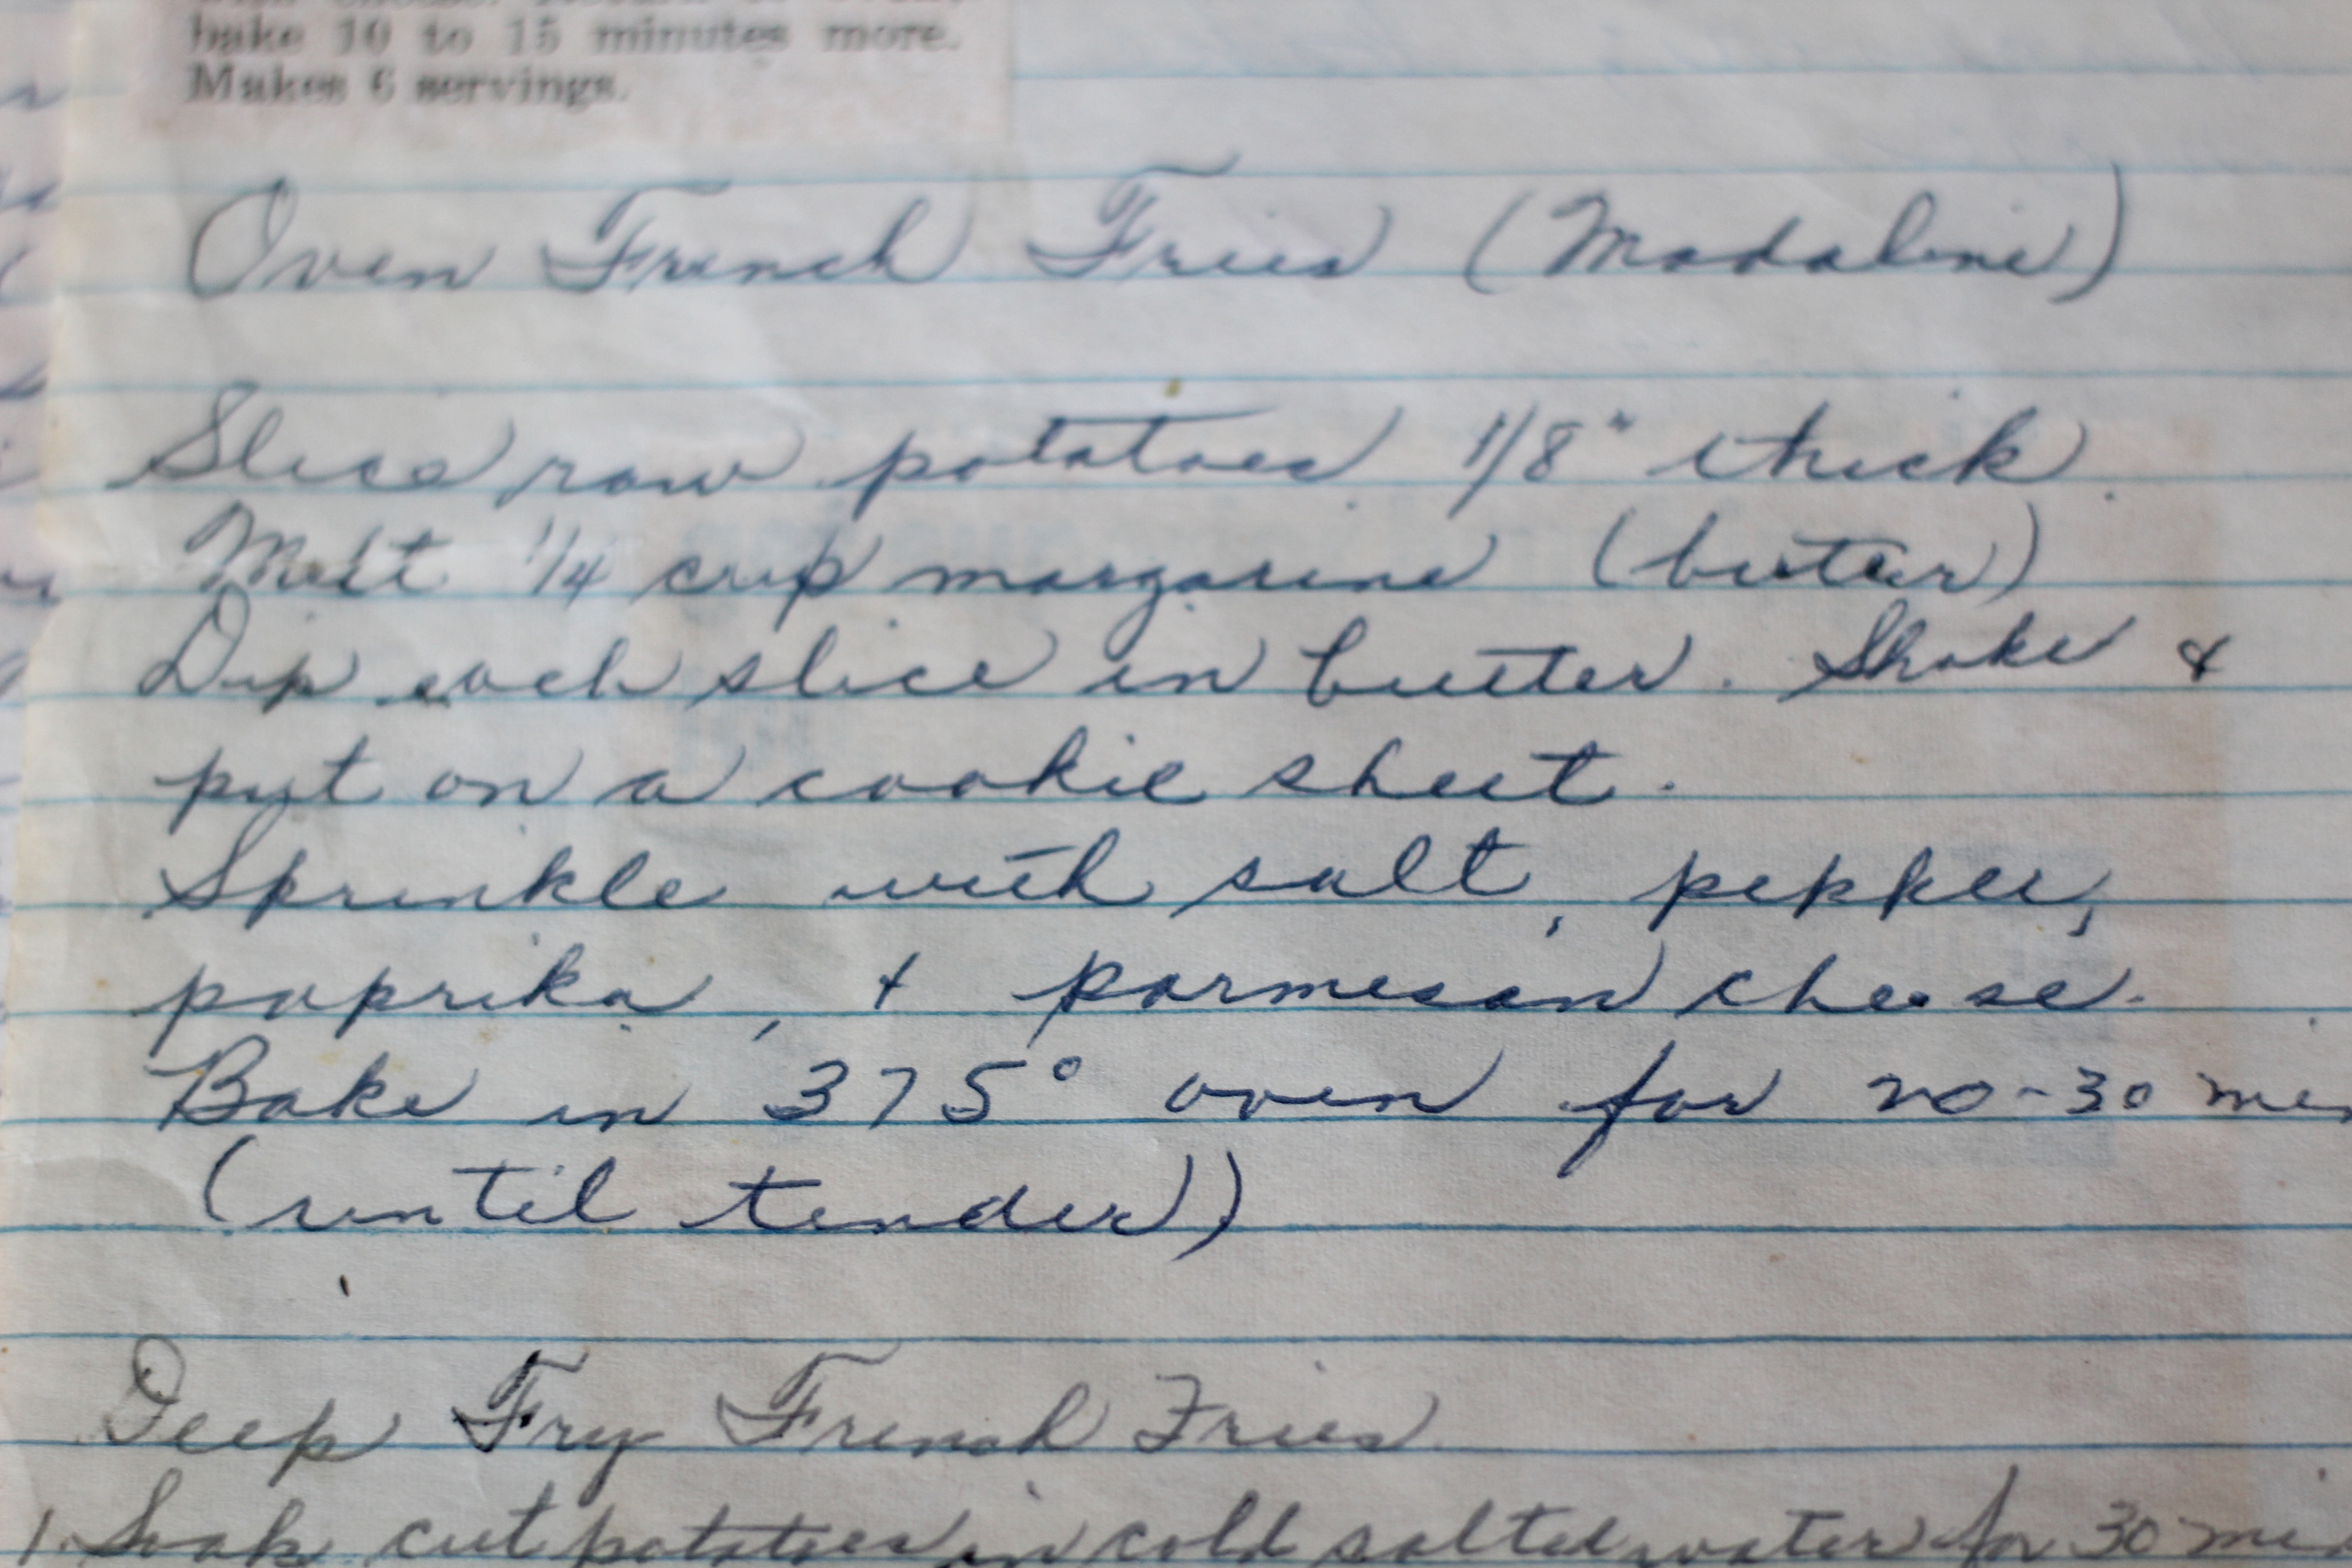
  1. Preheat oven to 375.
  2. Put the cream of celery soup and mushrooms in a medium saucepan over medium low heat.
  3. After a few minutes, whisk in the skim milk.
  4. Add the crab meat and lemon juice and mix ingredients together.
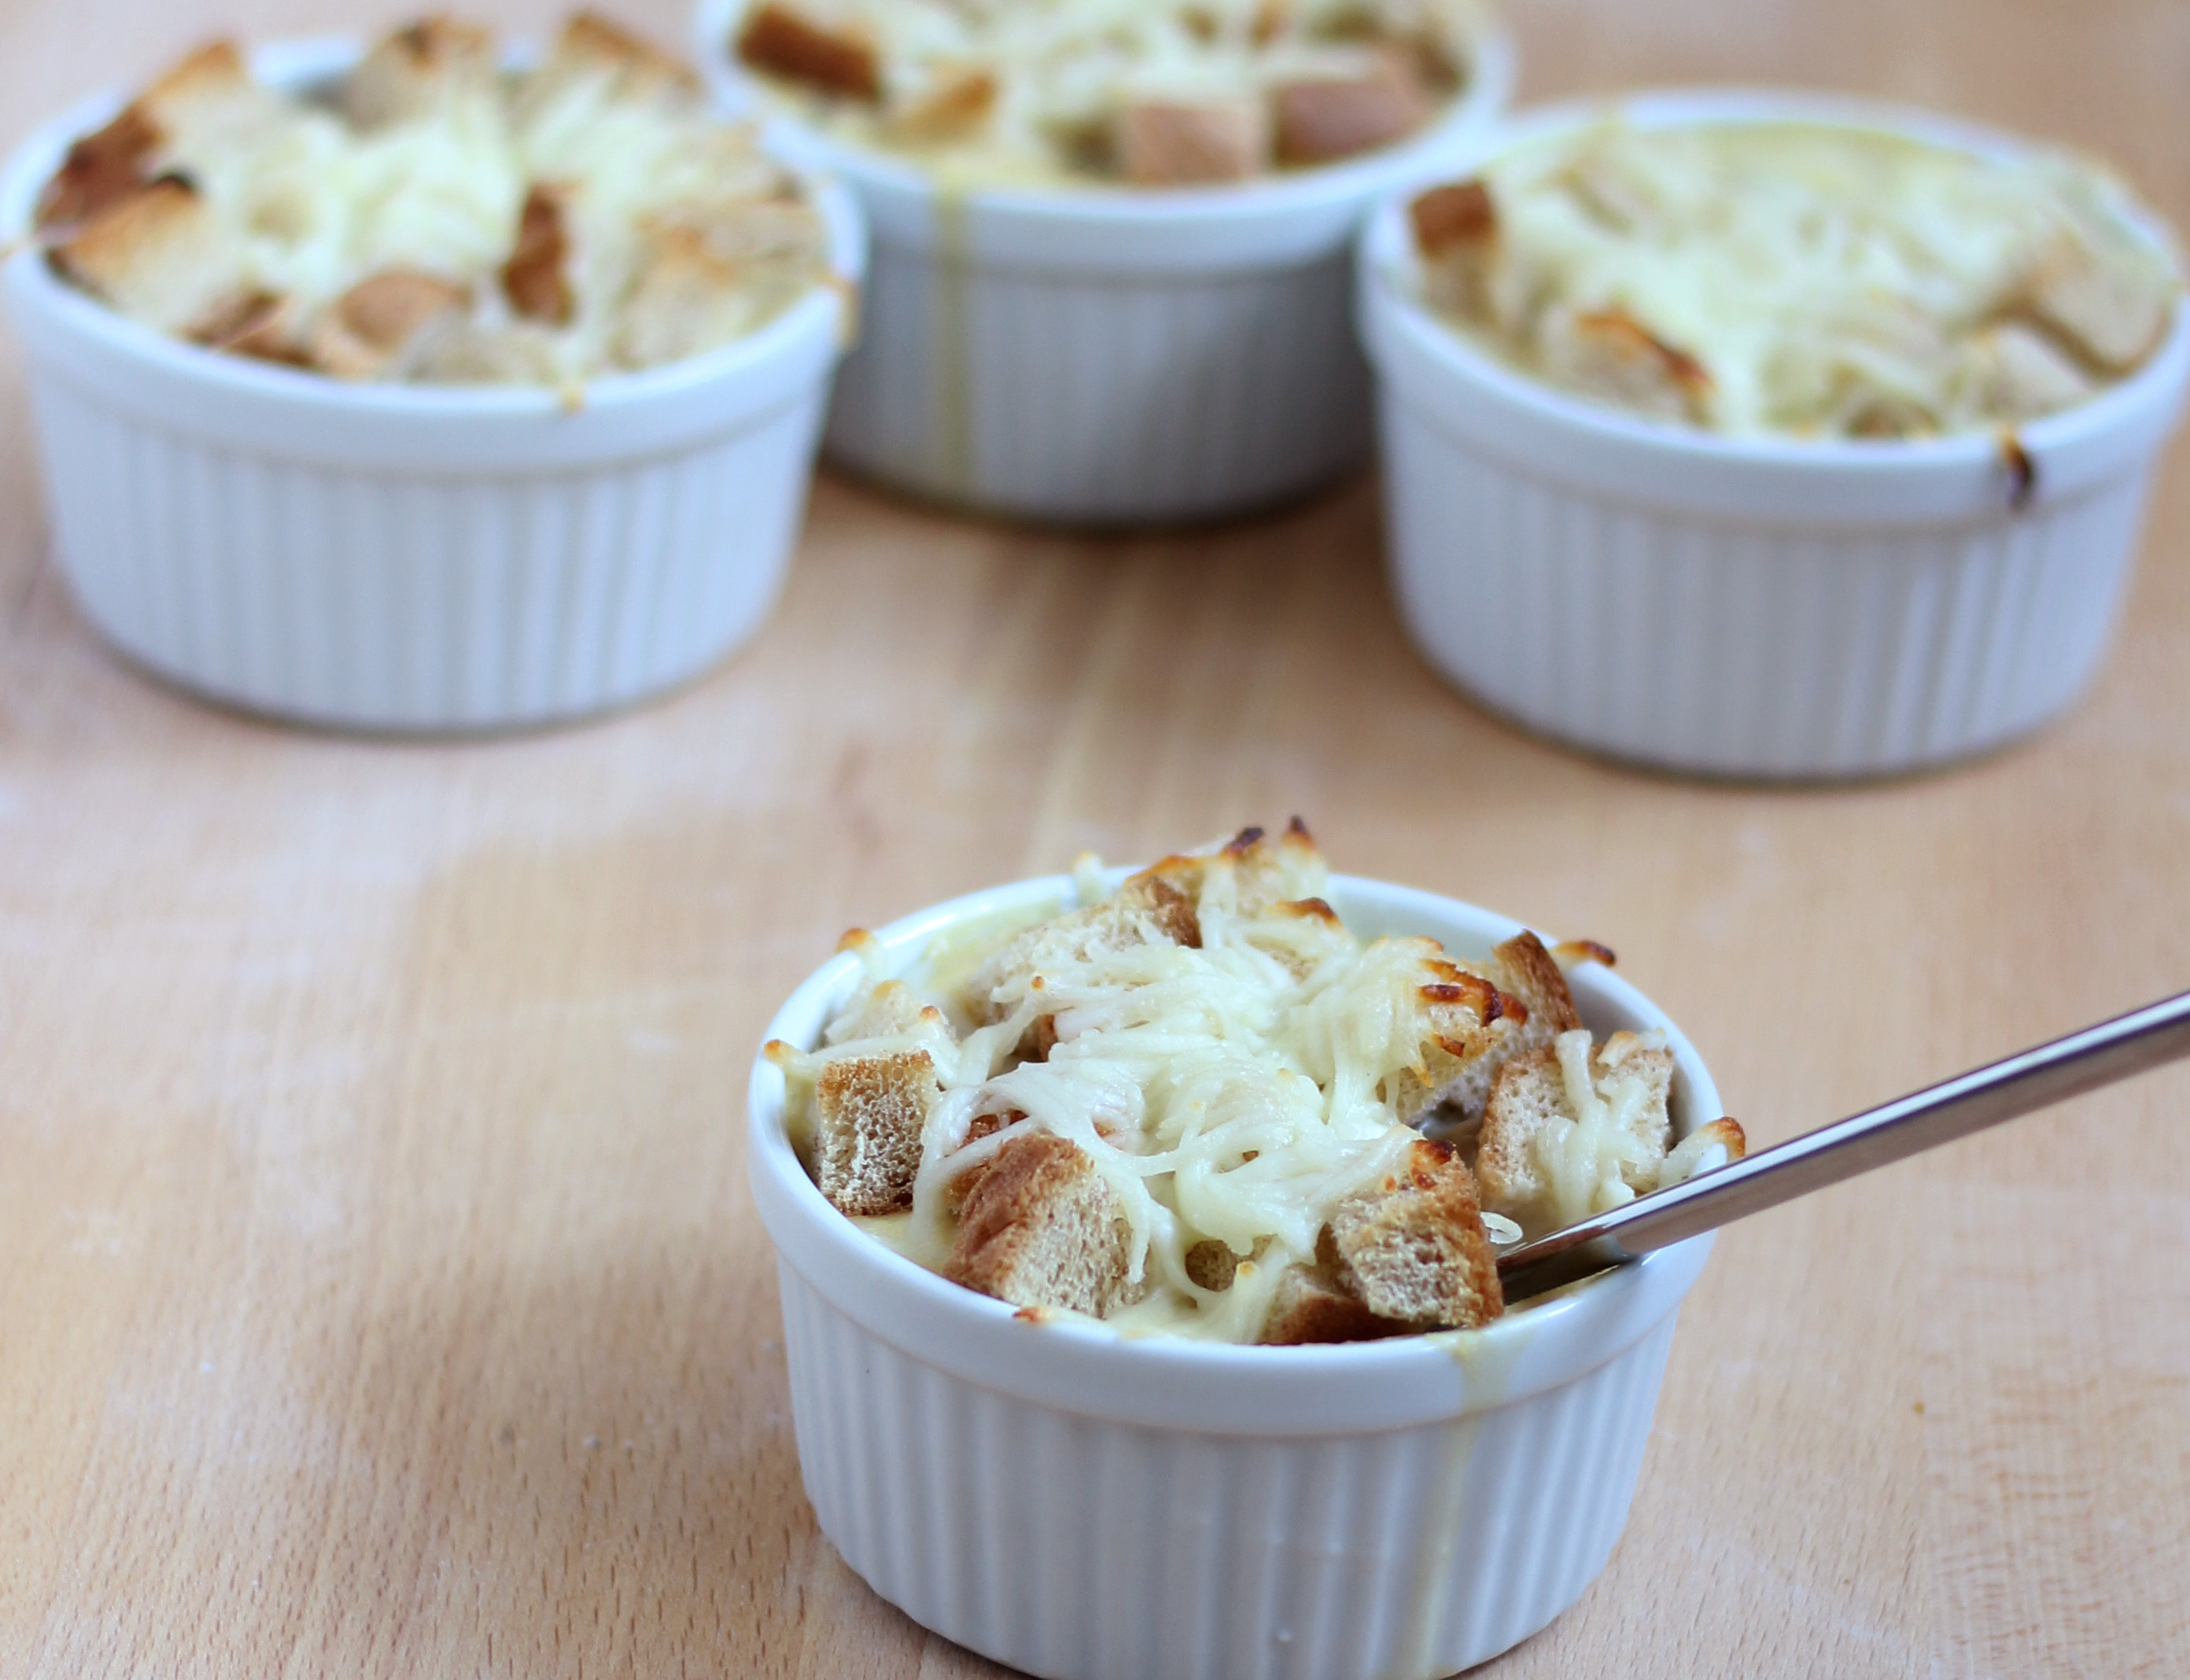
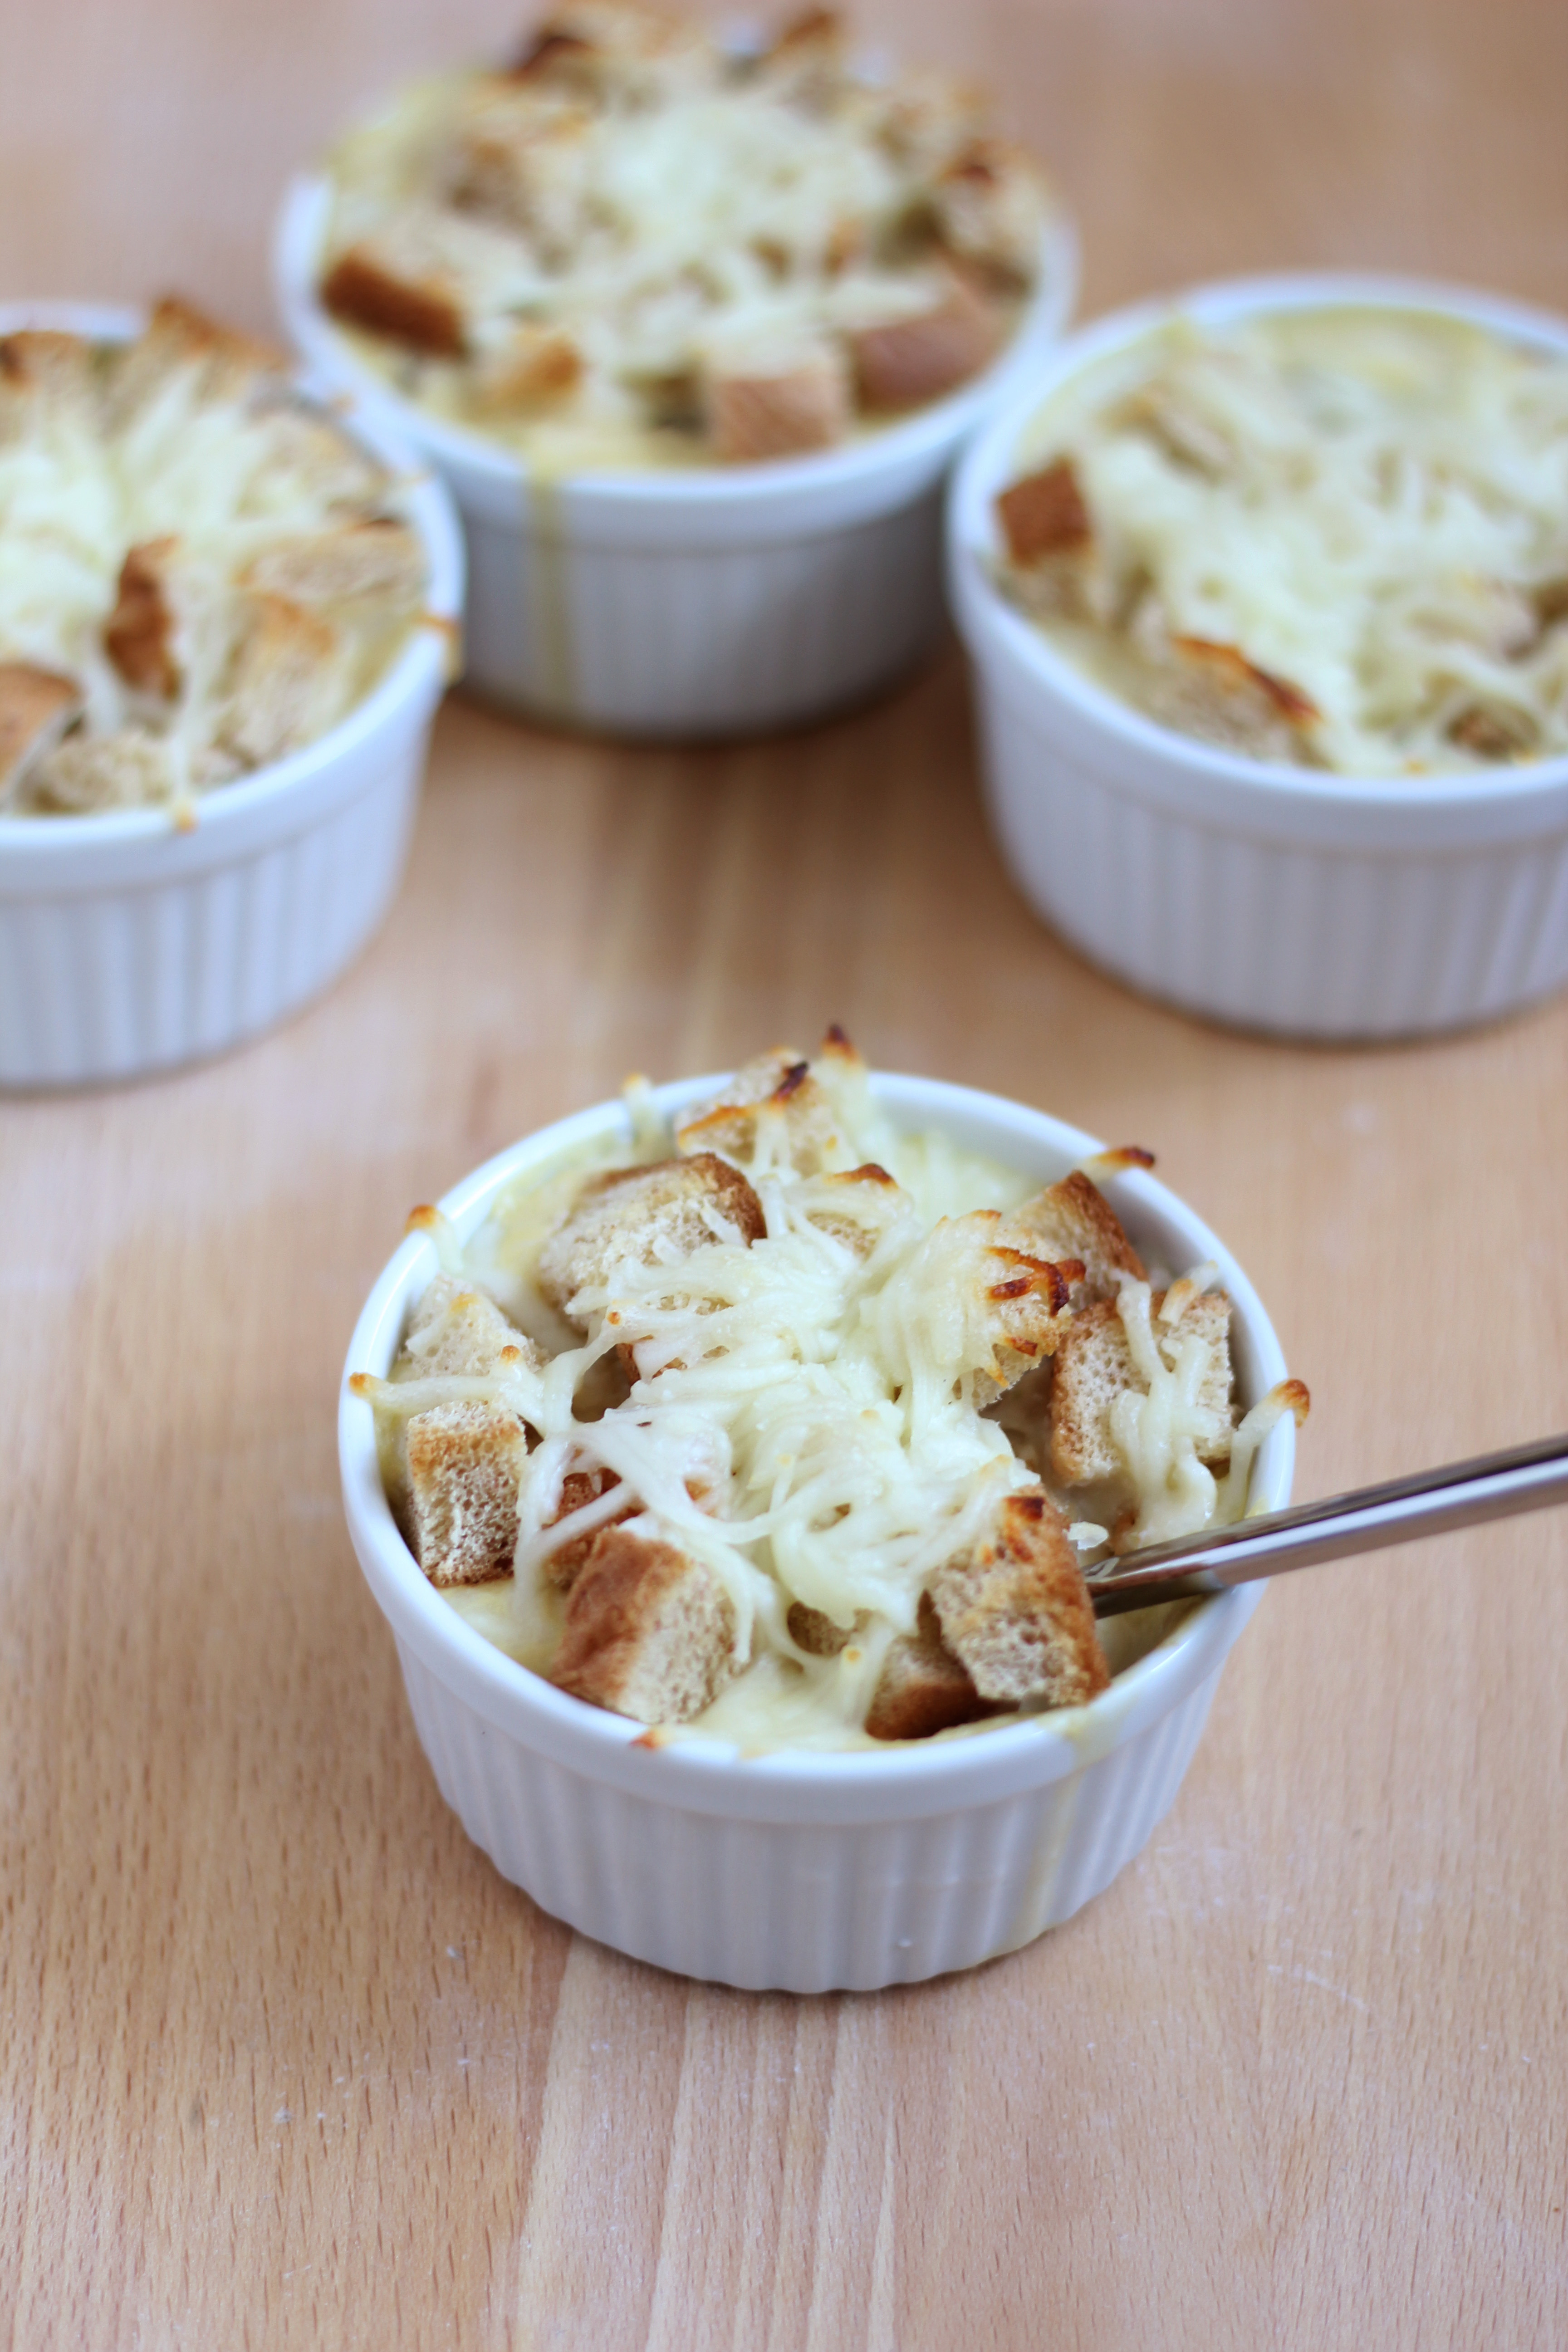
  5. Pour mixture into 7 oz. ramekins.
  6. Top with cubed bread and cheese.
  7. Place in oven for 8-10 minutes or until bread has browned and cheese has melted.
Share this Recipe
 
Powered byWP Ultimate Recipe

May 28, 2016 by: Shannon and Aaron

Brown Rice Casserole

BrownRiceHeader

It’s time for another installment in “Marguerite’s Casseroles!” But seriously, this cookbook is chock full of them. This, recipe, which we are calling brown rice casserole, is another one. I was hoping this was going to turn out more like fried rice, but that was not the case.

Here’s what Marguerite had to say (including her recipe title):

Brown Rice Casserole Recipe

Preparation for this dish was really simple. We bought a can of water chestnuts that was already sliced to save time. This was a very simple recipe, with only a few ingredients. As Aaron and I were making this recipe, I started realizing it was probably not something I was going to enjoy.

Brown Rice Casserole

I do like water chestnuts, and rice, but honestly that’s where my enjoyment of this dish ended. They can’t all be winners, huh? We did run in to one issue when gathering the ingredients for this recipe. Due to shopping at a small grocery store, and due to lack of planning, we could only find french onion soup, and not plain onion soup. Aaron decided that if anything, it would improve the recipe.

Brown Rice Casserole

While the brown rice casserole was not the most delicious recipe in our opinion, it did at least turn out well. Aaron didn’t love this recipe either. He liked the mushrooms in the brown rice casserole more than the water chestnuts. We make a great pair! If you want to try a simple rice with some interesting flavor, give this brown rice casserole a try. We’re still not sure why she called it an “Oriental Rice.”

Brown Rice Casserole

Brown Rice Casserole
Print Recipe
  • CourseAppetizers and Sides
Servings
4-6
Cook Time
1 hour 10 minutes
Servings
4-6
Cook Time
1 hour 10 minutes
Brown Rice Casserole
Print Recipe
  • CourseAppetizers and Sides
Servings
4-6
Cook Time
1 hour 10 minutes
Servings
4-6
Cook Time
1 hour 10 minutes
Ingredients
  • 1 stick butter
  • 1 cup rice uncooked
  • 1 can water chestnuts sliced thin
  • 1 4 oz can button mushrooms
  • 1 can onion soup
  • 3/4 cup water chestnut and mushroom liquid
Servings:
Instructions
  1. Melt butter. Add rice, chestnuts, and mushrooms. Cook 10 minutes.
  2. Add soup and liquid.
  3. Pour in casserole dish. Cover and bake for one hour at 300 degrees.
Share this Recipe
 
Powered byWP Ultimate Recipe

May 14, 2016 by: Shannon and Aaron

Homemade Meatballs

Homemade Meatballs

As you may recall, my Italian heritage requires me to love all things pasta related, that includes spaghetti and meatballs. These homemade meatballs were very easy and I liked how plain they were (a real “shock” to those of you that know me personally.) But honestly, the nice plain flavor is not too overpowering, making these a great candidate for being added to any pasta dish, sauce, and the like.

Homemade Meatballs

Here is what Marguerite had to say:

Homemade Meatballs Recipe

You may have noticed, Marguerite’s original recipe called for a quarter pound of veal. We decided we did not want to go through the hassle of finding or paying for veal. As you may recall, we had issues with this earlier. Also, while some may think veal has a discernibly better flavor, both Aaron and I felt it was not necessary to include in this recipe. Veal-Schmeal! We just edited the amounts of each remaining meat to keep a decent ratio of beef to pork, as well as making sure to keep the total amount of ground meat to one pound. Make sense? If not just read the recipe below.

Homemade Meatballs

Marguerite’s recipe says that this amount of ingredients will make 16 meatballs. Our cooking of this recipe did not yield that many, however, we made some of ours way too large! Most of the ones in these photographs are an average size, but we (Aaron) did make a few monster meatballs that ended up larger than desired.

Homemade Meatballs

As mentioned above, they were a little plain. Not something I would serve on their own as an appetizer, but something to add to some pasta and sauce. Perhaps with her meatless spaghetti sauce, which we previously made? We will have to try them together sometime and get back to you.

The meatballs also reminded me of my mother’s meatloaf, and some insight into this recipe from Aaron’s mom proved that to be a valid thought. She told us that her dad, and Marguerite’s husband, Jim, liked meatloaf. The ingredients in this recipe were incredibly similar to the meatloaf that Marguerite would make for Jim, particularly the three different kinds of meat.

Homemade Meatballs

Aaron liked making these meatballs because they reminded him of making homemade meatballs with his mom. She had a different meatball recipe of her own, and if you want to hear about that recipe in the future, you should subscribe to our monthly newsletter! In contrast to these homemade meatballs, it’s very much an “eat on their own as an appetizer” recipe. Aaron thought these meatballs were yummy, but he is getting increasingly tired of all the finely chopped onion in these recipes, particularly because the Marguerite he remembered couldn’t stomach onions anymore and didn’t but them in anything she was planning on eating! I also make him do all the onion chopping…


Homemade Meatballs
Print Recipe
  • CourseAppetizers and Sides
Servings Prep Time
16 Meatballs 30 minutes
Cook Time
25 minutes
Servings Prep Time
16 Meatballs 30 minutes
Cook Time
25 minutes
Homemade Meatballs
Print Recipe
  • CourseAppetizers and Sides
Servings Prep Time
16 Meatballs 30 minutes
Cook Time
25 minutes
Servings Prep Time
16 Meatballs 30 minutes
Cook Time
25 minutes
Ingredients
  • 5/8 lbs ground beef
  • 3/8 lbs ground pork
  • 1 cup bread crumbs
  • 1 egg
  • 1 tbsp dried parsley
  • 1 medium onion chopped fine
  • 1/4 cup Parmesan cheese
  • salt and pepper to taste
Servings: Meatballs
Instructions
  1. Combine all ingredients and mix thoroughly. Form into balls.
  2. TIP: If meatballs tend to stick to hands as they are formed, add more breadcrumbs.
  3. Place in a shallow baking dish. Bake for 20-25 minutes at 350 degrees.
Share this Recipe
 
Powered byWP Ultimate Recipe

May 7, 2016 by: Shannon and Aaron

Oven French Fries

Oven French Fries Header

I don’t know about you, but one side dish Aaron and I could eat always and forever are french fries. From fast food to handmade, french fries are a delicious way to prepare potatoes. In case you haven’t noticed a trend on this blog, we’re potato obsessed. These oven french fries combined flavors we never would have paired together and resulted in my favorite recipe so far (I’m pretty sure Aaron’s too.) They would also go great with the Pittsburgh Ham Barbecue Sandwiches that we made last week!


It’s also another “guest” post. Marguerite noted below that she got this recipe from Madaline, who was a long time friend of her’s. Here’s what she had to say:

Oven French Fries Recipe

One thing we have found in cooking through Marguerite’s cookbook, is that both Aaron and I like paprika much more than either of us realized. It has been one of the main spices we’ve used in quite a number of dishes, and it is something we both really enjoy. Now salt is really what makes any french fries, good, am I right? But the addition of the paprika and the parmesan cheese really create a much more exciting set of flavors for these oven french fries. Also, butter. ‘Nough said.

Oven French Fries

The thing Aaron enjoyed about making these fries is that it didn’t require any special equipment, or having cooking grease to fry them in. And, to be honest, I think he really liked the idea of being able to make the fries any shape and size he wanted.

Oven French Fries

In the end, both that unique, “homemade” fry look, and the delicious flavors I mentioned before, made these oven french fries a huge success with both of us. We have already made them several times, and plan on making them any time we need to finish off a bag of potatoes! Not so good for our waistlines, but who cares?

Oven French Fries Recipe

Oven French Fries
Print Recipe
  • CourseAppetizers and Sides
Servings Prep Time
2 15 minutes
Cook Time
25 minutes
Servings Prep Time
2 15 minutes
Cook Time
25 minutes
Oven French Fries
Print Recipe
  • CourseAppetizers and Sides
Servings Prep Time
2 15 minutes
Cook Time
25 minutes
Servings Prep Time
2 15 minutes
Cook Time
25 minutes
Ingredients
  • 4 Potatoes
  • butter
  • salt
  • pepper
  • paprika
  • Parmesan cheese
Servings:
Instructions
  1. Slice raw potatoes 1/8" thick.
  2. Melt butter and dip each potato slice. Shake excess off and place on a cookie sheet.
  3. Sprinkle with salt, pepper, paprika, and parmesan cheese.
  4. Bake in oven for 20-30 minutes (or until tender) at 375 degrees.
Share this Recipe
 
Powered byWP Ultimate Recipe

April 16, 2016 by: Shannon and Aaron

Salmon Balls

Salmon Balls

Like I said a few posts ago, if there is food everyone likes some version of, it is probably potatoes. Baked, mashed, fried – you name it – they’re delicious. So any recipe with potatoes in it is bound to be good. The salmon balls were no exception.

Salmon Balls

Here is what Marguerite had to say:

Salmon Balls

The most difficult part of this recipe was definitely preparing the canned salmon. We had never worked with canned salmon before, and neither of us really enjoyed it. Getting the bits of skin and bones out was a long and messy process. Other than that, it was a pretty simple recipe with just a few ingredients.

Salmon Balls

As you can see, the salmon balls are not the largest. For that reason we feel that they are best served as appetizers before a meal. I really like salmon, it is one of my favorite fish. I thought the combination of salmon with breading tasted good, and like I said before, who doesn’t love potatoes in a dish? Aaron also enjoyed them, referring to them as “a simple version of crab cakes.” Next time we try these I would prefer to try and use fresh salmon, as we felt the canned salmon did not taste as good as fresh.

Salmon Balls

We hope the next time you are looking for an interesting yet simple party food or appetizer, you keep these salmon balls in mind!

Salmon Balls
Print Recipe
  • CourseAppetizers and Sides
Servings Prep Time
4-6 20 minutes
Cook Time
30 minutes
Servings Prep Time
4-6 20 minutes
Cook Time
30 minutes
Salmon Balls
Print Recipe
  • CourseAppetizers and Sides
Servings Prep Time
4-6 20 minutes
Cook Time
30 minutes
Servings Prep Time
4-6 20 minutes
Cook Time
30 minutes
Ingredients
  • 1 cup instant potatoes
  • 3/4 cup water
  • 7 3/4 oz canned salmon drained, boned, and flaked
  • 2 eggs
  • 1 tsp salt
  • 1/4 cup bread crumbs seasoned
Servings:
Instructions
  1. Boil the water and add the instant potatoes.
  2. After draining, boning, and flaking the salmon, combine with the two eggs and salt.
  3. Stir the salmon mixture into the instant potatoes until fluffy.
  4. Shape into 4-6 balls (they will be sticky.)
  5. Roll the balls in bread crumbs.
  6. Bake at 375 for 30 minutes.
Share this Recipe
 
Powered byWP Ultimate Recipe

April 9, 2016 by: Shannon and Aaron

Sesame Bread

*This post may contain affiliate links or sponsored content. While we always try to provide our readers with great content, occasionally we will work with sponsors when their brands and products mesh with what our blog is about and what our readers want. These affiliates help to keep the blog up and running.*

SesameBreadheader

There are a few things that Aaron and the rest of Marguerite’s family can remember as a constant during Sunday dinners. One of them was fresh Mancini’s bread and the other was Pillsbury crescent rolls. While Aaron doesn’t remember this exactly, the twist (pun intended) on the standard Pillsbury Crescents Rolls is a great change of pace.


Sesame Bread

Here is what Marguerite had to say:

SesameBread

Making these sesame bread twists was very simple. Some of the directions seemed strange, however. Neither of us had ever beaten an egg in a pie pan and then used the pie pan as prep space. For two still relatively unexperienced cooks, twisting the dough and rolling it through the egg was difficult. The beauty of sprinkling sesame seeds is that the randomness has a sort of perfection to it, so no need to be a master chef.

Sesame Bread

The one thing we had trouble with was the length of time we took to bake the sesame bread. Its unclear whether or not we baked them too long, which is likely, or that the issues had to do with the small and inexpensive electric oven we have. Either way, they turned out beautifully and were delicious to boot. Aaron liked them as well, and is eager to make them again sometime. We hope you enjoy them, too.

Sesame Bread


Sesame Bread
Print Recipe
  • CourseAppetizers and Sides
Servings Prep Time
12 Twists 20 minutes
Cook Time
10 minutes
Servings Prep Time
12 Twists 20 minutes
Cook Time
10 minutes
Sesame Bread
Print Recipe
  • CourseAppetizers and Sides
Servings Prep Time
12 Twists 20 minutes
Cook Time
10 minutes
Servings Prep Time
12 Twists 20 minutes
Cook Time
10 minutes
Ingredients
  • 1 pkg Pillsbury crescent rolls
  • 1 egg
  • 4 Tbsp sesame seeds
Servings: Twists
Instructions
  1. Preheat oven to 400 degrees.
  2. Beat egg slightly in pie pan.
  3. Unroll dough in four rectangles. Press two rectangles together.
  4. Cut into six strips lengthwise. Twist each strip. Repeat.
  5. Roll in egg, then in seeds on wax paper.
  6. Place 1 1/2 inches apart on greased cookie sheet.
  7. Bake 10 minutes or until golden brown.
Share this Recipe
 
Powered byWP Ultimate Recipe

March 12, 2016 by: Shannon and Aaron

Broccoli Cheese Soup

Broccoli Cheddar Soup

We’re in what looks like our last week of winter weather here in Chicago, and nothing quite shakes off those winter blues like a hot bowl of Broccoli Cheese soup. There’s just something comforting about the look of a nice big bowl of soup, isn’t there?

Broccoli Cheddar Soup

Aaron enjoys when Marguerite’s recipes have the instructions jammed on the right half of the page alongside the list of ingredients. It is so unlike the typical recipe format and that unique style seems distinctly “Marguerite” to him. Here is what she had to say this time:

BroccoliCheeseSoupRecipe

Another characteristic of some of Marguerite’s recipes is that they are usually only as detailed as she needed to remember how they went. We often have to read the entire recipe at least once through to make sure we don’t come upon any surprises. In this recipe, we noticed it made the most sense to sautĂ© the onion in the big pot to begin with. This soup was so creamy, cheesy, and very easy to make. I’m not a huge fan of creamy soups, but I really liked this one.

broccoli cheese soup

Aaron felt it was a little too thin in consistency and would have liked more of a cheesy flavor. I think next time we try this, we’ll add more than just cheddar to really make it cheesy.

Broccoli Cheddar Soup

We hope you enjoy the creamy and cheesy goodness of this very simple soup!

Broccoli Cheese Soup
Print Recipe
  • CourseAppetizers and Sides
Servings Prep Time
4-6 30 minutes
Cook Time
15 minutes
Servings Prep Time
4-6 30 minutes
Cook Time
15 minutes
Broccoli Cheese Soup
Print Recipe
  • CourseAppetizers and Sides
Servings Prep Time
4-6 30 minutes
Cook Time
15 minutes
Servings Prep Time
4-6 30 minutes
Cook Time
15 minutes
Ingredients
  • 1 large head broccoli
  • 1/2 cup butter
  • 1 medium onion
  • 2 cups milk
  • 1 cup grated sharp cheddar cheese
  • 2 cans chicken broth
  • 1/2 cup flour
  • salt and pepper to taste
Servings:
Instructions
  1. Cut up and cook broccoli until tender. Drain.
  2. Chop onion and saute in butter until transparent. (You will want to do this in the pot your soup will end up in.)
  3. Stir in flour and cook about five minutes.
  4. Add milk slowly, stirring continuously.
  5. Stir in and blend grated cheese.
  6. Slowly blend in chicken broth.
  7. Add broccoli and salt and pepper.
  8. Simmer about 15 minutes.
Share this Recipe
 
Powered byWP Ultimate Recipe

February 6, 2016 by: Shannon and Aaron

Zucchini Bread Recipe

Zucchini Bread

Zucchini + Bread is the way to a girl’s heart. More specifically Shannon’s heart. I love bread and zucchini dishes get me hyped up. Needless to say, I was excited for this recipe.
When we initially picked this, I browsed over it quickly and saw “bread” and “zucchini.” I actually thought we were making breaded/fried zucchini. Oops.

I was disappointed for a hot second, but then I got very excited to try something new.

Here is what Marguerite had to say:

Original Zucchini Bread

The best way to describe this bread is a flavor-packed, fluffy slice of deliciousness. Seriously, if you want an appetizer that’s rich and easy to make, try this zucchini bread.

Zucchini BreadNot only did we enjoy this zucchini bread, but we shared it twice with friends and family over the past month and it was a smash success both times.

Aaron took the leftovers of our first attempt to work and his co-workers raved. Then we hosted my parents and Aaron’s mom for dinner so that we could share some of the cool things Marguerite’s book has been teaching us. Again, the bread was a hit. The other dishes were also enjoyed, but more on those later.

Zucchini Bread

Our favorite thing about this bread was how easy it was to make and how moist it turned out. Based on our very limited cooking knowledge, we believed achieving moistness in bread to be a difficult thing to do. If that is the case, this zucchini bread recipe is the exception.

Zucchini Bread

As much as I love zucchini dishes, I actually felt like this was just a little too heavy on the zucchini flavor. Say what? I guess I was expecting more of a bread with a hint of zucchini, instead of the packed in flavor this bread delivers. It may just be a personal preference as well.

Aaron loved the consistency of the bread. Each time we made it, he was in charge of zucchini prep and felt chopping it then blending it was “tedious.” I think he just wanted to try it sooner…

Other than a somewhat laborious prep (if you have a food processor, this won’t be as much of an issue) this bread is very easy to make. Once you’ve got everything chopped up, it’s as simple as mixing and throwing it in the oven.

PinterestBread
Zucchini Bread
Print Recipe
  • CourseAppetizers and Sides
Servings Prep Time
2 loaves 30 minutes
Cook Time
45-60 minutes
Servings Prep Time
2 loaves 30 minutes
Cook Time
45-60 minutes
Zucchini Bread
Print Recipe
  • CourseAppetizers and Sides
Servings Prep Time
2 loaves 30 minutes
Cook Time
45-60 minutes
Servings Prep Time
2 loaves 30 minutes
Cook Time
45-60 minutes
Ingredients
  • 3 large eggs
  • 2 cups sugar
  • 1 cup salad oil
  • 2 tsp vanilla
  • 3 cups flour
  • 1 tsp salt
  • 1 tsp cinnamon
  • 1 tsp baking soda
  • 1 tsp baking powder
  • 3 cups grated raw zucchini
Servings: loaves
Instructions
  1. Grate the zucchini to whatever thickness you'd like. For this, very fine works best.
  2. Beat eggs until light and foamy.
  3. Add oil, sugar, vanilla, and grated zucchini.
  4. Mix together dry ingredients and add to egg and zucchini mixture.
  5. Put in two greased loaf pans.
  6. Bake at 325 degrees for 45-60 minutes or until lightly browned. Test to see if done. Remove from pan at once and cool on rack.
Share this Recipe
 
Powered byWP Ultimate Recipe
  • « Previous Page
  • 1
  • 2

Hey There!

We're Aaron and Shannon, the cooks behind Marguerite’s Cookbook. We are a husband and wife cooking/blogging team who love food, fun, and family.

Give us a follow

Twitter

Sign up for our monthly newsletter and receive exclusive content from us in your inbox once a month.

  • Policies
  • Contact

© 2025 · Fun Genesis WordPress Theme by, Pretty Darn Cute Design