Marguerites Cookbook

A cooking blog all about making vintage recipes from a cookbook we inherited from our grandmother

  • Home
  • Recipes
    • Main Dishes
    • Appetizers and Sides
    • Desserts
    • Breakfast
  • About
  • Contact

April 23, 2016 by: Shannon and Aaron

Cheesecake Recipe

Cheesecakeheader

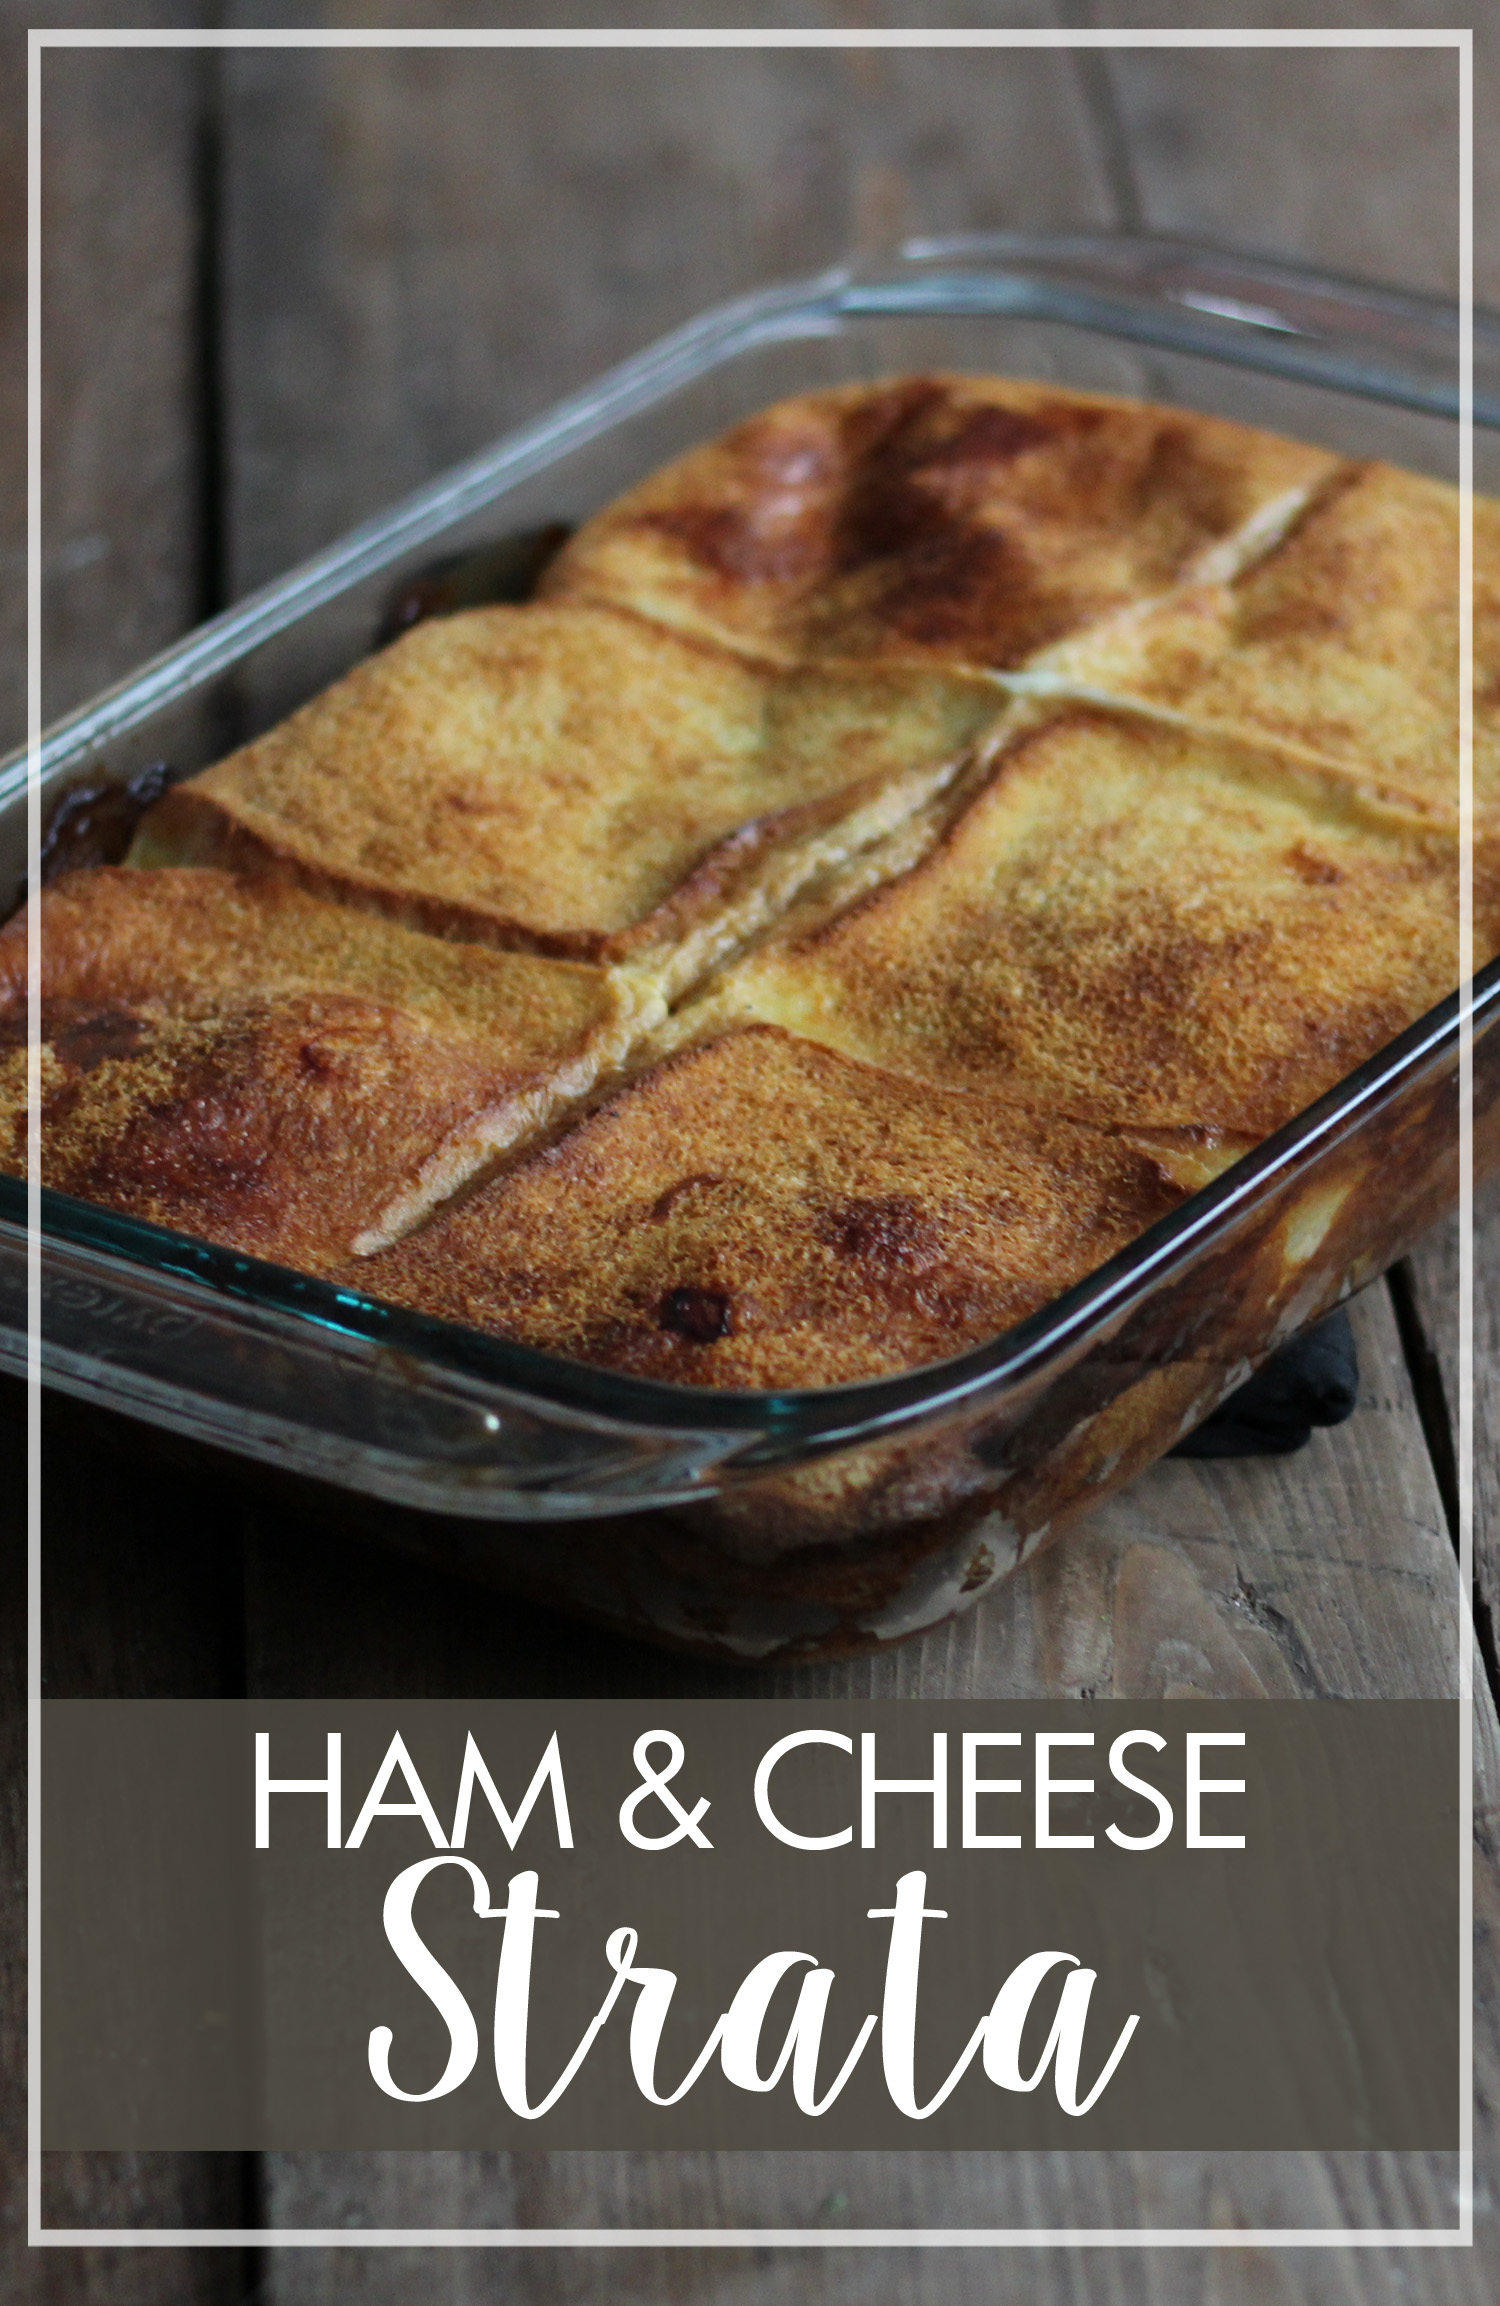
I love cheesecake. Aaron’s mom makes great cheesecake, so I lucked out marrying into a family of great cheesecake. That being said, I was really excited to try out Marguerite’s cheesecake recipe!

Cheesecake Recipe

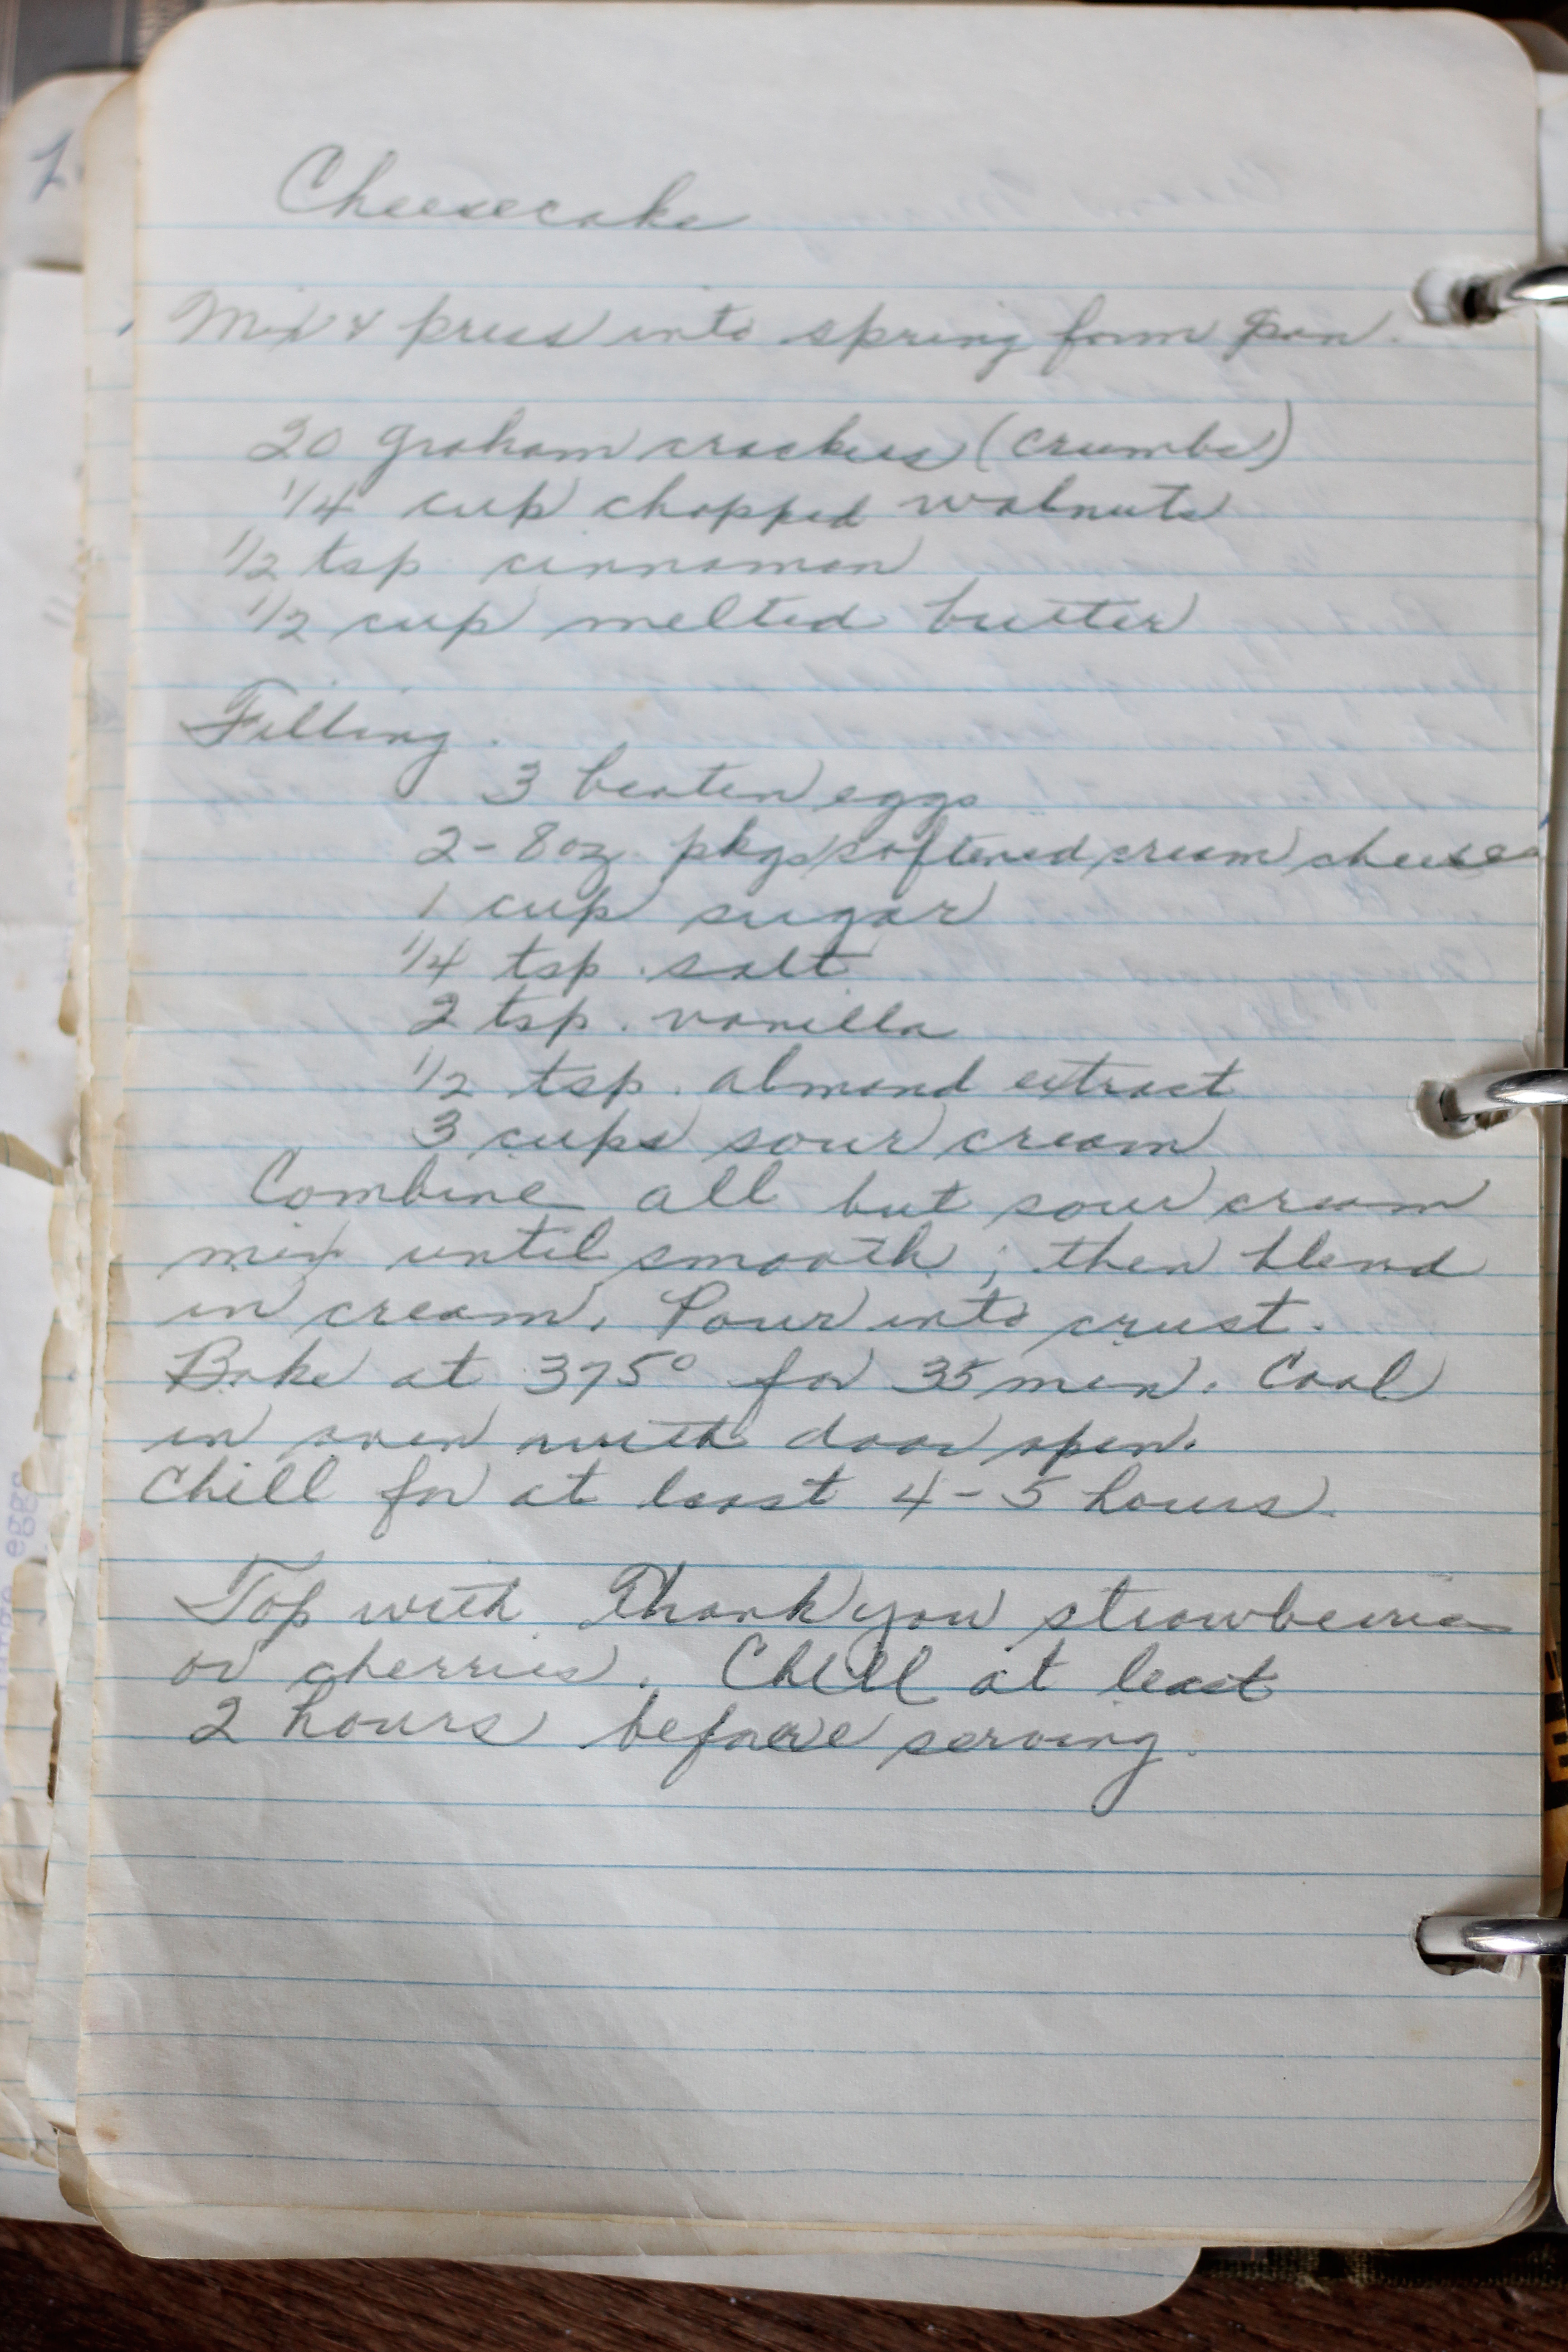
Here is what Marguerite’s cheesecake recipe looks like:

Cheesecake Recipe

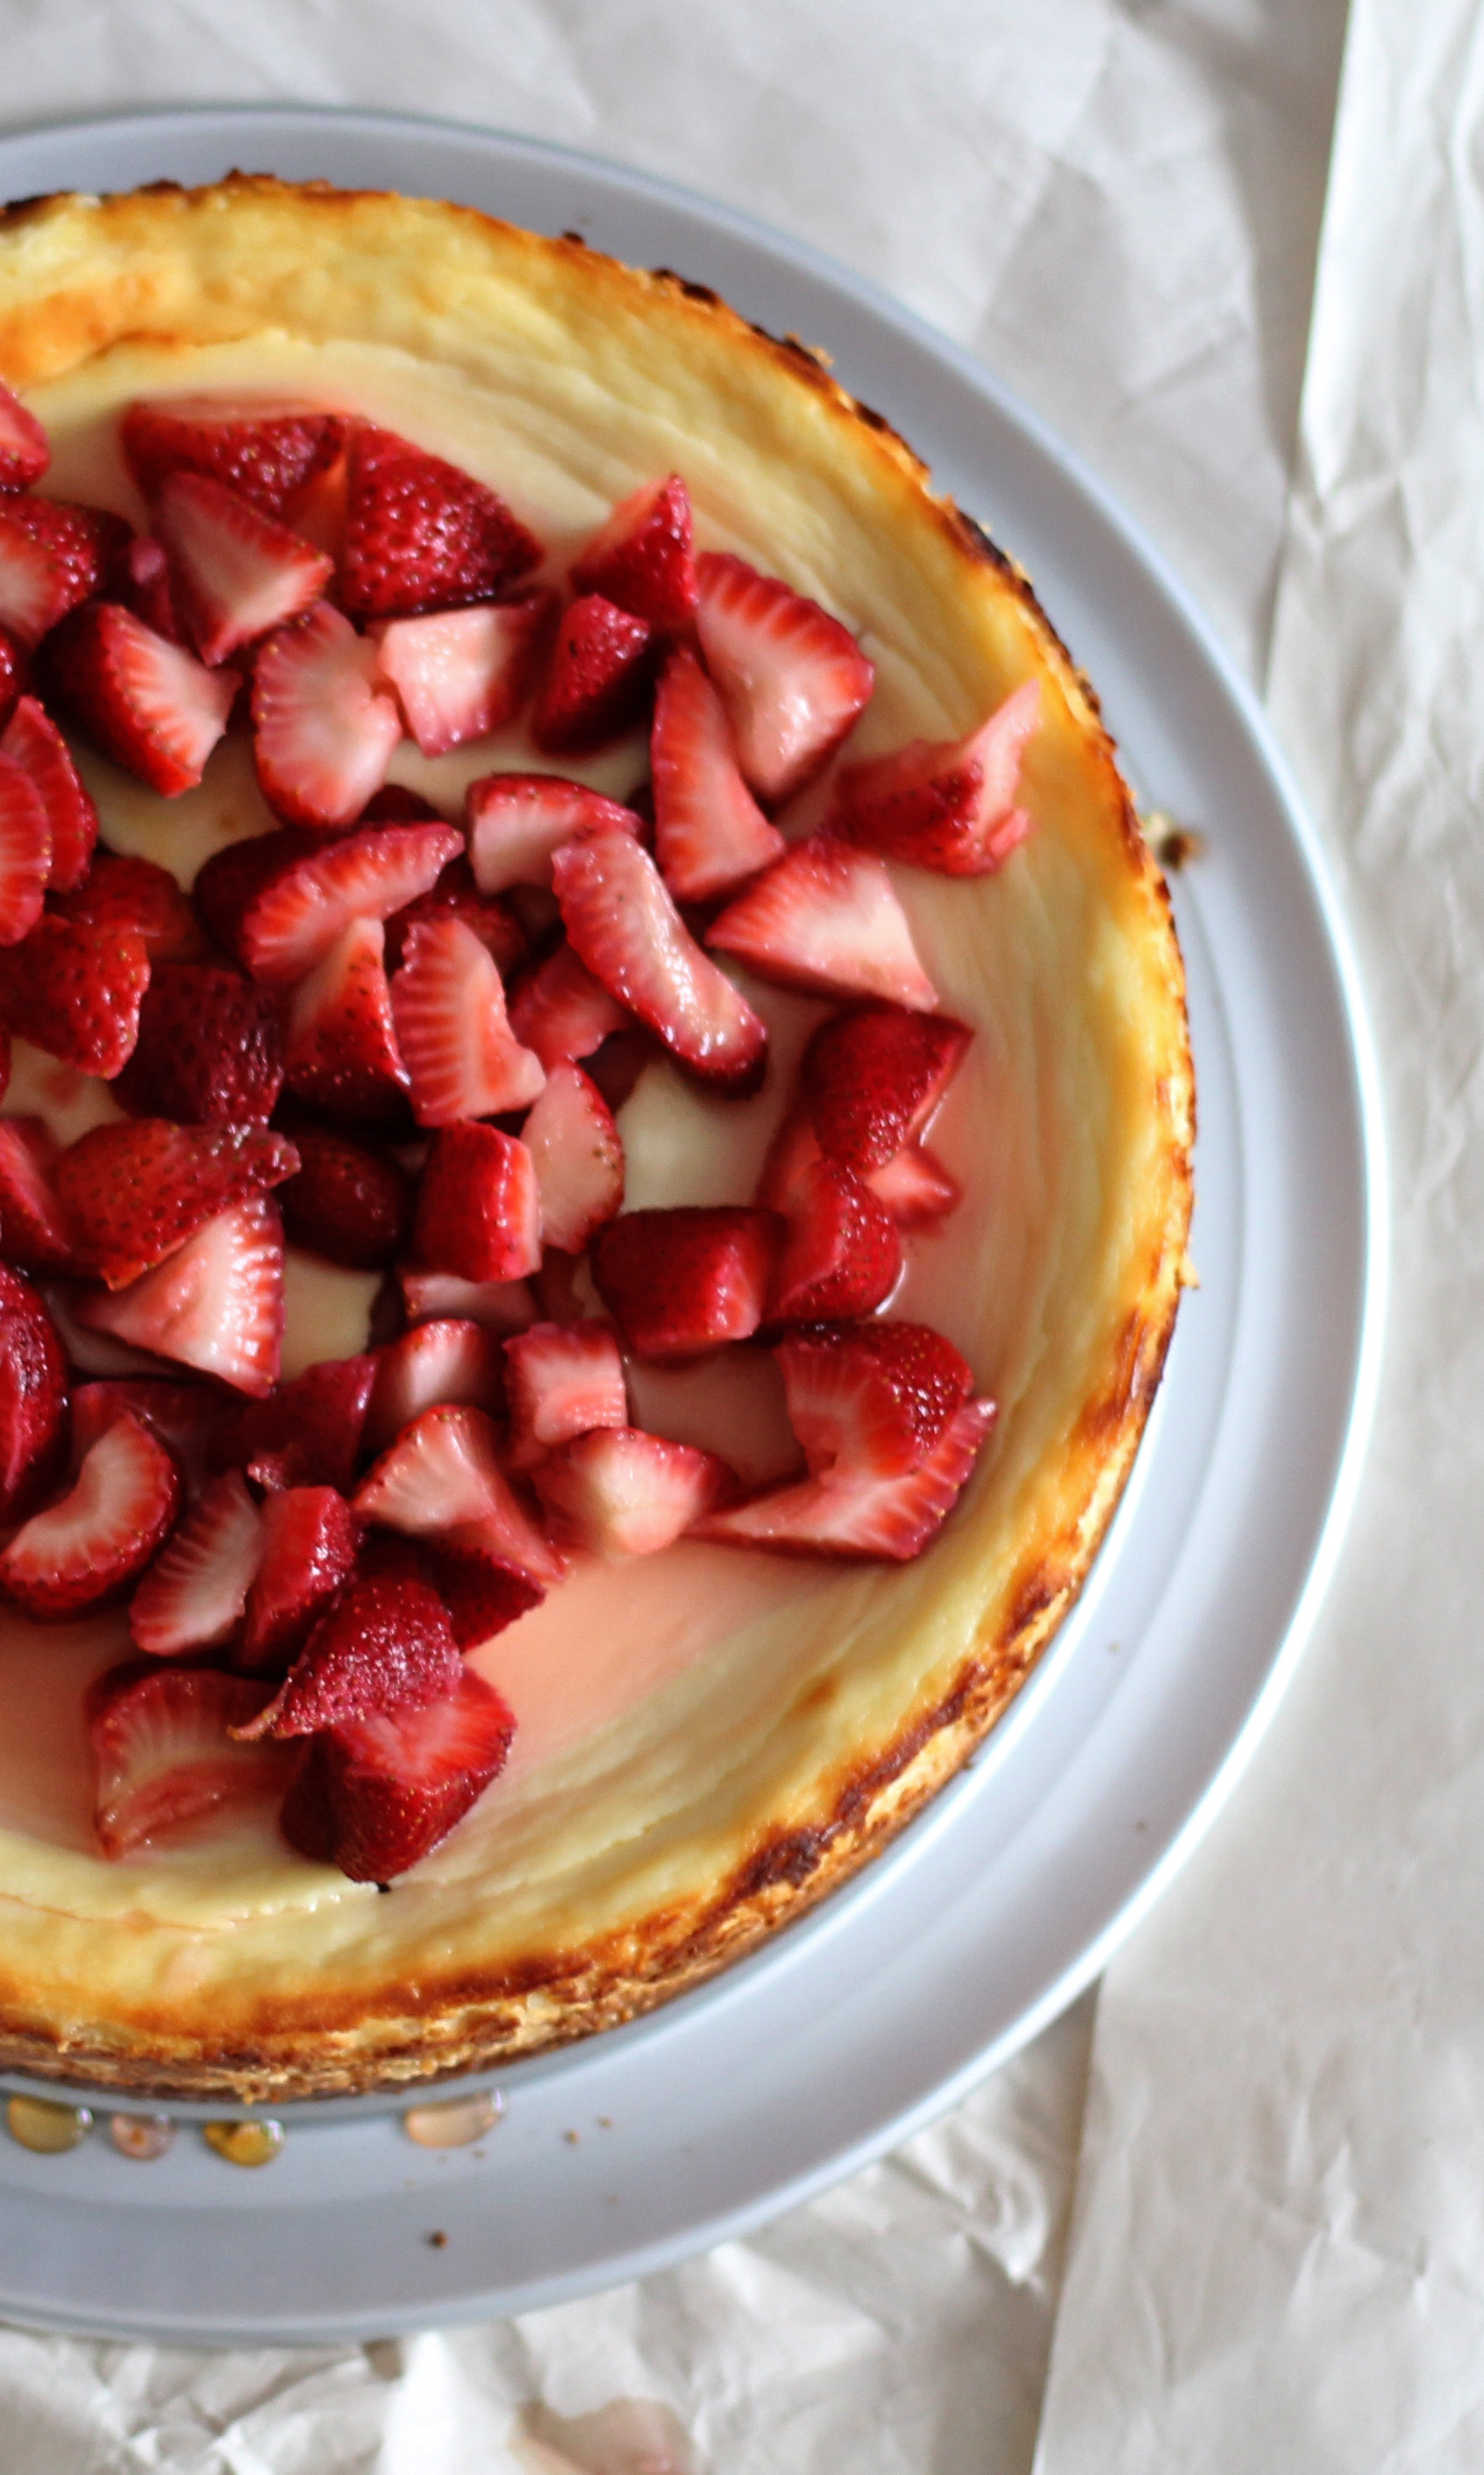
Preparing the ingredients for the crust was a very time consuming process! It took us a full thirty minutes to crush up regular whole graham crackers into crumbs small enough for the crust. We did want to try to make it exactly as Marguerite would, so we went through all that trouble. What we did find out, as you can see, is that 20 graham crackers made a very thick crust.

Cheesecake Recipe Piece

Even though the crust was thick, it was delicious! The addition of walnuts and cinnamon in the crust made for a delicious extra boost of flavor that really complemented the plain flavor of the cheesecake.

Cheesecake Recipe

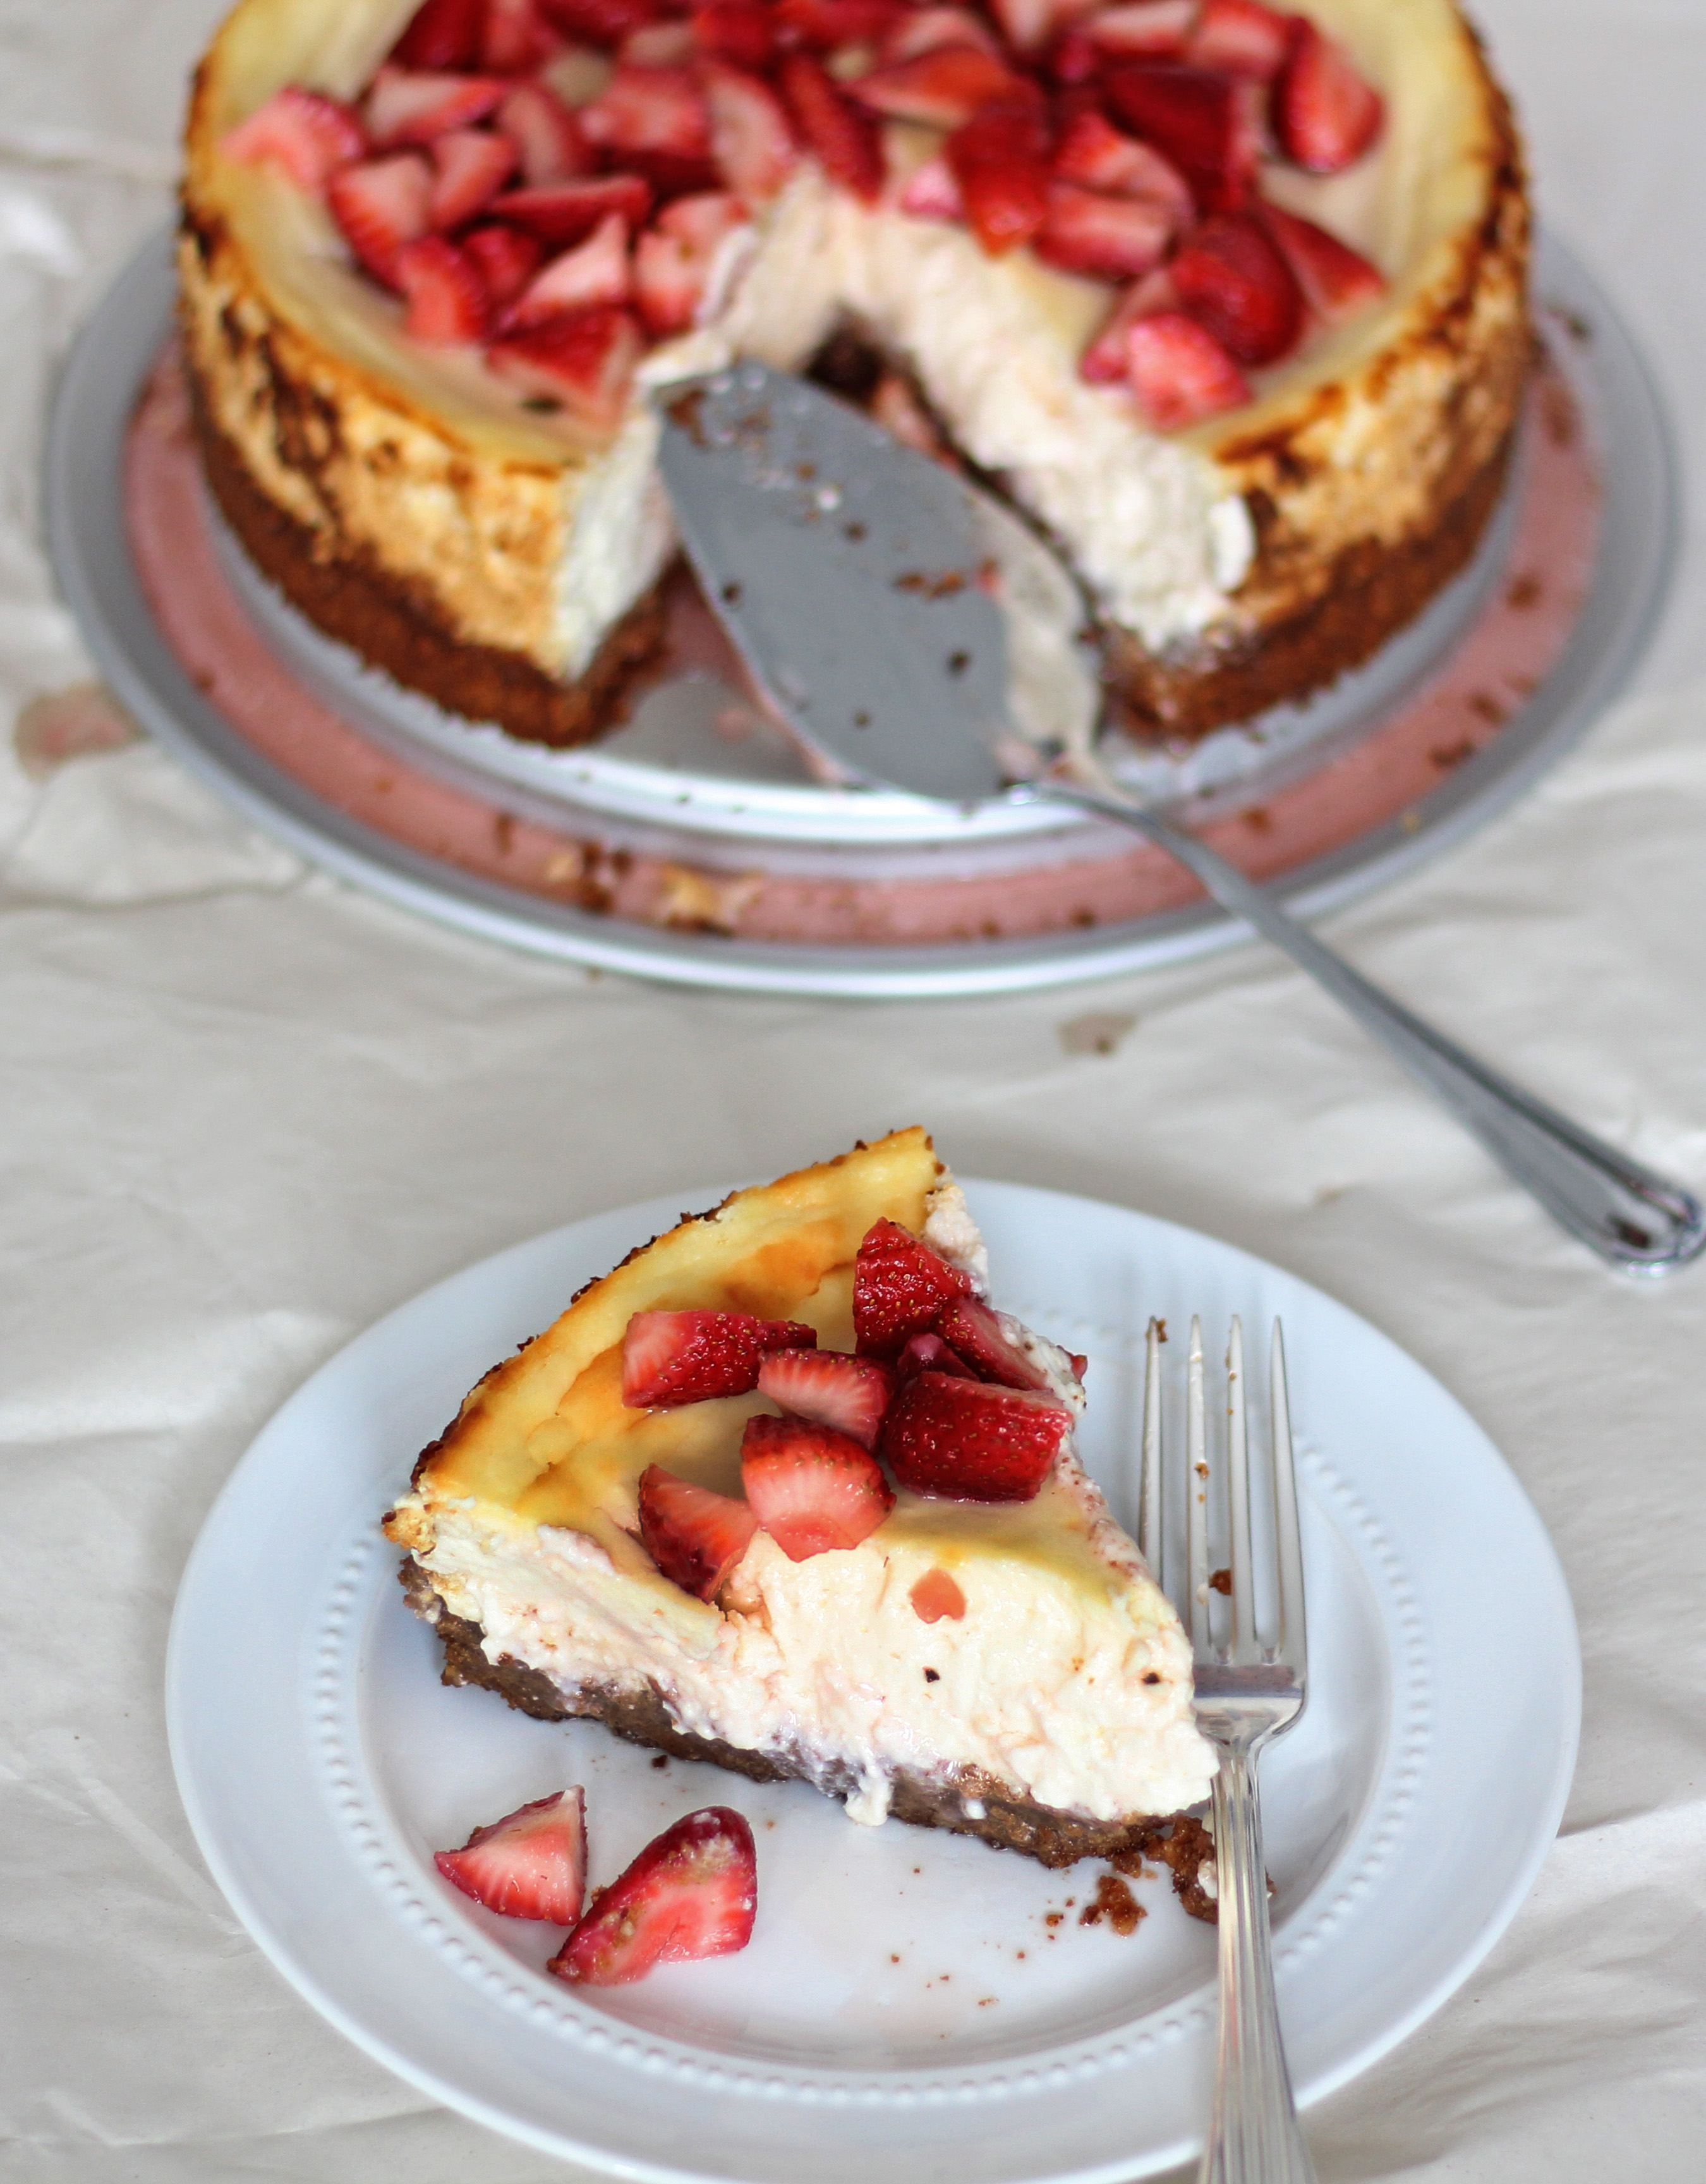
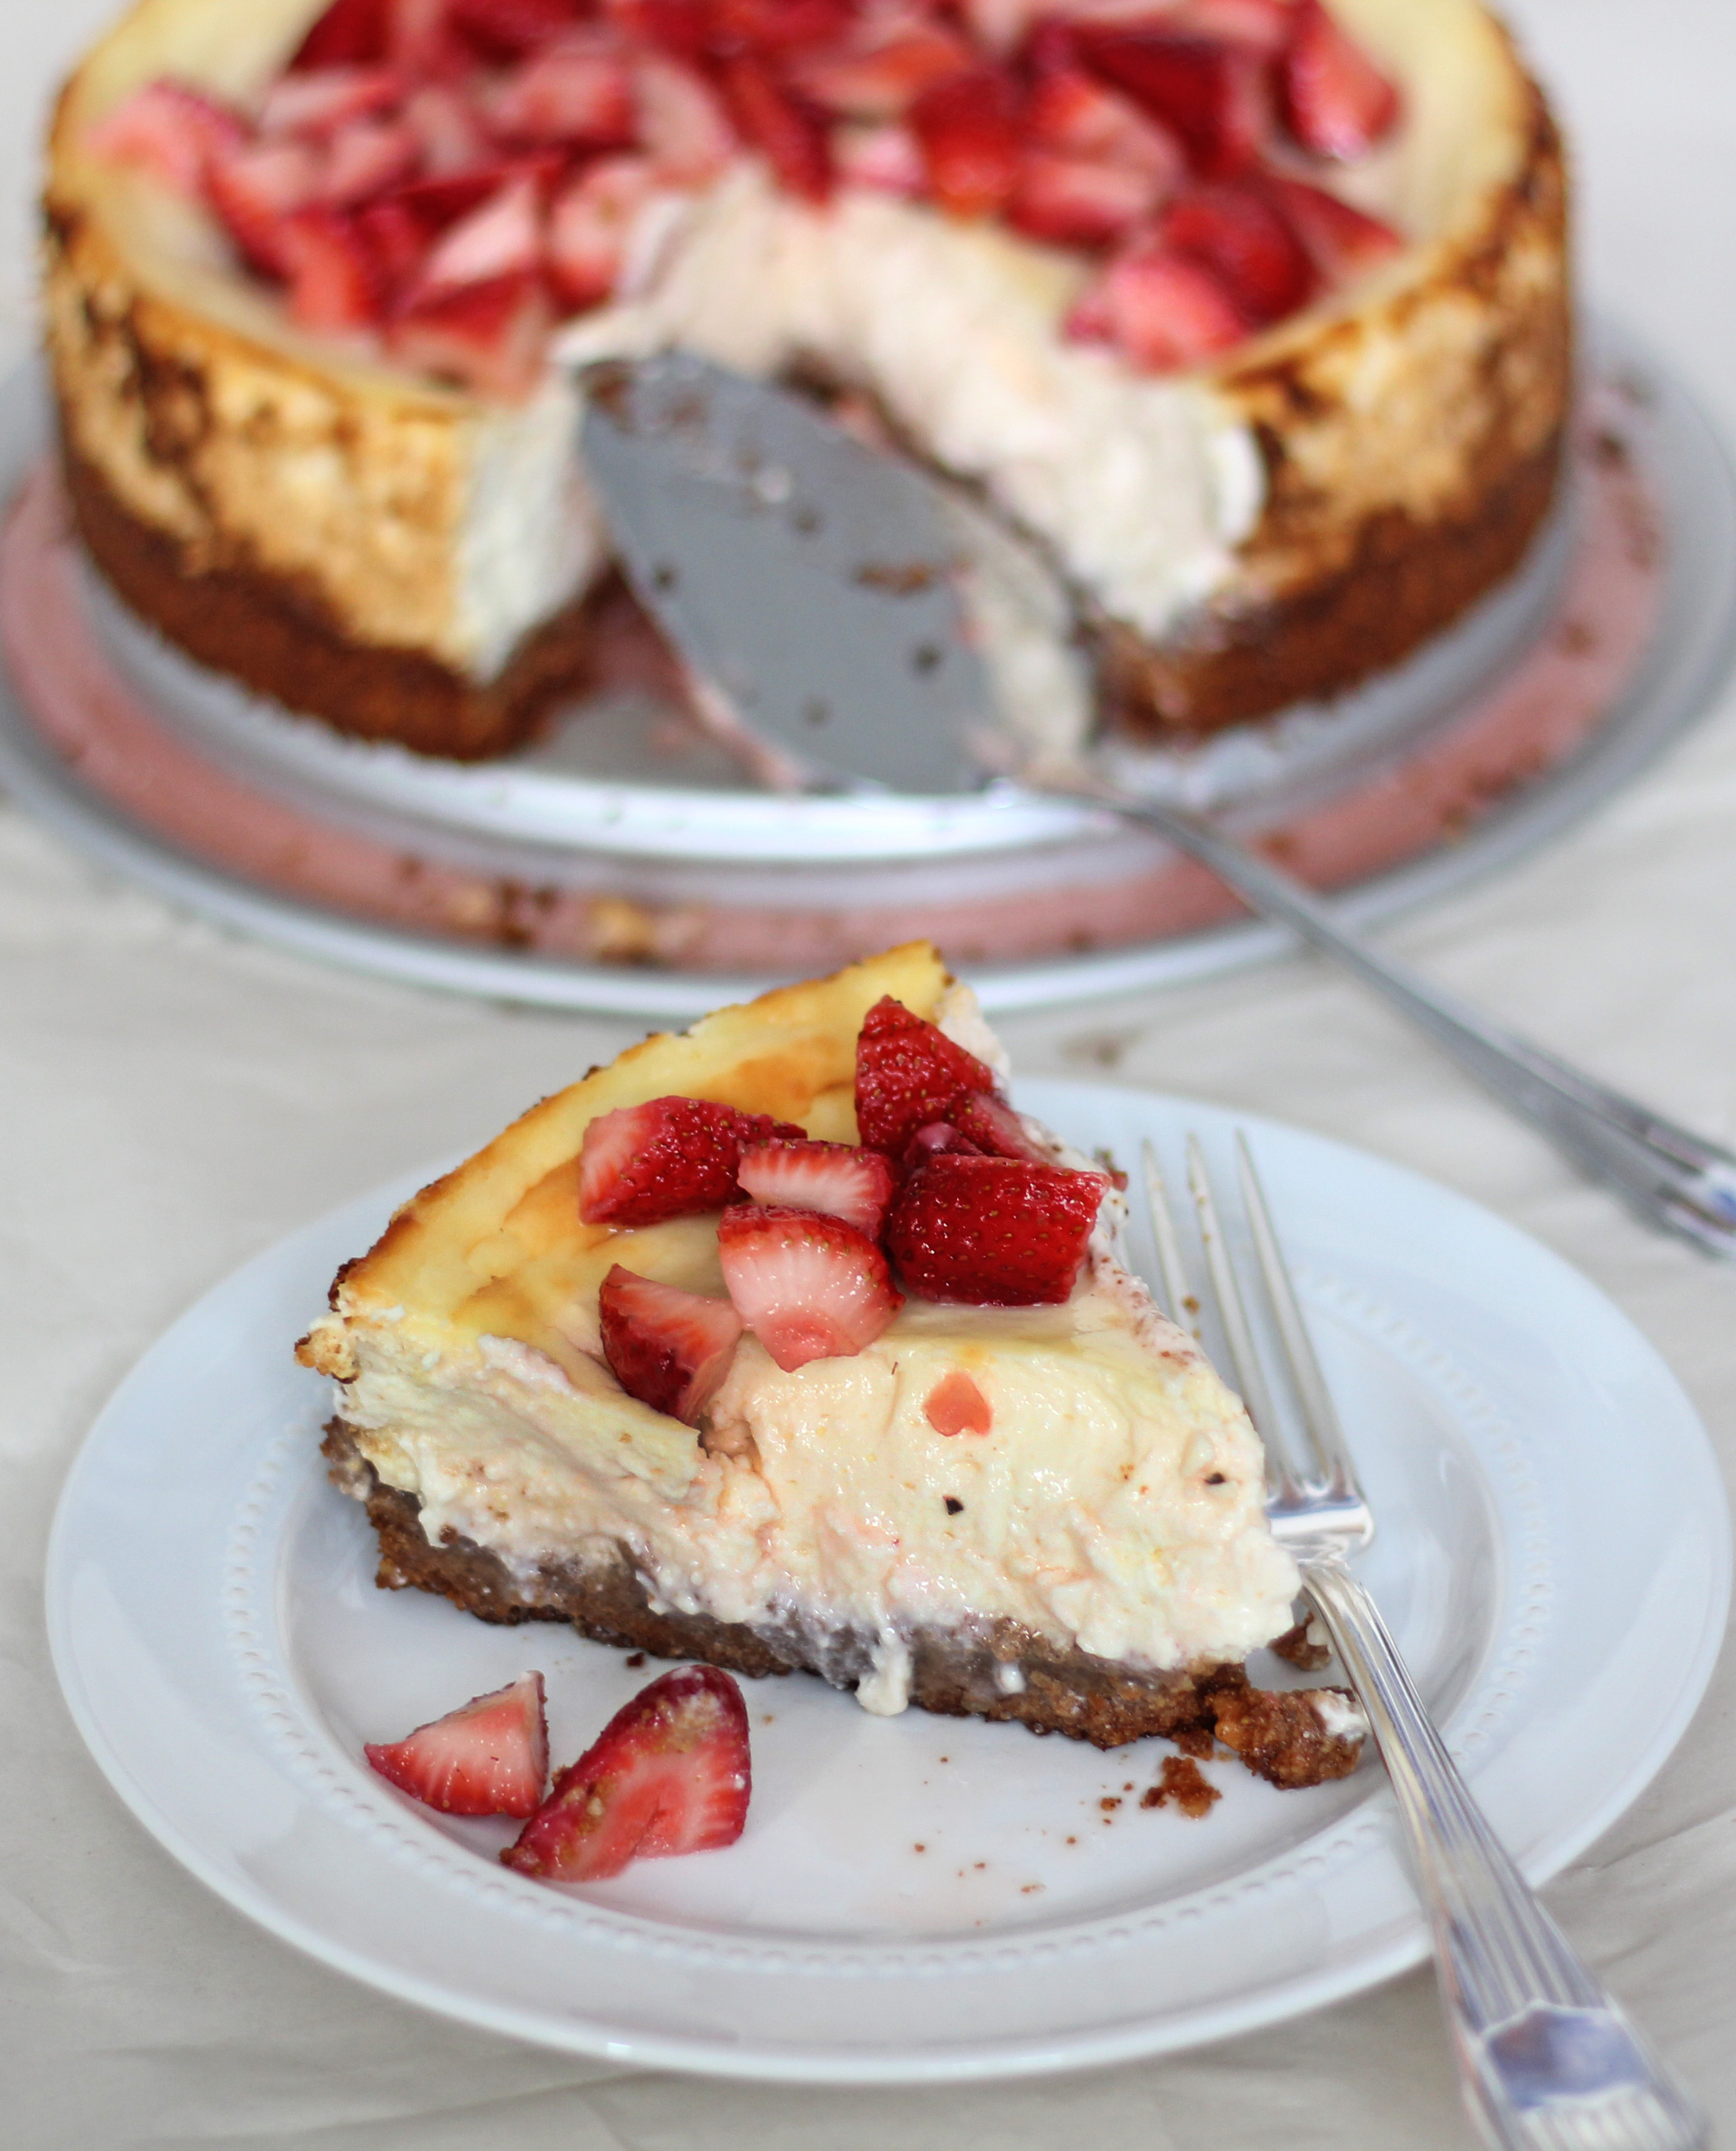
My other favorite thing about cheesecake is having strawberries with it. So we made some sugared strawberries to go on top of our cheesecake. At that point I was itching to have some of this cheesecake. And let me tell you, I was not disappointed! It was simply delicious. Aaron really enjoyed it too (is there anything he doesn’t enjoy though?)

Cheesecake Recipe

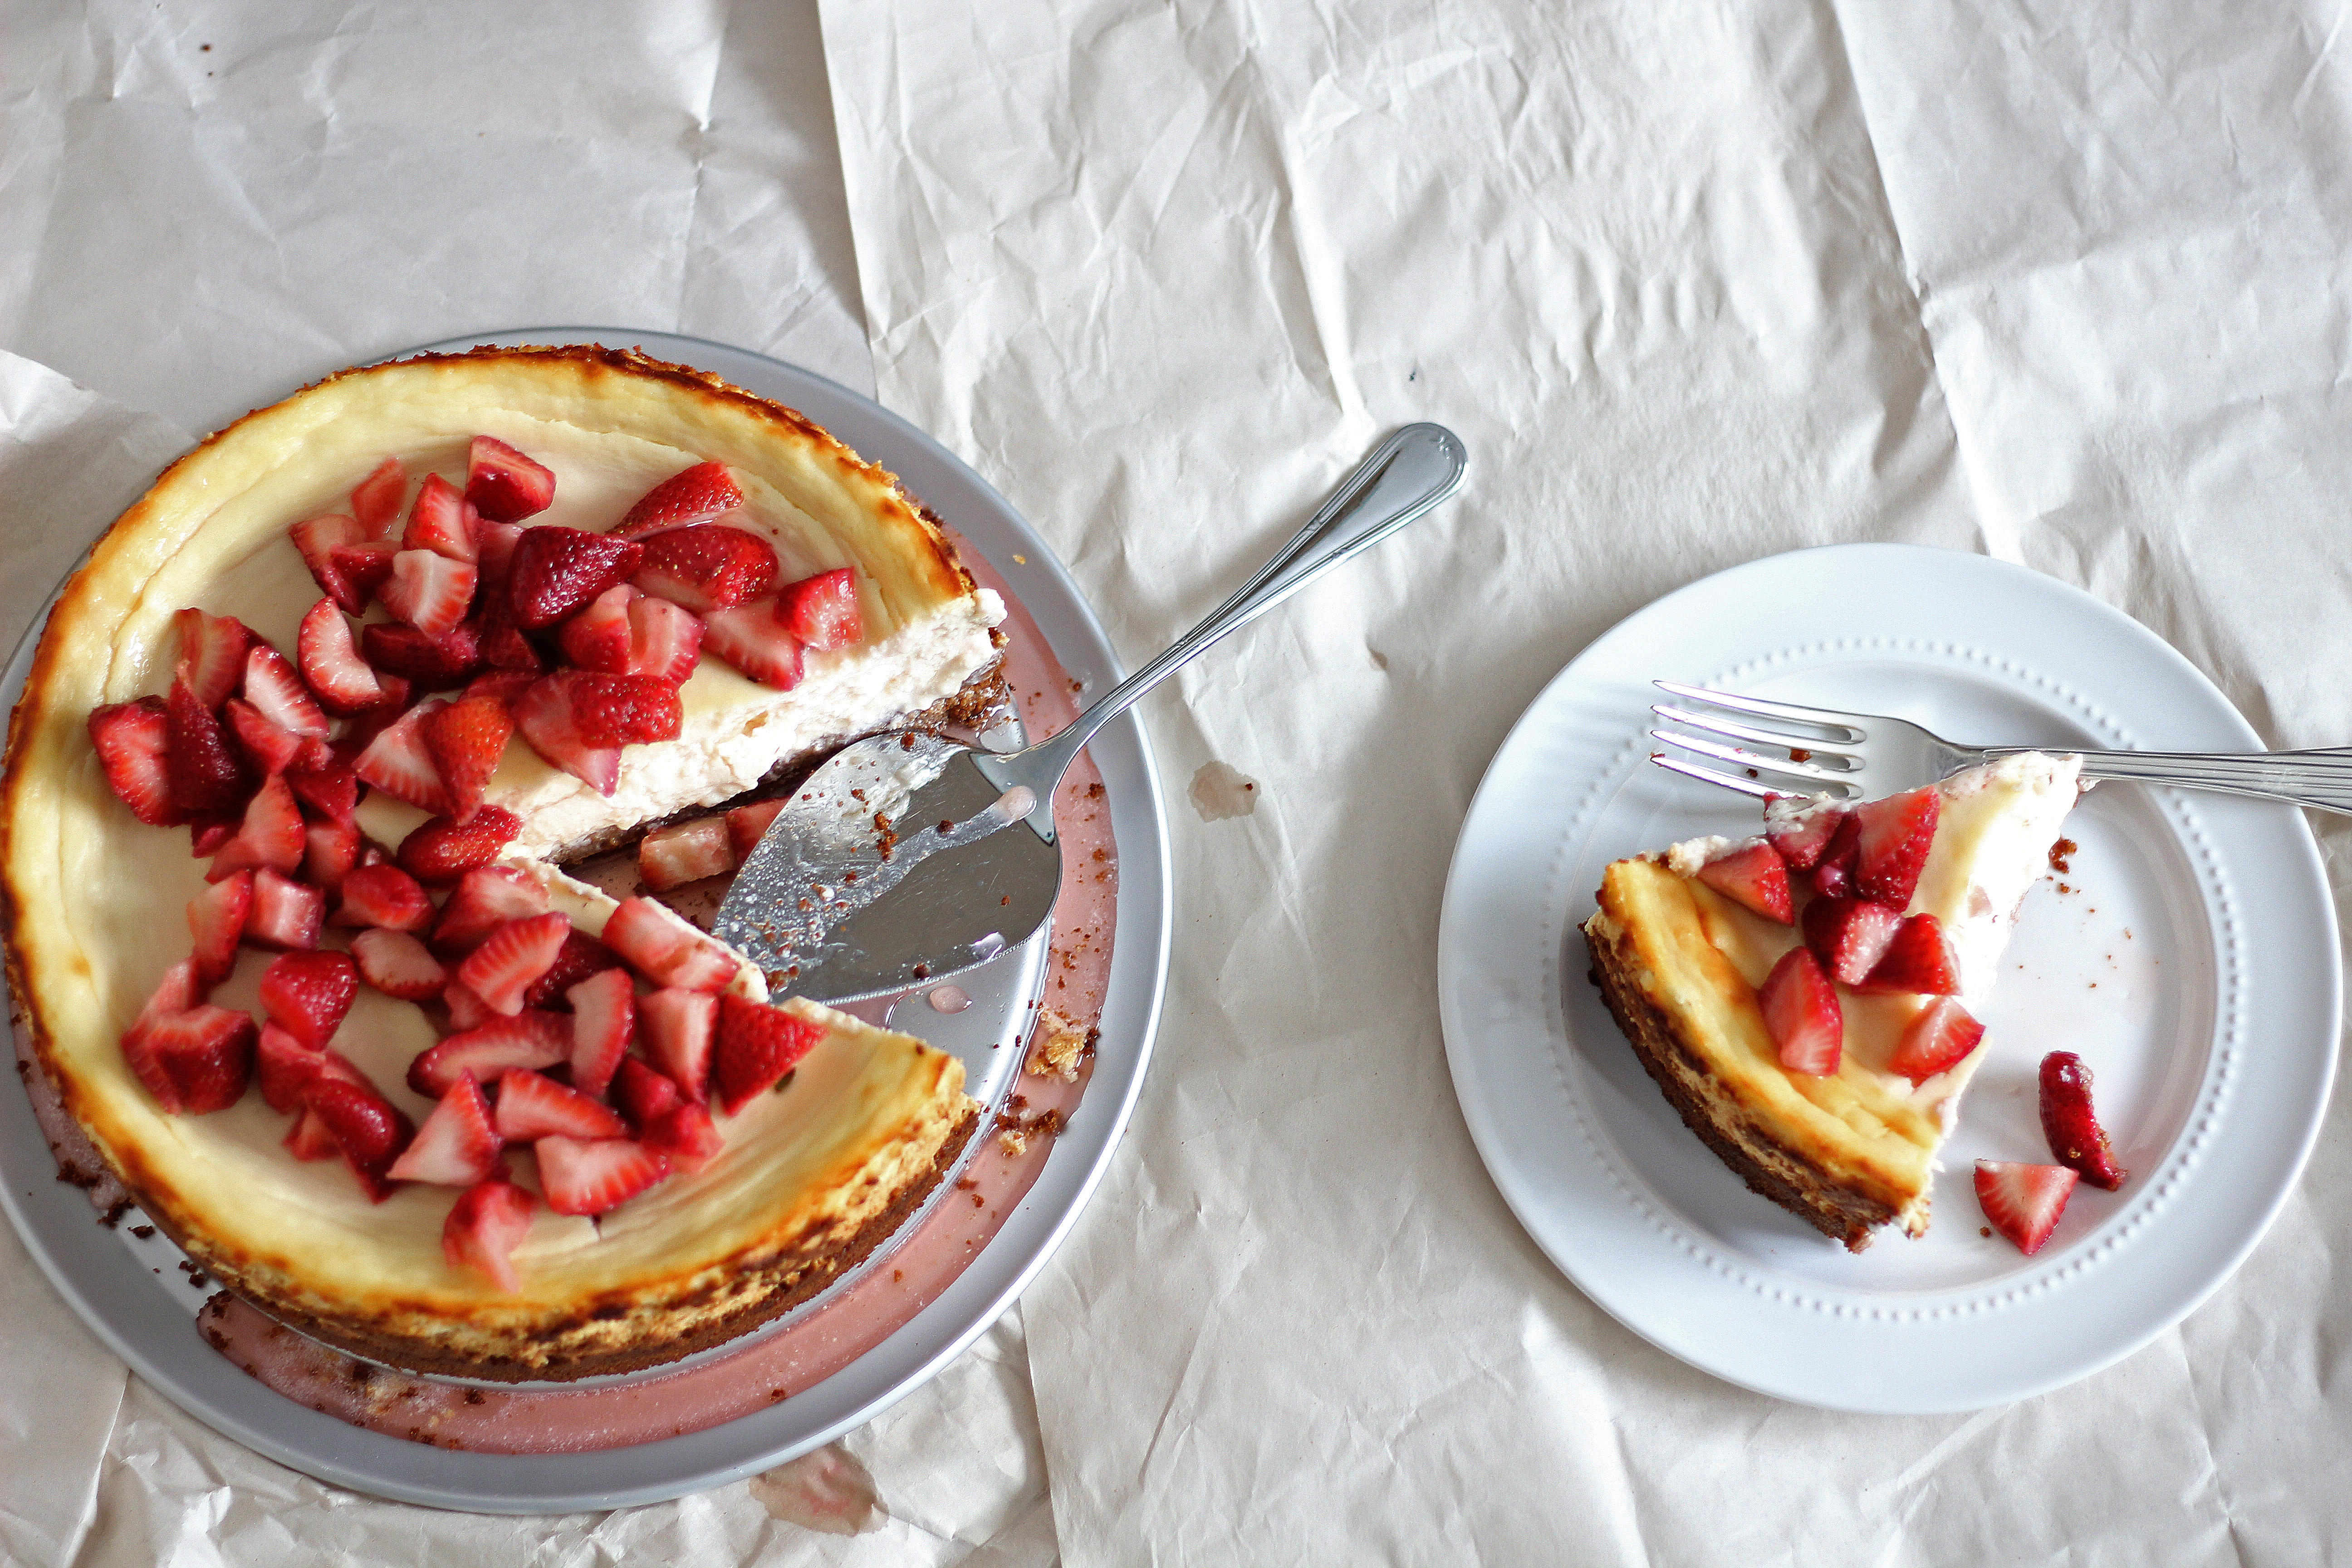
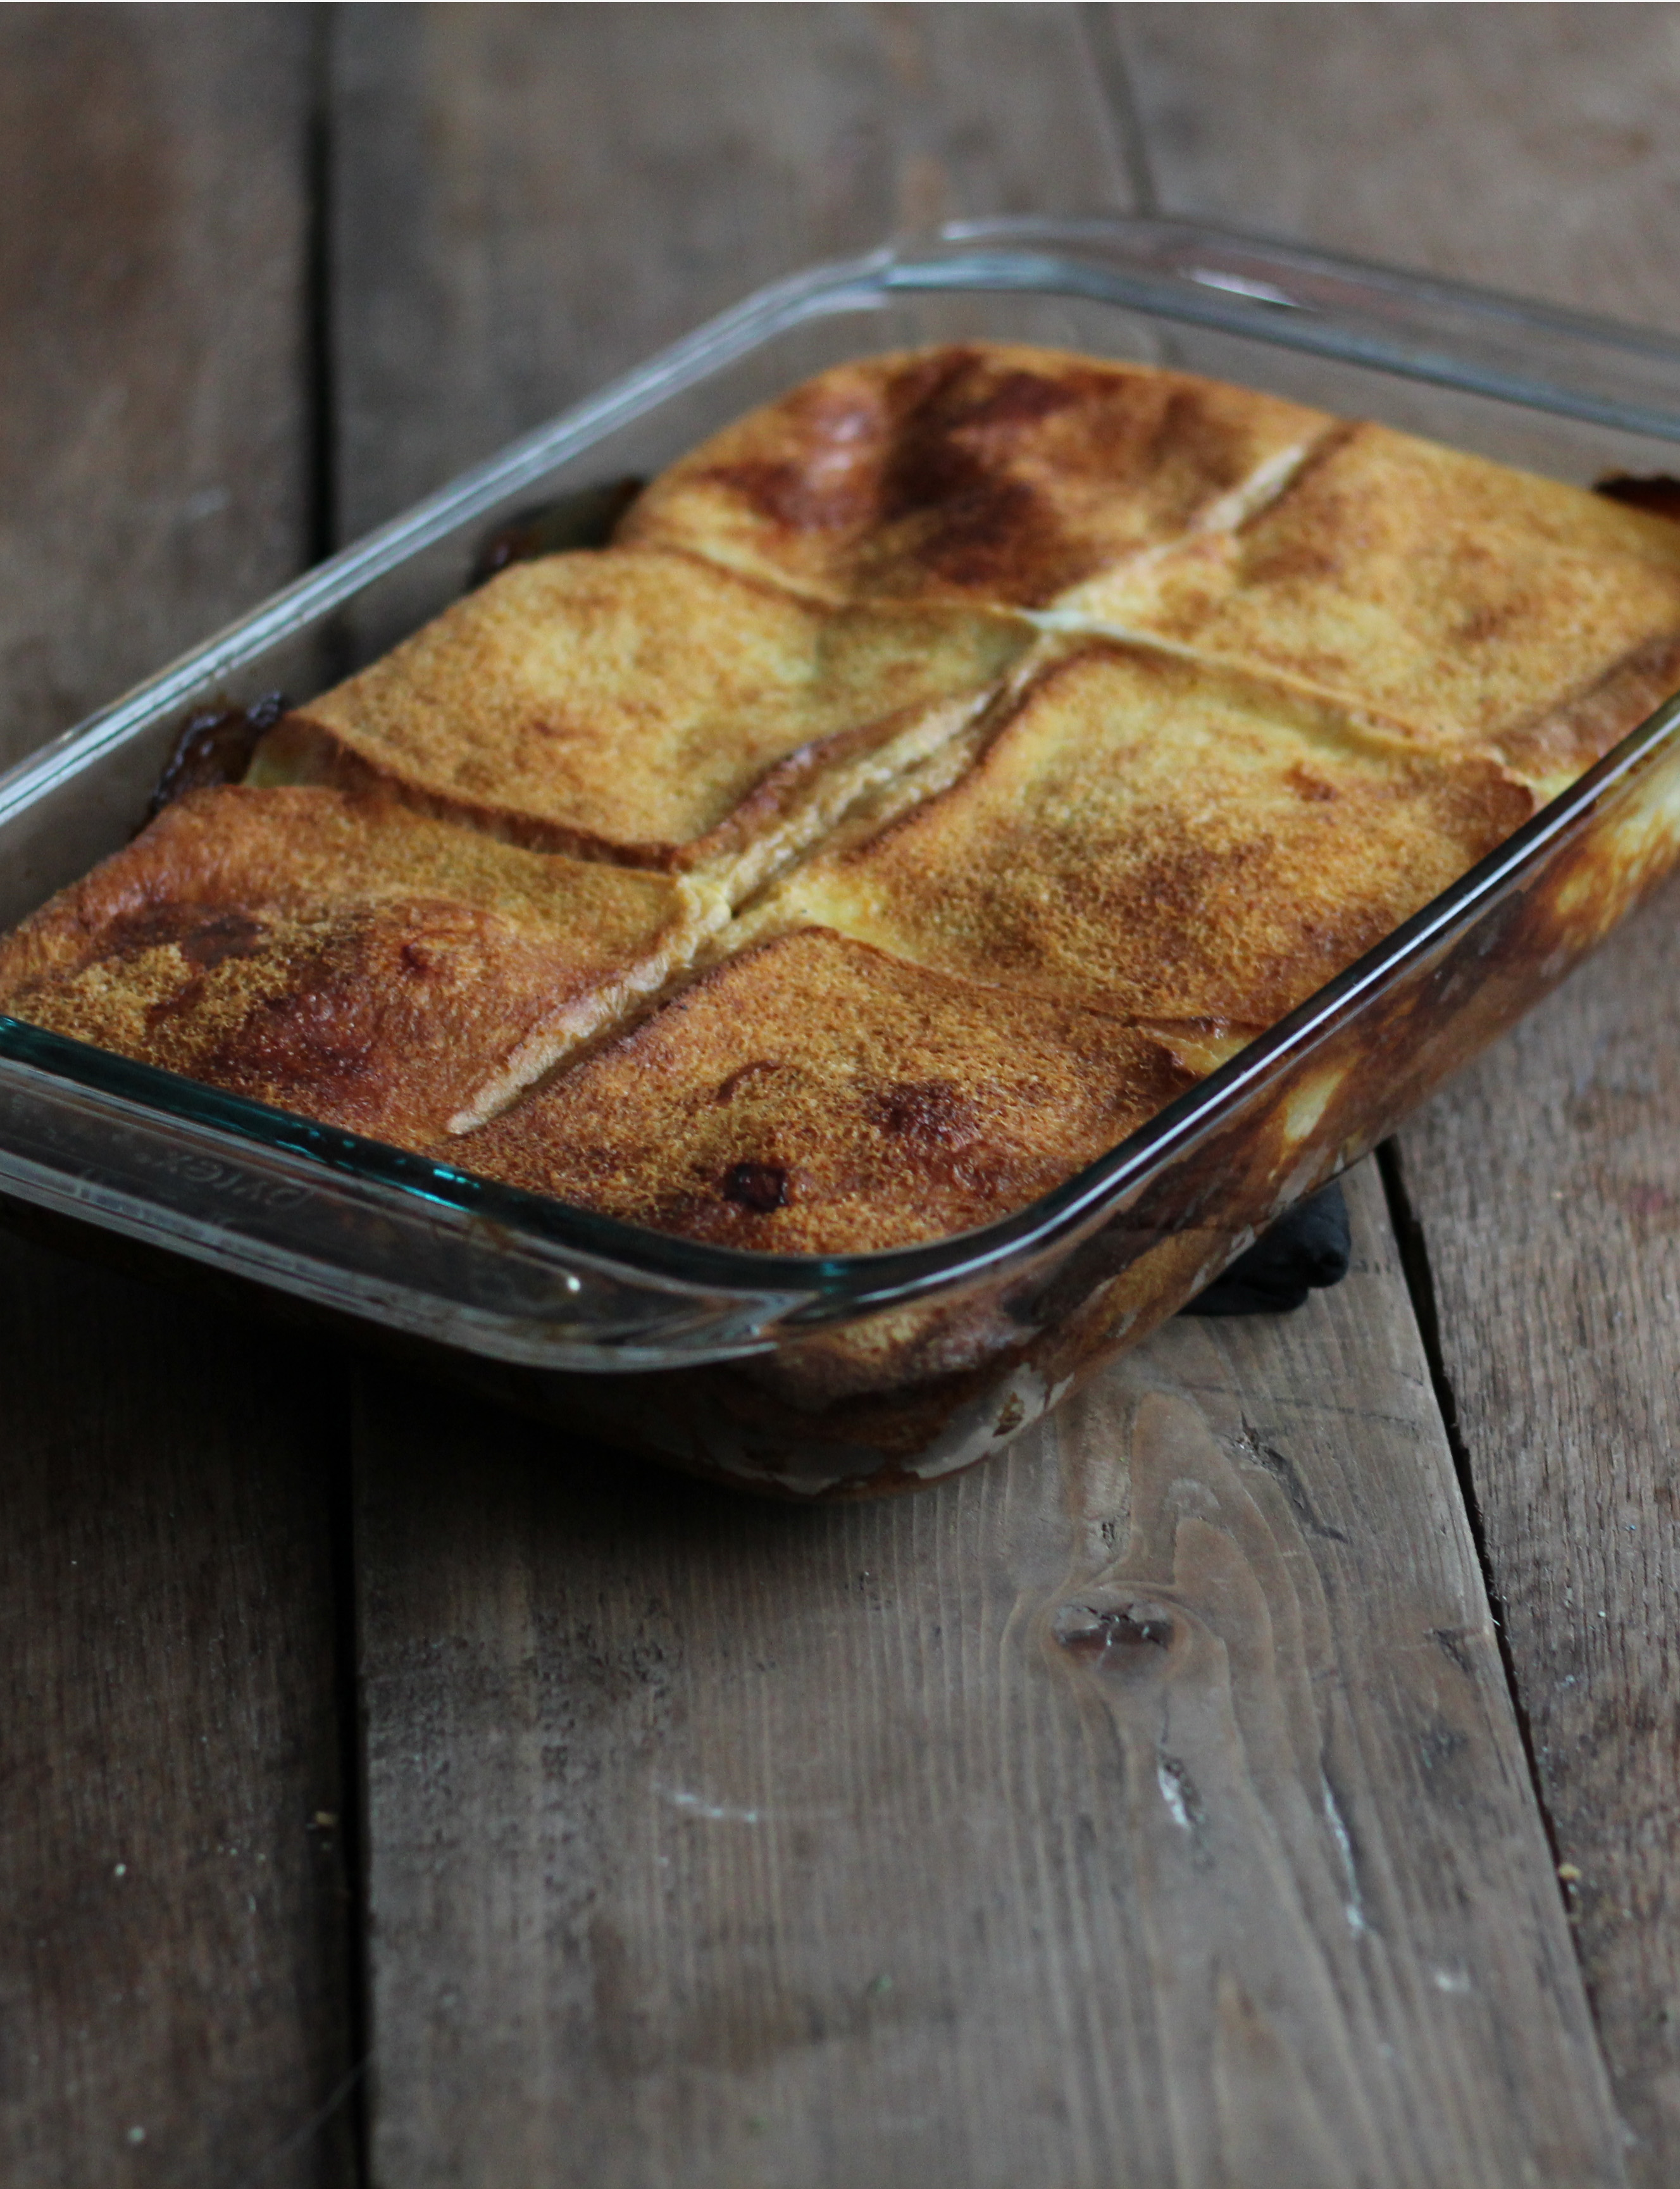
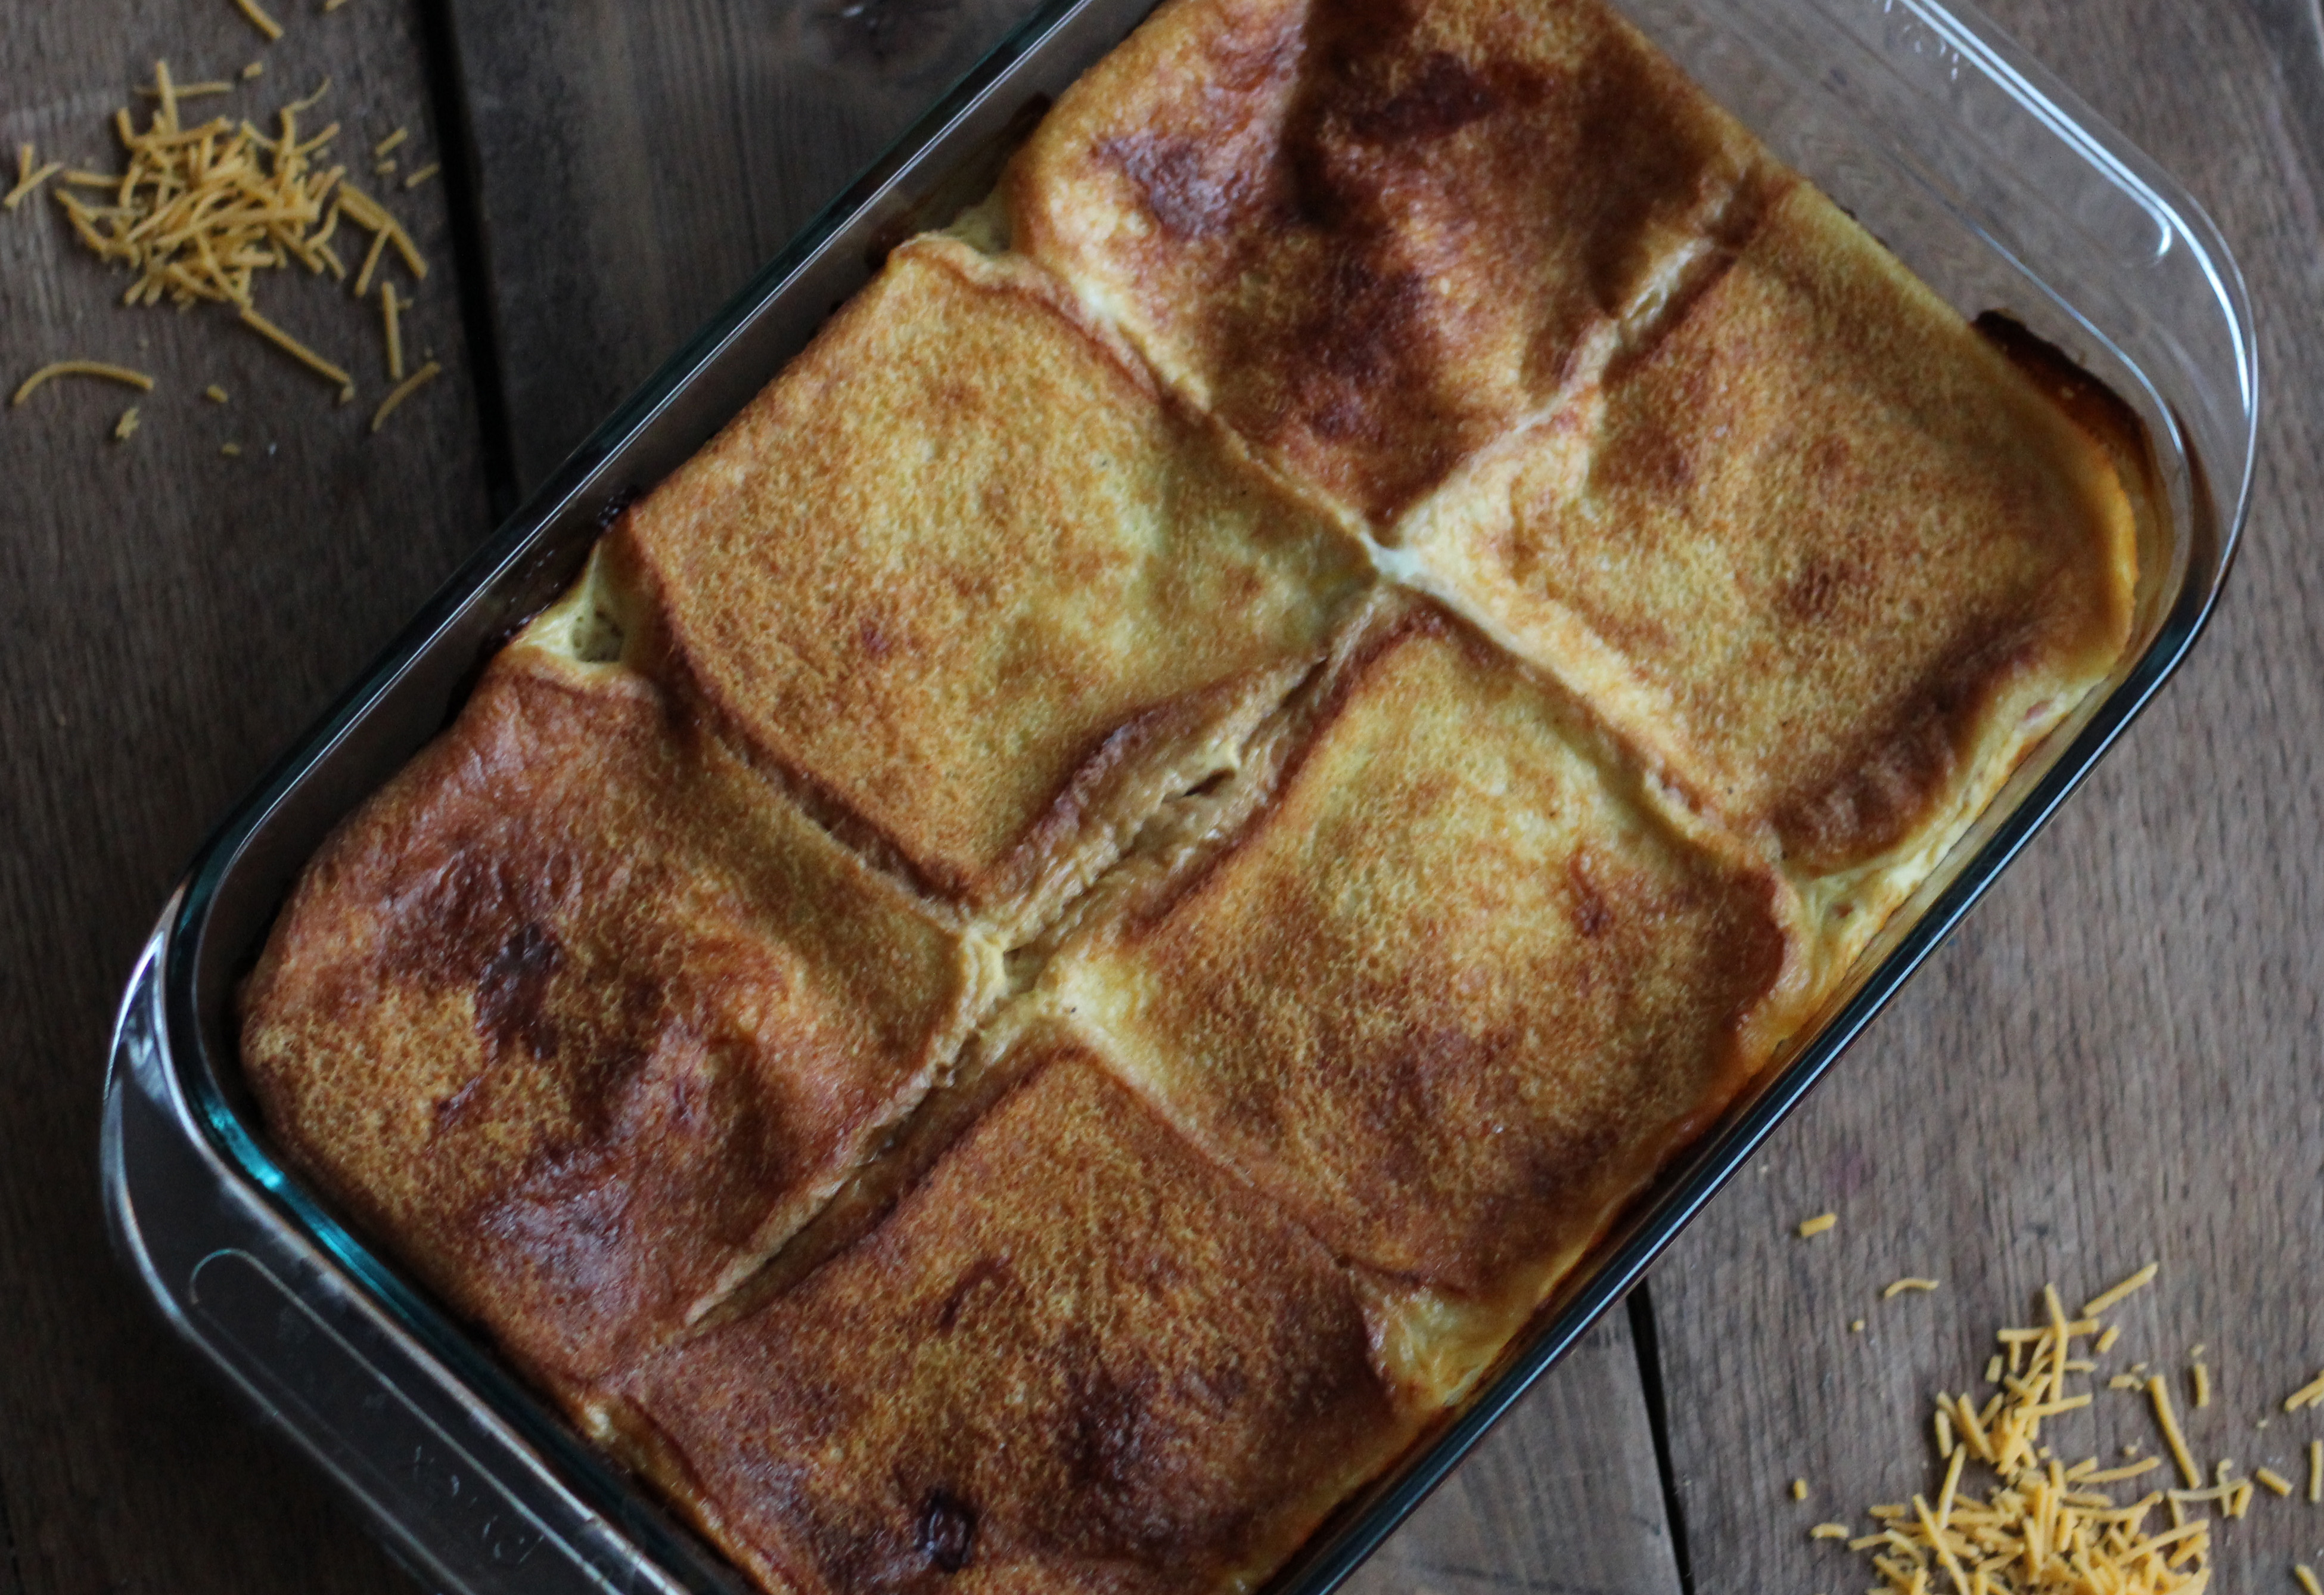
Our first attempt at cheesecake did not come without some difficulties. The cheesecake cracked across the top, and parts of the sides browned a little more than other parts. We consulted with our cheesecake expert, Aaron’s mom, and she let us know what she thought happened. First of all, even though Marguerite’s instructions said so, Aaron’s mom thought it was a little too high of a temperature in the oven.  She would suggest a lower temperature for a longer length of time. She also thought we could have over beaten our batter, could have had some difficulties due to it being the inaugural run of our spring form pan, or it could have been due to using an electric oven instead of gas. Regardless, this cheesecake was delicious and we will be making it again, probably halving the crust so it’s not as thick. Hope you enjoy it too!

Cheesecake Recipe

Cheesecake Recipe
Print Recipe
  • CourseDesserts
Servings Prep Time
1 Cheesecake 45 minutes
Cook Time Passive Time
35 minutes 5 hours
Servings Prep Time
1 Cheesecake 45 minutes
Cook Time Passive Time
35 minutes 5 hours
Cheesecake Recipe
Print Recipe
  • CourseDesserts
Servings Prep Time
1 Cheesecake 45 minutes
Cook Time Passive Time
35 minutes 5 hours
Servings Prep Time
1 Cheesecake 45 minutes
Cook Time Passive Time
35 minutes 5 hours
Ingredients
Crust
  • 20 graham crackers crumbs
  • 1/4 cup chopped walnuts
  • 1/2 tsp cinnamon
  • 1/2 cup butter melted
Filling
  • 3 eggs
  • 2 8 oz packages cream cheese softened
  • 1 cup sugar
  • 1/4 tsp salt
  • 2 tsp vanilla
  • 3 cups sour cream
Servings: Cheesecake
Instructions
Crust
  1. Mix graham cracker crumbs, chopped walnut and cinnamon. Add melted butter.
  2. Press into spring form pan.
Filling
  1. Combine all the filling ingredients except the sour cream. Mix until smooth.
  2. Add sour cream.
  3. Pour into crust.
Baking Instructions
  1. Bake at 375 degrees for 35 minutes.
  2. Let cool in the oven with the door open for one hour.
  3. Chill for at least four to five hours.
Share this Recipe
 
Powered byWP Ultimate Recipe

April 16, 2016 by: Shannon and Aaron

Salmon Balls

Salmon Balls

Like I said a few posts ago, if there is food everyone likes some version of, it is probably potatoes. Baked, mashed, fried – you name it – they’re delicious. So any recipe with potatoes in it is bound to be good. The salmon balls were no exception.

Salmon Balls

Here is what Marguerite had to say:

Salmon Balls

The most difficult part of this recipe was definitely preparing the canned salmon. We had never worked with canned salmon before, and neither of us really enjoyed it. Getting the bits of skin and bones out was a long and messy process. Other than that, it was a pretty simple recipe with just a few ingredients.

Salmon Balls

As you can see, the salmon balls are not the largest. For that reason we feel that they are best served as appetizers before a meal. I really like salmon, it is one of my favorite fish. I thought the combination of salmon with breading tasted good, and like I said before, who doesn’t love potatoes in a dish? Aaron also enjoyed them, referring to them as “a simple version of crab cakes.” Next time we try these I would prefer to try and use fresh salmon, as we felt the canned salmon did not taste as good as fresh.

Salmon Balls

We hope the next time you are looking for an interesting yet simple party food or appetizer, you keep these salmon balls in mind!

Salmon Balls
Print Recipe
  • CourseAppetizers and Sides
Servings Prep Time
4-6 20 minutes
Cook Time
30 minutes
Servings Prep Time
4-6 20 minutes
Cook Time
30 minutes
Salmon Balls
Print Recipe
  • CourseAppetizers and Sides
Servings Prep Time
4-6 20 minutes
Cook Time
30 minutes
Servings Prep Time
4-6 20 minutes
Cook Time
30 minutes
Ingredients
  • 1 cup instant potatoes
  • 3/4 cup water
  • 7 3/4 oz canned salmon drained, boned, and flaked
  • 2 eggs
  • 1 tsp salt
  • 1/4 cup bread crumbs seasoned
Servings:
Instructions
  1. Boil the water and add the instant potatoes.
  2. After draining, boning, and flaking the salmon, combine with the two eggs and salt.
  3. Stir the salmon mixture into the instant potatoes until fluffy.
  4. Shape into 4-6 balls (they will be sticky.)
  5. Roll the balls in bread crumbs.
  6. Bake at 375 for 30 minutes.
Share this Recipe
 
Powered byWP Ultimate Recipe

February 27, 2016 by: Shannon and Aaron

Ham Cheese Strata

Ham and Cheese Strata

When we started this recipe, neither of us really knew what to expect.  But, I thought, “Bread and cheese and warm, maybe it’ll be like grilled cheese and I’ll love it!”  That’s not quite how it turned out, and since I love a good grilled cheese sandwich, was a little disappointed.

Ham and Cheese Strata

We really couldn’t discern a lot of details about what this recipe had in store for us from just what Marguerite wrote.  Take a look for yourself:

Original Ham and Cheese

It really started to make sense when Aaron called his mother to ask her opinion about part of the recipe.  After getting our question answered, Aaron asked her if she remembered having it.  She did remember.  Although not well, she did recall it tasting like and reminding her of quiche.  Of course, soaking the whole thing in an egg mixture, it does start to make sense as a breakfast dish once it is pointed out to you.  Upon further research, it turns out that the Strata is a layered casserole dish, whose most common modern variation is a brunch dish similar to a quiche or frittata!

Ham and Cheese Strata

I was not a fan, although I couldn’t tell you why exactly.  However, Aaron loves breakfast foods, and was pleasantly surprised that this dish tasted quiche-like.  He actually heated it up almost every morning the week we made it and had some for breakfast.  A few improvements he would make:

  • More Meat: The recipe had no instruction on the amount of ham to put in.  Aaron put in less than one pound and found it to be a pitiful amount, so we have suggested two pounds in the recipe
  • More Cheese: Because, why not?  But really, it lacked overall in cheesy-ness as well.

Ham and Cheese Strata

Aaron’s mom also told us this was a dish Marguerite would often prepare the night before an let saturate overnight (as the recipe suggests.)  All in all, this is a simple dish to make that you can prepare the night before, and then pop in the oven in the morning before the kiddos (or your husband or wife) wake up.  Enjoy!

Ham Cheese Strata
Print Recipe
Servings Prep Time
6-12 10 minutes
Cook Time Passive Time
1 hour 2-8 hours
Servings Prep Time
6-12 10 minutes
Cook Time Passive Time
1 hour 2-8 hours
Ham Cheese Strata
Print Recipe
Servings Prep Time
6-12 10 minutes
Cook Time Passive Time
1 hour 2-8 hours
Servings Prep Time
6-12 10 minutes
Cook Time Passive Time
1 hour 2-8 hours
Ingredients
  • 12 slices bread with or without crusts (your choice)
  • 6 slices American cheese
  • 2 lbs ham diced
  • dried minced onion
  • 5 eggs slightly beaten
  • 3 1/4 cups milk
  • 1/2 tsp salt
  • dash pepper
Servings:
Instructions
  1. Arrange six slices of bread in a 9 x 13 pan.
  2. Cover with slices of American cheese.
  3. Scatter diced ham over each slice.
  4. Sprinkle a little dried minced onion over each slice.
  5. Cover with six more slices of bread.
  6. Mix slightly beaten eggs with milk. Add salt and pepper. Pour over sandwiches.
  7. Refrigerate at least two hours or even overnight.
  8. Bake 1 hour at 350 degrees. Let set 10 minutes before serving.
Share this Recipe
 
Powered byWP Ultimate Recipe

February 6, 2016 by: Shannon and Aaron

Zucchini Bread Recipe

Zucchini Bread

Zucchini + Bread is the way to a girl’s heart. More specifically Shannon’s heart. I love bread and zucchini dishes get me hyped up. Needless to say, I was excited for this recipe.
When we initially picked this, I browsed over it quickly and saw “bread” and “zucchini.” I actually thought we were making breaded/fried zucchini. Oops.

I was disappointed for a hot second, but then I got very excited to try something new.

Here is what Marguerite had to say:

Original Zucchini Bread

The best way to describe this bread is a flavor-packed, fluffy slice of deliciousness. Seriously, if you want an appetizer that’s rich and easy to make, try this zucchini bread.

Zucchini BreadNot only did we enjoy this zucchini bread, but we shared it twice with friends and family over the past month and it was a smash success both times.

Aaron took the leftovers of our first attempt to work and his co-workers raved. Then we hosted my parents and Aaron’s mom for dinner so that we could share some of the cool things Marguerite’s book has been teaching us. Again, the bread was a hit. The other dishes were also enjoyed, but more on those later.

Zucchini Bread

Our favorite thing about this bread was how easy it was to make and how moist it turned out. Based on our very limited cooking knowledge, we believed achieving moistness in bread to be a difficult thing to do. If that is the case, this zucchini bread recipe is the exception.

Zucchini Bread

As much as I love zucchini dishes, I actually felt like this was just a little too heavy on the zucchini flavor. Say what? I guess I was expecting more of a bread with a hint of zucchini, instead of the packed in flavor this bread delivers. It may just be a personal preference as well.

Aaron loved the consistency of the bread. Each time we made it, he was in charge of zucchini prep and felt chopping it then blending it was “tedious.” I think he just wanted to try it sooner…

Other than a somewhat laborious prep (if you have a food processor, this won’t be as much of an issue) this bread is very easy to make. Once you’ve got everything chopped up, it’s as simple as mixing and throwing it in the oven.

PinterestBread
Zucchini Bread
Print Recipe
  • CourseAppetizers and Sides
Servings Prep Time
2 loaves 30 minutes
Cook Time
45-60 minutes
Servings Prep Time
2 loaves 30 minutes
Cook Time
45-60 minutes
Zucchini Bread
Print Recipe
  • CourseAppetizers and Sides
Servings Prep Time
2 loaves 30 minutes
Cook Time
45-60 minutes
Servings Prep Time
2 loaves 30 minutes
Cook Time
45-60 minutes
Ingredients
  • 3 large eggs
  • 2 cups sugar
  • 1 cup salad oil
  • 2 tsp vanilla
  • 3 cups flour
  • 1 tsp salt
  • 1 tsp cinnamon
  • 1 tsp baking soda
  • 1 tsp baking powder
  • 3 cups grated raw zucchini
Servings: loaves
Instructions
  1. Grate the zucchini to whatever thickness you'd like. For this, very fine works best.
  2. Beat eggs until light and foamy.
  3. Add oil, sugar, vanilla, and grated zucchini.
  4. Mix together dry ingredients and add to egg and zucchini mixture.
  5. Put in two greased loaf pans.
  6. Bake at 325 degrees for 45-60 minutes or until lightly browned. Test to see if done. Remove from pan at once and cool on rack.
Share this Recipe
 
Powered byWP Ultimate Recipe
  • « Previous Page
  • 1
  • 2

Hey There!

We're Aaron and Shannon, the cooks behind Marguerite’s Cookbook. We are a husband and wife cooking/blogging team who love food, fun, and family.

Give us a follow

Twitter

Sign up for our monthly newsletter and receive exclusive content from us in your inbox once a month.

  • Policies
  • Contact

© 2025 · Fun Genesis WordPress Theme by, Pretty Darn Cute Design